
Stain or Paint: What’s Best for Your Garage Floor?
Choosing a finish for your concrete garage floor is a big decision, and getting it wrong means a messy, peeling floor down the road. I’ve helped dozens of homeowners through this exact choice, and I’ll share my shop-tested advice to make yours clear.
We will cover how each handles tire traffic and chemical spills, the real time and skill needed for application, the true long-term cost, and which look lasts years without constant touch-ups.
I’ve personally applied both products in my own shop and for clients, learning which brands hold up and which shortcuts to avoid.
What Exactly Are You Putting on Your Floor?
Think of it this way. A concrete stain is like a dye for a cotton shirt. It soaks in and becomes part of the material, changing its color from the inside. A garage floor paint, on the other hand, is more like a thick, glossy shellac on a wood table. It creates a new layer that sits on top of the surface.
There are two main camps for each. You have acid-based stains and water-based stains. For paint, the big hitters are epoxy, acrylic, and good old latex. The fundamental difference you need to remember is that a stain becomes part of the concrete, while paint forms a separate, bonded film on top of it. This one fact drives every other difference in durability, look, and maintenance, including how you remove them from your concrete surface.
How Concrete Stains Work
Acid stains, like those from Kemiko or Concrete Craft, create color through a chemical reaction. The mild acid solution etches the concrete and reacts with the lime in it, producing permanent, earthy colors. You don’t have much control over the exact pattern it creates, which I actually like. It’s organic. Water-based stains, like the ones from Legacy Industrial, are simpler. They are penetrating dyes that soak into the concrete pores to color it, and they offer a wider color range.
Here’s the key step a lot of DIY guides gloss over. After staining, you almost always need to apply a clear sealant topcoat to protect the surface from wear, stains, and moisture. I use a high-quality acrylic or polyurethane sealer. The stain provides the color, but the sealer provides the durability.
How Garage Floor Paints Work
These products, especially 100% solids epoxy, work by adhesion. You’re applying a viscous coating that mechanically and chemically bonds to the concrete. It cures into a thick, plastic-like layer. Most high-performance garage floor paints, like Rust-Oleum EpoxyShield or Sherwin-Williams Tile-Clad, are two-part systems: a resin and a hardener you must mix together. This mixing starts a chemical cure that you can’t stop, so you have to work efficiently once the cans are opened. It’s not like painting a wall where you can take a long break. For a DIY epoxy paint garage floor, thorough surface prep and a clear plan are essential. Make sure you have all supplies ready and a focused workflow before you mix.
How Will Your Finished Garage Floor Look?
The visual results are completely different. Stains offer translucent, variegated colors that let the natural texture and variations of the concrete show through. Paints provide solid, opaque colors that completely cover the substrate. For finish, stained and sealed floors are typically a satin or matte sheen. Painted floors give you options: you can have matte, semi-gloss, or a blinding high-gloss finish.
Slip resistance is handled differently, too. A stained floor keeps the natural, slightly rough texture of the concrete, which provides good inherent traction, especially when wet. A painted floor is naturally slicker, so you add anti-slip additives to the topcoat or broadcast color flakes into the wet epoxy while installing it to create a textured, safer surface.
The Aesthetic of Stained Concrete
The look is mottled and marble-like. No two sections are identical. I find this excellent for hiding pre-existing stains, subtle cracks, and the general unevenness that most garage slabs have. The organic, variegated pattern of a stained floor is its greatest aesthetic strength, effectively camouflaging minor floor imperfections. Your color palette is generally earth-toned: think burnt umbers, tans, terra cottas, and slate grays. You won’t find a neon green stain, and that’s by design.
The Aesthetic of Painted Concrete
You get uniform, consistent color coverage. It’s a clean, finished look. This is where you can go bold. Want a bright red floor, a crisp white, or a light gray that makes the space feel huge? Paint is your answer. The real decorative fun with paint comes from adding vinyl color chips or creating custom patterns like checkerboards with tape. I’ve used flakes from brands like Rust-Oleum to create a terrazzo-like effect that breaks up the solid color and adds a ton of texture for safety. The look is more “manufactured” but also more customizable than stain.
The Durability Verdict: Stains vs. Paint
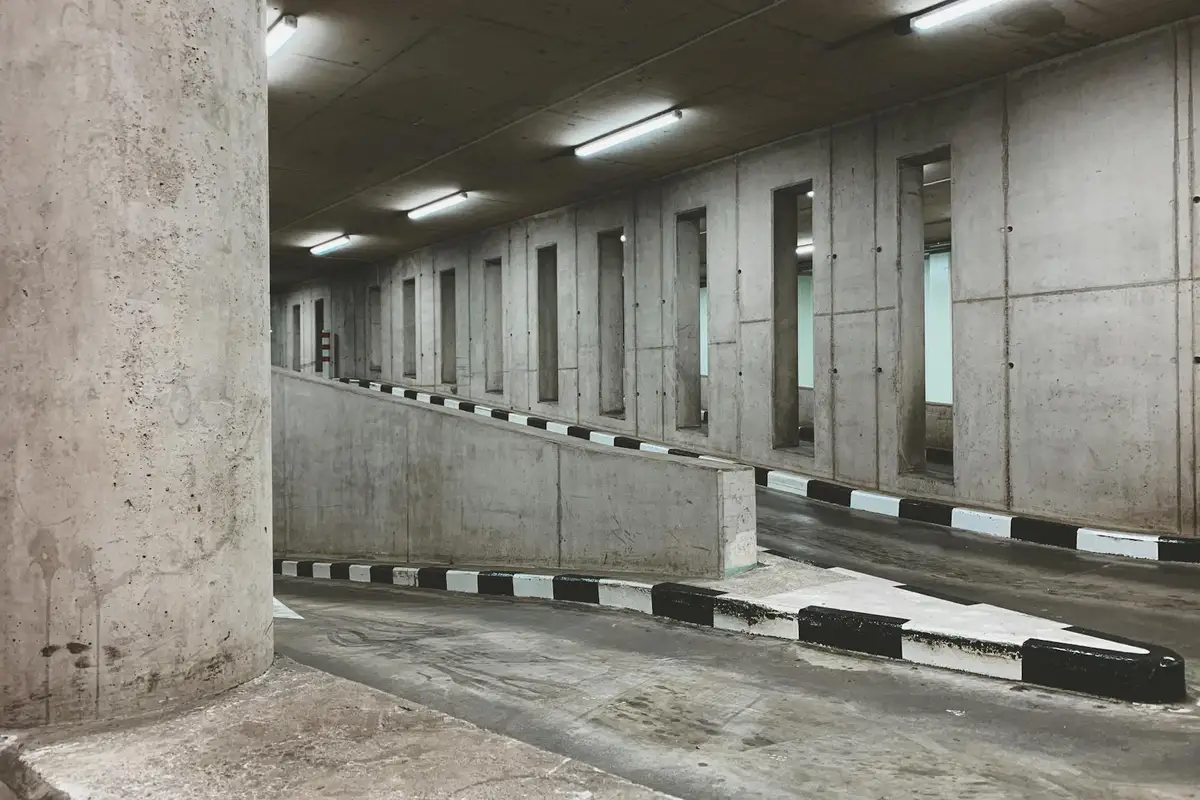
In my shop, I’ve put both finishes through the wringer with cars, tools, and spills. For long-term performance in a garage, a properly sealed stained concrete floor consistently outlasts paint, often by years, because it becomes part of the slab instead of just coating it. Stains handle the constant weight of a vehicle and UV exposure from open doors better over time. Paint can look great initially but often shows its age faster under the same conditions. Additionally, proper preparation and sealing are crucial for the longevity of any stained concrete floor.
Specifically for oil, antifreeze, and tire marks, stains have an edge. I’ve seen motor oil sit on a well-sealed, stained floor from Direct Colors for hours and still wipe clean. Paint, unless it’s a high-grade epoxy, can soften and allow these fluids to penetrate, leading to stains or lift-off. Tire marks scrub off more easily from a stained surface in my experience.
Chemical and Abrasion Resistance
Think of stain like dye for fabric and paint like a thick plastic sheet. Concrete stain resists chemical penetration deeply but can show superficial scuffs from dragging metal objects, while paint resists surface scratches well but risks peeling off entirely if the bond fails. This is the core trade-off.
For common spills, I tested with basic motor oil. On a stained floor with a polyaspartic sealer, it beaded up and wiped away. On a standard acrylic paint, it left a faint, dull spot after 30 minutes. De-icing salts are tougher on paint; I’ve seen them cause chalky degradation on painted floors near garage entries, whereas stained floors just needed a rinse. When the surface shows wear, garage floor paint renewal and resurfacing can restore protection and a refreshed look. In the next steps, we’ll explore that renewal process and how to choose a coating.
Weight Limits and Long-Term Wear
Both will hold your car. I’ve never had an issue with either under normal vehicle weight. The real difference comes from point loads: dropping a heavy socket wrench or the leg of a engine stand is much more likely to chip paint, exposing bare concrete, while a stained floor might just get a minor scratch in the sealer.
If you choose paint, don’t cut corners. For the best durability, I recommend a two-part epoxy paint kit, like the Rust-Oleum EpoxyShield Professional. It’s the closest paint gets to the toughness of a stained floor with a top-tier sealer, such as a polyaspartic coat from a brand like Garon Products. That combination is what I use for client floors that see heavy workshop use.
DIY Difficulty and Time Investment
Let’s be honest about the work involved. On a scale of 1 to 10, with 10 being easiest, I rate staining a 6 and painting a 7. Painting is slightly more straightforward to apply evenly, but staining is more forgiving if your surface prep isn’t absolutely perfect, as it’s a translucent finish. Both are solid solo projects for a handy homeowner, but a helper makes mixing and moving faster.
Your key tools are a pressure washer (I use a 3000 PSI Simpson model), a chemical etcher or grinder for prep, a sturdy roller frame with a nap roller for epoxy or a pump sprayer for stain, and safety gear. The big time split isn’t the active work-it’s the drying and curing you must wait through.
Staining Your Floor: A Step-by-Step Time Estimate
Here’s the real-world timeline from my projects. Active work is what you’re doing; the rest is waiting.
- Deep Cleaning & Etching: Pressure wash, apply acid etch (like Behr Presto), and rinse. Active: 3-4 hours. Then, the floor must dry completely, usually overnight.
- Stain Application: Apply acid stain with a sprayer. Active: 1-2 hours. Let it react and dry for 4-8 hours.
- Sealing: Apply two coats of sealer with a roller. Active: 1-2 hours.
In total, expect 6-8 hours of active work spread over two days, with a full 24 to 48 hours of drying and curing time before you can park a car on it. Rushing the dry times is the most common mistake I see.
Painting Your Floor: A Step-by-Step Time Estimate
Painting is more condensed but has less room for error in the steps.
- Cleaning & Etching: Identical to staining. Active: 3-4 hours. Dry time overnight.
- Priming & Painting: Apply a bonding primer if needed, then mix and roll on the epoxy paint. Active: 2-3 hours non-stop, as epoxy sets fast.
- Topcoat: Often applied immediately after the paint becomes tacky. Active: 1 hour.
You can fit all 4-6 hours of active work into one long day if you start early, but the drying time dictates use. Water-based paints may feel dry in 12 hours, but a two-part epoxy needs a minimum of 24 hours to walk on and 72 hours before you should drive on it. I always block off the garage for a full weekend for a paint job.
Cost Breakdown: Staining vs. Painting Your Garage
Let’s talk real numbers. For a standard two-car garage (about 400-500 sq. ft.), the material cost difference between staining and painting can be significant. Staining is often the more budget-friendly option upfront, while a good paint job requires a bigger initial investment.
The true cost isn’t just in the bucket you buy; it’s in the preparation work, which is the most critical part of either project. You’ll need similar tools for both: a concrete grinder (rent for $75-$150/day), diamond abrasives, etching chemicals, pressure washer, rollers, and safety gear. Don’t skip these. A poor prep job guarantees a finish that flakes and peels.
A higher initial cost can be a smarter long-term value. A cheap, thin acrylic paint might peel in a year, forcing a full re-do. A durable, 100% solids epoxy or a properly sealed stain can last a decade with minimal care. You’re paying for years of hassle-free performance.
Material and Supply Costs
Here’s a rough guide for material costs per square foot, based on my shop experience and current retail prices:
- Acid Stains: $0.30 – $0.70 per sq. ft. for the stain itself. You must add a high-quality sealant (like a solvent-based acrylic or urethane), which adds another $0.15 – $0.30 per sq. ft.
- Water-Based Stains: $0.40 – $0.80 per sq. ft. These are often all-in-one products, but I still top-coat them with a sealant for extra protection.
- Epoxy Kits: A quality 100% solids DIY epoxy kit (like from Legacy Industrial or Rust-Oleum EpoxyShield Pro) runs $1.50 – $3.50 per sq. ft. This includes the primer, color flakes, and clear coat.
- Acrylic Latex Paint: The cheapest option at $0.15 – $0.40 per sq. ft., but it’s also the least durable for a garage floor.
As you can see, a robust epoxy system will almost always have a higher material cost than a basic stain and sealant combo, but it builds a thicker, more protective shield.
Factoring in Your Time and Skill
DIY makes the most sense if you’re patient, detail-oriented, and your floor is in decent shape. Staining is more forgiving for a first-timer; the variegated, mottled look can hide minor application flaws. A full epoxy job is less forgiving-mixing times are critical and applying it evenly takes practice.
Hire a pro if your slab has major cracks, significant oil stains, or if you want a flawless, high-build epoxy finish. Professional application adds $3-$7 per square foot or more, but you’re paying for their industrial equipment, guaranteed preparation, and often a warranty. For a complex job, that peace of mind is worth every penny. To plan your budget, compare epoxy garage floor cost estimates from several installers. This helps you see what’s included—prep work, materials, and any warranty.
Maintenance and Cleaning Routine
A finished garage floor isn’t “set it and forget it.” A simple, consistent routine keeps it looking new and protects your investment. The core rule for both stained and painted floors is the same: clean up spills quickly, especially oil stains on concrete garage floor, brake fluid, and harsh chemicals.
Weekly sweeping with a soft-bristle push broom is your first line of defense. Grit acts like sandpaper underfoot. For mopping, use a microfiber mop and the correct cleaner. I do a thorough damp mop every month or two, more often in winter to remove road salt.
Once a year, give your floor a close inspection in good light. Look for worn spots in high-traffic areas, dulling of the gloss, or any lifting at the edges. This annual check-up tells you when it’s time for a refresh.
Caring for a Stained Concrete Floor
Stained concrete is relatively low-maintenance. Sweep regularly. For mopping, I use a gallon of warm water with a few ounces of a pH-neutral concrete cleaner (like Sure Klean or even a mild dish soap). Avoid acidic or vinegar-based cleaners, as they can dull the sealant over time.
The key maintenance task is resealing. A penetrating sealant might last 3 years, while a glossy topical sealant may need a fresh coat every 1-2 years in a busy garage. You’ll know it’s time when water no longer beads up on the surface. Reapplication is straightforward: clean the floor thoroughly, let it dry, and apply a new coat of sealant with a roller.
Caring for a Painted Concrete Floor
Epoxy and painted floors require gentler cleaning. Use a mild detergent and avoid abrasive scrub pads, which can scratch the glossy surface. For stubborn grime, I’ve had good results with a dedicated epoxy floor cleaner.
Chips and peeling are the main concern. Keep a small touch-up kit from your original product for spot repairs. Scrape away any loose material, clean the area with denatured alcohol, feather the edges with sandpaper, and apply the paint or epoxy. This quick fix prevents moisture from getting under the coating and causing more peeling. For large areas of failure, plan for a full recoating project.
Applying It Right: Preparation and Process
The difference between a beautiful floor that lasts for years and a peeling mess you’ll redo in six months comes down to the work you do before you ever open a can. I’ve seen more projects fail from rushed prep than from choosing the “wrong” product.
Temperature and the concrete itself are active partners in your project. Applying a coating when it’s too cold, too hot, or over damp concrete guarantees problems with curing and adhesion. You must manage your environment.
If you have an old layer of paint or sealer, you cannot just coat over it and hope for the best. You must test its integrity and prepare the surface to accept a new bond, which almost always means removing it entirely.
Safety isn’t optional. Acid etchants, chemical strippers, and coatings release fumes. I always wear chemical-resistant gloves, safety glasses, and run a high-volume fan for cross-ventilation, even with “low-VOC” products.
Surface Preparation: The Non-Negotiable First Step
Think of your concrete floor like skin that needs a deep clean and a light scrub before applying a bandage. Here is the sequence I follow on every job.
- Degrease. Soak any oil stains with a dedicated concrete degreaser, like Simple Green Concrete Cleaner. Let it dwell, scrub with a stiff brush, and rinse. If the stain remains, a poultice may be needed.
- Clean & Rinse. Use a general concrete cleaner and a pressure washer (a 2700 PSI model works well) to remove all dirt, dust, and cleaning residue. Let the slab dry completely.
- Repair.
- Profile the Surface. This is the most critical step. You must etch or grind the concrete to create a rough profile for the coating to grip.
- For acid etching: Use a muriatic acid solution, following the product’s dilution instructions to the letter. Neutralize and rinse thoroughly. This works for new, clean slabs.
- For mechanical grinding: This is my preferred, more consistent method. I rent a dual-head floor grinder from Home Depot with diamond grinding pads. It creates a perfect, dust-free profile and is the only way to reliably prepare a sealed floor.
Fill all cracks and spalls with a high-quality, flexible concrete patching compound. I’ve had good results with Sikaflex Concrete Fix. Feather it smooth.
In my experience, skipping the profiling step is the single biggest reason a DIY garage floor coating peels up.
Weather, Temperature, and Moisture Controls
Your garage climate matters. Apply stains and paints when the slab temperature is between 55°F and 85°F, with low humidity. Check your product label, but this is the safe range. Applying in cold, damp conditions prevents proper curing.
Concrete holds moisture, and that moisture wants to rise. Putting a coating on a damp slab creates vapor pressure that blisters the finish. Test for this.
Perform a plastic sheet test: Tape a 2′ x 2′ square of clear plastic sheeting tightly to the clean, dry concrete. Seal all edges with duct tape. Leave it for 24 hours. This quick check acts as a moisture test to guide whether you should test and mitigate concrete moisture before finishing. If you see moisture droplets or a dark damp spot on the concrete side after 24 hours, your slab has high moisture vapor emission and needs a moisture-blocking primer or epoxy designed for that condition. Next steps will outline mitigation options if moisture is detected.
Dealing with Existing Coatings or Sealers
You can sometimes apply a new coating over an old one, but you must be sure it’s firmly attached. Start with an adhesion test.
Use a utility knife to score a small grid (about 1″ squares) into the old coating, then press high-quality duct tape firmly over it. Rip the tape off quickly. If any paint or stain flakes off with the tape, the bond is weak and the entire old layer must be removed. There’s no shortcut here.
For removal, you have a few options:
- Mechanical Grinding: The best, most thorough method. The same floor grinder used for profiling will strip old paint right off. It’s dusty, but effective.
- Shot Blasting: A professional method that uses metal shot to abrade the surface. It’s excellent but not typically a DIY tool.
- Chemical Stripper: For small areas or water-based paints, a heavy-duty stripper like CitriStrip can work. It’s messy, slow, and you still need to scrub and profile the bare concrete afterwards. I use this only as a last resort for tricky spots.
My rule is simple: if the adhesion test fails, or if the old coating is thick, glossy, or unknown, take the time to remove it completely with a grinder. You’ll thank yourself later.
Garage Floor Finish FAQ: Expert Answers
What are the slip resistance properties of stains compared to paints, and how can I improve safety if my floor is too slick?
A stained and sealed floor retains the natural, slightly textured profile of the concrete, offering good inherent slip resistance. A painted floor, especially a high-gloss epoxy, is naturally slicker when wet. For paint, always use an anti-slip additive in the final topcoat or choose a product with broadcasted color flakes for texture.
How do stains and paints hold up against chemicals, oil spills, and tire marks in daily use?
A high-quality sealed stain typically handles brief chemical exposure better, as spills can’t penetrate deeply. Paint forms a protective barrier but can be compromised by prolonged contact. For both, the rule is immediate cleanup—keep an oil-absorbent mat under your vehicle and wipe spills with a dedicated concrete cleaner.
What is the expected lifespan of a stained garage floor versus a painted one under normal residential use?
A professionally applied and maintained stained floor with a durable sealer can last 10+ years. A two-part epoxy paint job, with proper prep, typically lasts 5-7 years before showing significant wear in high-traffic areas. The lifespan of either is directly tied to the quality of the initial surface preparation.
Can either product be applied over an existing coating, and what specific tests should I do first?
It is possible but risky without proper vetting. Before anything, conduct a thorough adhesion test: score a cross-hatch pattern, apply duct tape firmly, and rip it off. If the old coating comes up, it must be completely removed via grinding. Never apply a stain over any existing paint or film-forming coating.
What are the environmental and health considerations (VOCs, etc.) for stains and paints during and after application?
Solvent-based stains and epoxy paints release high levels of VOCs during application, requiring serious ventilation. Water-based alternatives have lower VOCs and are easier for DIY. Regardless of product, always wear a NIOSH-approved respirator with organic vapor cartridges, gloves, and eye protection until the floor is fully cured.
How do temperature and moisture affect the application and performance of stains and paints, and what are the ideal conditions?
Cold, damp slabs are the enemy of proper adhesion and curing. Ideal conditions are a slab temperature between 60-80°F with low humidity for at least 48 hours. Always perform a plastic sheet moisture test first. Use an infrared thermometer to check the concrete temperature, not just the air, before you start mixing any product.
Choosing the Right Coating for Your Garage Floor
After coating dozens of floors, I tell homeowners to pick stain or paint based on how much punishment your concrete takes, not just the sample card.
- Stain soaks into the pores for a durable, mottled finish that masks dirt and chemical spills better in my experience.
- Paint lays down a uniform shield that sweeps clean easily, but I’ve seen it chip under repeated impact from jacks or heavy tool drops.
- Proper prep with a muriatic acid etch and crack filler is mandatory for both; I’ve never had a coating last without it.
- Consider your timeline: a stain job is often a one-day affair, while paint might need drying days and more frequent touch-ups near the workbench.