
Is Your Garage Holding Its Breath? A Practical Guide to Ventilation
Notice musty odors or rust forming on your stored gear? I’ll explain how proper airflow stops moisture and fumes before they cause real damage.
This article walks you through the practical steps. We will cover spotting the signs of poor ventilation, comparing passive vents versus powered fans, my preferred installation methods using specific tools, and a simple seasonal checkup routine.
Having retrofitted ventilation in over fifty garages, I’ve learned which solutions last and which ones waste your time and money.
What Puts Moisture and Fumes in Your Garage?
Think of your garage like a big plastic storage bin. When you seal the lid on a bin with damp stuff inside, what happens? Everything gets musty and wet. Your garage works the same way without airflow.
The main sources of moisture and fumes are your daily routines and the stuff you store. Let’s break them down.
Where Moisture Comes From
Moisture is a sneaky problem. It’s not always a big leak you can see. Here’s what I find in most garages:
- Your Wet Car: This is the biggest culprit. Driving home in rain or snow brings gallons of water inside. It evaporates off the car and hangs in the air.
- The “Concrete Sweat”: Your floor is a giant sponge. In spring and fall, when the warm, humid air hits the cool concrete, water droplets form just like on a cold drink can. I see this all the time.
- Humidity from the House: If your garage is attached, laundry vents, bathroom fans, or even just opening the door lets your home’s warm, moist air flood into the cooler garage space.
- Melting Snow on Gear: Snowblowers, shovels, and boots left to melt inside add a surprising amount of water vapor.
Where Fumes Come From
The air quality issue is just as real. Many garases smell “like a garage” for a reason.
- Vehicle Exhaust: Warming up your car, even for a minute, pumps carbon monoxide and other gases into an enclosed space. It’s a silent hazard.
- Fuel Vapors: Gas cans for your mower, leftover fuel in the lawn tractor, and even that old gas for the snowblower release flammable vapors continuously. I always recommend the Eagle Type I metal safety cans-they seal better than plastic.
- Chemicals and Solvents: Open paint cans, strippers, adhesives, and cleaners “off-gas” volatile organic compounds (VOCs). That strong chemical smell is a sign of poor air.
- Equipment Exhaust: Running a pressure washer, generator, or any small engine inside, even with the door open, is extremely dangerous and concentrates fumes fast.
Why Ignoring Garage Ventilation Costs You Money and Safety
Letting moisture and fumes build up isn’t just a nuisance. It’s a slow drain on your wallet and a direct threat to your family’s safety. I’ve seen the damage firsthand.
The Costly Damage from Moisture
Rust doesn’t sleep. In a damp garage, it works overtime.
- Tools Rust: The fine edge on your chisels, the moving parts on your wrench sockets, even the steel deck of your table saw will develop surface rust. I’ve had to clean more rusty tools than I can count, often using evaporative rust removers like Evapo-Rust, which works well but is an added cost and chore.
- Mold and Mildew Grow: Cardboard boxes disintegrate. Holiday decorations, old clothes, and photos stored in bins can get ruined. Mold spores can also travel into your home.
- Wood Warps and Rots: That beautiful wooden workbench or set of plywood shelving will swell, twist, and eventually rot at the bottom where it touches the floor or wall.
- Long-Term Structural Damage: This is the big one. Persistent moisture rots the bottom plate of your walls (the horizontal wood piece on the concrete). I’ve seen it soften drywall and ruin the insulation inside the walls. It can also drastically shorten the life of appliances like a water heater stored in the garage.
Controlling moisture is the single best thing you can do to protect your investment in tools, storage, and the garage itself. A garage vapor barrier is a simple, effective step in moisture control. It helps reduce humidity and protects floors, walls, and stored items from dampness.
The Direct Safety Risks from Fumes
This isn’t about smells. It’s about real danger.
- Health Hazards: Breathing concentrated VOCs from chemicals or carbon monoxide from vehicles causes headaches, dizziness, and nausea. Long-term exposure to some fumes is linked to serious health issues.
- Fire and Explosion Risk: This is critical. Gasoline vapors are heavier than air. They sink and pool along the floor. A single spark from a water heater ignition, a power tool, or even static electricity can ignite them. I treat any garage with gas cans or equipment as a potential hazard zone.
- Reduced Air Quality for Your Home: Fumes and pollutants from the garage can seep into your living spaces through doors, cracks, and ductwork, affecting your whole home’s air.
Proper ventilation isn’t a luxury; it’s a fundamental safety requirement for any garage that stores vehicles, fuel, or chemicals. Beyond a detector, garage ventilation requirements dictate how air should move, where vents belong, and the minimum air exchange needed to keep fumes from building up. Following these requirements helps prevent fumes from accumulating. A simple, battery-powered carbon monoxide detector mounted in your garage is a minimum first step I tell every homeowner to take.
How to Spot the Signs Your Garage Can’t Breathe

Think of your garage like a pair of lungs. If it can’t breathe, moisture and fumes get trapped, and problems start to surface. Your first job is a simple walk-through inspection. Look for the clues your garage is giving you.
Start with the obvious visible signs. On a cool morning, check your garage windows and the metal surfaces of your tools or garage door track. Do you see water droplets or fogging? Condensation is a sure sign that warm, moist air is hitting a cold surface because it has nowhere else to go. Look closely at old metal shelving brackets or the bottom of lawn mower decks for small, reddish-brown spots of rust. That’s metal reacting to constant dampness.
Next, use your nose and your hands. When you walk in, does it smell like a damp basement or wet cardboard? That musty odor is a calling card for mold and mildew. After a woodworking project with your table saw or using a solvent, do the chemical smells hang around for hours or even days? Your nose is a powerful sensor for poor air exchange. Run your hand along a concrete wall or the slab floor. Does it feel cool and damp, not just cool? That general clamminess is a bad sign.
Finally, inspect your surfaces. Is the paint on the walls or your workbench peeling or bubbling up? That’s moisture pushing from behind or within. On bare concrete floors or walls, look for a white, powdery, chalk-like stain. This is called efflorescence. It happens when water moves through the concrete, dissolves salts inside, and then deposits them on the surface as it evaporates. It’s a clear indicator of water movement.
If you spot two or more of these symptoms, your garage is telling you it needs help moving air. Trapped moisture will eventually damage your belongings and the structure itself. It’s crucial to remove moisture and humidity from the garage to protect it.
Choosing a Ventilation System: Passive Vents vs. Active Fans
Once you know you have a problem, the solution is moving air. You have two main paths: letting air move on its own or forcing it to move. I’ve installed both types countless times for clients.
Passive Ventilation: The Simple Breather
Passive systems use natural air pressure and temperature differences to pull air through. They have no moving parts. Common types are louvers (often placed in a door or high on a wall), soffit vents under your roof eaves, and ridge vents along the peak of your roof.
The biggest pro for passive vents is their simplicity; once installed, they work forever with zero electricity and almost no maintenance. I often use them as a first, cost-effective step. A pair of basic 8″ x 16″ louvered vents from a brand like Cor-A-Vent, installed high on opposite walls, can make a noticeable difference in a standard two-car garage. The con is that they rely on a good breeze or a strong temperature difference. On a hot, still day, the air movement can be minimal.
Active Ventilation: The Forced-Air Solution
Active systems use fans to pull air in or push it out. This includes exhaust fans, intake fans, and ceiling fans. I install these when passive vents aren’t enough, or when a homeowner uses the garage as a workshop or gym.
An active system is more effective. You can turn on a fan and clear out paint fumes or sawdust in minutes. The trade-off is cost, installation complexity, and ongoing electricity use. You’re also adding a piece of machinery that will eventually need replacing. For a reliable mid-range exhaust fan, I’ve had good results with the Broan-NuTone 9093WH for sidewall mounting. It’s powerful for its size and built to handle moisture.
The Exhaust Fan vs. Intake Vent Debate
Homeowners often ask if they should blow air out or pull fresh air in. The answer depends on your garage’s layout and primary use. However, there are numerous myths about garage ventilation that can cloud this decision.
In most attached garages, I recommend an exhaust fan. Mount it high on a side or back wall. An exhaust fan works by creating negative pressure, actively sucking the bad, moist, or fume-filled air out of the space. Fresh air will then naturally seep in through any cracks, under the door, or through a dedicated passive intake vent lower on the opposite wall. This is the safest method for clearing harmful vapors from cars or chemicals away from your living space. This setup also helps prevent carbon monoxide buildup in an attached garage. Pair it with a dedicated carbon monoxide detector to further reduce the risk.
An intake fan (bringing fresh outside air in) can be useful in a detached garage workshop where you want positive pressure to keep dust from settling, or if your garage is extremely sealed. But for general moisture and fume control, exhausting the problem air is usually the more direct and effective strategy. That approach also helps prevent garage condensation by removing humid air before it condenses on cold surfaces.
A Quick Word on Building Codes
Before you cut any holes or wire any fans, you must check your local building codes. This isn’t just bureaucracy; it’s about safety and preventing fire spread. Many codes specify minimum vent sizes for garages or require any electrical fan to be rated for use in a garage environment. Some even dictate the type of louver required on an exterior vent. A quick call to your local building department can save you from failing an inspection or, worse, creating a hazard. Garage electrical code requirements often specify how wiring is run, GFCI protection for outlets, and equipment rated for garage use. Make sure your fan, switches, and receptacles comply with those standards before installation. Always factor code compliance into your system choice from the very beginning.
A Step-by-Step Plan to Fix Your Garage’s Ventilation
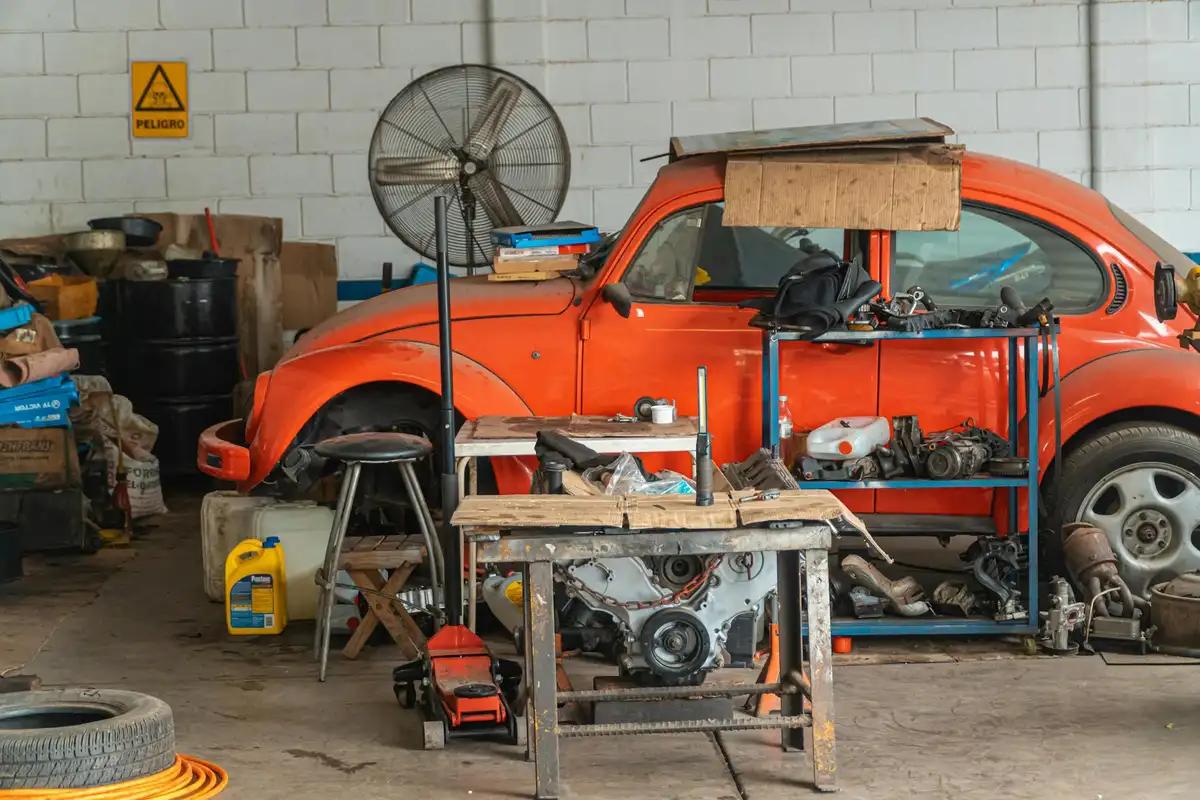
Let’s get to work. Improving your garage air starts with a plan, not a power tool. You avoid mistakes by measuring twice and buying once.
Assess Your Space First
Grab a tape measure and notepad. Walk the perimeter of your garage and note any existing vents, including those tiny foundation vents near the floor. Your goal is to understand your garage’s cubic footage (length x width x height) and identify where air currently moves, or doesn’t. For example, a typical two-car garage is about 22′ x 22′ with an 8′ ceiling. That’s roughly 3,900 cubic feet. You need this number to size a fan correctly later. Also note the garage space square footage (length x width) to complete the footprint. This helps with layout planning and anticipating how space constraints affect airflow and fan placement.
Gather Your Tools and Materials
You don’t need a shop full of gear, but the right tools make the job clean and safe. Here’s what I keep on my cart for this job:
- Drill/Driver: A cordless model like a DeWalt 20V is perfect for driving screws and pilot holes.
- Jigsaw: For cutting clean openings in drywall or siding. I use a Bosch with a fine-tooth blade for wood.
- Stud Finder: A basic Zircon model works, but spend a little more for one that also detects live wiring.
- Screwdriver Set: Both flathead and Phillips for electrical connections.
- Caulk Gun & High-Quality Sealant: I use GE Silicone II for its flexibility and weather resistance.
- Safety Glasses & Dust Mask: Non-negotiable. A simple N95 mask is fine for cutting drywall.
- Tape Measure & Pencil: For marking your cut lines.
Install a Basic Wall Vent or Exhaust Fan
I’ll walk you through installing a simple louvered vent, which is a great first step. Adding a fan follows similar steps with wiring. Always check with your local building department before cutting into an exterior wall; some areas require a permit for this work.
- Plan the Location: Use your stud finder to locate two wall studs. You want to place your vent between them. Mark the center point. Hold the vent flange against the wall and trace its interior opening with a pencil.
- Prepare and Cut: Turn off the power to any outlets or lights on that wall at your main circuit breaker. Double-check it’s off with a voltage tester. Put on your safety glasses and dust mask. Drill a starter hole inside your traced lines, then use your jigsaw to carefully cut out the opening.
- Seal and Secure: Run a bead of silicone caulk around the backside of the vent’s flange. Slide the vent into the hole from the outside. From inside the garage, secure it with the provided screws into the surrounding wall material. Wipe away any excess caulk.
- Wiring a Fan (If Applicable): If you’re installing a powered exhaust fan, this is the critical step. The fan must connect to a power source via a proper electrical box-never just wire nuts tucked into the wall. If you are not comfortable connecting black (hot), white (neutral), and green/bare (ground) wires, stop here and call an electrician. For a simple swap of an existing fan, turn the power off, disconnect the old unit, and connect the new one wire-for-wire.
Dispose of cut-out drywall or siding pieces properly by sealing them in a heavy-duty trash bag. Don’t just leave them in your regular bin where debris can blow out.
Maintenance, Products, and When to Call a Pro
Once your system is in, keeping it working is straightforward. Knowing what to buy and when to step back is just as important as the installation.
Routine Maintenance and Cleaning
Ventilation systems fail from neglect, not use. I add this check to my spring and fall garage clean-out routine.
- Every season, vacuum your vent covers, inside and out, using a brush attachment. Spider webs and leaves are the usual culprits.
- Test any exhaust fans by turning them on and holding a piece of paper up to the grill. The paper should be pulled tight against it. If not, the fan or motor may be failing.
- Inspect the caulk seal around vents and where siding meets the foundation. Re-caulk any cracks you find to stop moist outside air from sneaking in.
For fans with oil ports, add two drops of lightweight machine oil (like 3-in-1 oil) to the motor annually to keep it running quietly for years.
Recommended Products for Garage Ventilation
You get what you pay for. I’ve installed cheap plastic vents that crack in a cold snap and fans that burn out in a year.
- Wall Vents: Choose stamped aluminum louvers over plastic. The Cor-A-Vent soffit and wall vents are durable and have a clean look. Plastic becomes brittle.
- Exhaust Fans: Look for a fan rated for your garage’s cubic footage. CFM (Cubic Feet per Minute) is the key number. For that 3,900 cubic foot garage, a fan rated for 150-200 CFM is sufficient. The Broan NuTone 688 ceiling/wall fan is a reliable basic model. For smart control, consider a fan with a built-in humidistat that turns on automatically when moisture is high.
- Ductwork & Sealant: If your fan ducts to the outside, use insulated, flexible aluminum duct to prevent condensation inside the duct. Seal all joints with aluminum foil tape, not duct tape, which dries and fails.
When NOT to Try DIY Ventilation Upgrades
Your safety and your home’s integrity come first. Here are the red flags that mean you should pick up the phone, not the jigsaw.
- Old Wiring or Insulation: If your home was built before 1960 and you see fabric-wired (knob-and-tube) electrical or suspect asbestos insulation (often looks like pebbly, gray material), stop. Disturbing these requires a licensed pro.
- Complex Walls: Cutting through brick, stone, or stucco is a masonry job. It requires different tools and techniques to prevent water intrusion and structural damage.
- Electrical Work Beyond a Simple Swap: Need to run a new circuit from your breaker panel? That’s a job for a licensed electrician. The risk of shock or fire is too high.
- Appliance Venting: Never, under any circumstances, vent a clothes dryer or gas appliance exhaust into your garage. This introduces lethal carbon monoxide and immense fire hazard from lint. It’s against building code everywhere.
Garage Ventilation FAQ: Straight Talk from a Pro

What are the tangible benefits of proper garage ventilation?
Proper airflow protects your investment and your safety. It directly prevents costly rust on tools, warping of wood, and mold on stored items by removing moisture. It also actively expels dangerous fumes from vehicles and chemicals, drastically reducing fire and health risks.
What’s the fastest way to improve ventilation in my existing garage?
Start by installing a pair of passive louvered vents high on opposite walls to create cross-ventilation. For immediate, powerful results, add a properly sized exhaust fan on a wall farthest from your house door. First, always vacuum existing vent covers and ensure your main garage door seals aren’t blocking the bottom airflow gap. These are essential steps to improve garage air circulation and ventilation.
As a rule, should I choose an exhaust fan or an intake fan?
For most homes, especially attached garages, install an exhaust fan. It creates negative pressure to actively pull moist, fume-laden air outside, which is the safest method for removing hazards. Fresh air will naturally infiltrate to replace it, but you can aid this with a passive intake vent low on the opposite wall.
What are the typical building code requirements I need to know about?
Codes vary, but many require a minimum net free vent area (often 1/150 of the floor area) and that any powered fan is specifically rated for garage use. For garage roof vent ventilation installation, plan for adequate intake and exhaust to promote proper airflow. Before cutting, always call your local building department; they can clarify requirements for louver types, fire-blocking, and if a permit is needed for your project.
Your Next Steps for a Healthier Garage
Regular, active airflow is the simplest and most effective defense against the slow, costly damage caused by stagnant air. Treat it with the same priority as changing your furnace filter or testing smoke alarms. To lock in this habit, remember these three points:
- Run your exhaust fan during and after any project that creates dust or fumes.
- Check vents and soffits each season to ensure they are clear of debris and pests.
- For most garages, a simple, well-placed fan you already own can make a bigger immediate difference than an expensive new system.
Industry References
- Garage Ventilation · Fantech
- Garage Ventilation: A Comprehensive Guide (2025 Updated)
- Mechanical Ventilation for Attached Garage | Building America Solution Center
- How to Ventilate a Residential Garage: DIY Guide | Today’s Homeowner