
How Do You Winterize Your Garage to Prevent Freezing and Damage?
Worried about burst pipes or a freezing cold garage this winter? I’ll show you a straightforward plan to secure your space based on what I’ve fixed in my own shop.
This article will walk you through insulating your garage door with kits like those from Frost King, sealing cracks with OSI Quad caulk, protecting water lines with heat tape, and storing tools properly to avoid rust.
I’ve winterized hundreds of garages over the years, learning which methods prevent callbacks and which don’t last a season.
Start With Your Garage Door: The Biggest Source of Cold Air
Your garage door is like a giant window into your unheated space. If it’s not sealed, cold air pours in and any warmth from your house leaks out. Sealing the gaps around your garage door is the single fastest way to make the space noticeably less drafty and protect anything stored inside. Addressing seal gaps around your garage door cuts drafts at the source and protects anything stored nearby. In the next steps, I’ll outline simple ways to seal gaps around your garage door. This is always my first stop on a winterization job.
Start by inspecting the weatherstripping. The bottom seal is a long rubber or vinyl strip that presses against the floor. Crouch down and look for cracks, brittleness, or spots where it’s worn thin. For the side and top seals, run your hand along them to feel for gaps or missing sections.
Replacing them is straightforward. For the bottom seal:
- Open the door fully and unplug the opener for safety.
- Remove the old seal by pulling it out of its retainer channel. This usually just requires a good tug.
- Measure the width of your door and cut the new seal to length with a sharp utility knife.
- Starting at one end, press the new seal’s lip firmly into the channel. A rubber mallet can help tap it into place if it’s tight.
For the side seals, the process is similar. They typically slide into a track on the door frame. Pull the old ones out, cut the new ones to the height of the door opening, and slide them in.
A common question I get is: “Can I winterize my garage door myself with an insulation kit?” You can. Those DIY foam panel kits from companies like Owens Corning or Johns Manville are a decent budget option. You cut the polystyrene panels to fit inside the door sections and secure them with the provided tape or clips. They do help slow down heat transfer through the metal or wood of the door itself. For a more comprehensive winterize, seal gaps around the frame and add weatherstripping along the door opening. These steps pair well with insulation kits and can complement a future upgrade to a professionally insulated door. For a more permanent, efficient solution, consider a professionally installed insulated garage door. These have a higher R-value core (like polyurethane foam) and are built for durability. The kits are a good patch; a new door is a long-term upgrade.
Door Seal Maintenance & Cleaning Routine
Twice a year, give your door’s moving parts some attention. First, vacuum out the tracks to remove grit and debris that can grind down the rollers. Then, spray a silicone-based lubricant (I use WD-40 Specialist Silicone) onto the rollers, hinges, and springs. Avoid oil-based lubricants as they attract more dirt.
To test your seal’s effectiveness, try the dollar bill test. Close the door on a dollar bill. If you can pull the bill out with little resistance, you have a gap that’s letting in cold air. Do this in several spots along the bottom and sides.
The Gearhead’s Checklist for Door Winterization
- Utility Knife: For cutting weatherstrip and insulation panels cleanly.
- Tape Measure: Measure twice, cut once.
- Rubber Mallet: To gently seat stubborn vinyl seals into their channels without damaging them.
- Silicone Sealant: A small tube is perfect for sealing the ends of weatherstrip or tiny gaps at corners.
I always recommend vinyl bulb seals over basic foam. In my experience, foam compresses and loses its shape over time, especially when it gets wet and then freezes. Vinyl holds up to moisture and temperature swings much better.
The Log Entry Pro-Tip
Here’s a lesson from my own garage. I once tried to save a few bucks and used a generic double-sided tape to install foam insulation panels. Within a week, during a cold snap, every single panel peeled off and fell into my truck bed. Always use the adhesive tape that comes with the kit or a construction adhesive rated for polystyrene foam. The right adhesive makes all the difference.
Insulate Walls and Ceiling to Trap What Heat You Have
Once the door is sealed, the next step is to keep any residual heat from escaping through the walls and ceiling. Your first job is to see what you’re working with. In an unfinished garage, look between the wall studs and ceiling joists. If you see fluffy pink or yellow material, you have fiberglass batt insulation. Look for empty bays or spots where the insulation has been pushed down or torn by pests, especially in the garage ceiling.
For a DIYer, adding batt insulation is the most feasible project. You buy it in pre-cut rolls or barts, cut it to width with a sharp knife, and friction-fit it between the studs. Blown-in cellulose is more effective at filling odd spaces, but it usually requires renting a machine. For most homeowners, batts are the right balance of cost, DIY skill, and effectiveness for a garage.
Before you push any insulation into place, there’s a critical safety step. Look for electrical boxes (outlets, switches) on the walls. You must seal the gaps around these boxes where they meet the drywall or sheathing. Use a fire-resistant spray foam, like Great Stuff Fireblock. This slows the spread of fire and prevents warm indoor air from leaking into the cold wall cavity where it can condense.
Wall and Ceiling Maintenance & Inspection Routine
Make it a habit every fall to do a quick visual inspection. Use a flashlight to look for signs of mice or insects nesting in the insulation, dark moisture stains, or areas where the insulation has settled and left a gap at the top of the wall. A simple way to find major cold spots is to run your hand along the interior wall on a very cold day; you’ll feel the temperature difference. For a clearer picture, a basic thermal camera that connects to your phone, like one from FLIR, can show you exactly where heat is escaping.
The Gearhead’s Checklist for Adding Insulation
- Insulation Barts: Choose an R-value suitable for your climate (R-13 or R-15 for walls is common).
- Sharp Utility or Drywall Knife: For clean cuts on the batts.
- Staple Gun: To secure foil or paper vapor barrier flaps on unfaced batts to the studs.
- Gloves, Goggles, and an N95 Dust Mask: Non-negotiable safety gear. Fiberglass particles are nasty.
Don’t cheap out on the staple gun. I’ve had a cheap one jam on me halfway through a project, leaving insulation sagging. A mid-range Arrow or DeWalt model is reliable and makes the job go smoothly.
Handle Garage Plumbing to Prevent Costly Freeze-Ups

I get two questions every single fall: “How do I winterize my garage sink?” and “What about my garage bathroom?” The process is the same, and ignoring it is a gamble I won’t take. A burst pipe in your garage wall is a messy, expensive repair that’s completely avoidable.
The only surefire way to protect garage plumbing is to completely shut off and drain the water supply to that space. This keeps the space dry and reduces the risk of garage flooding and water damage. This simple step also tees up the prevention tips to follow. Here’s my shop-tested method.
- Find the shut-off valve. For a standalone garage, this is usually a valve on the supply line just before it enters the garage slab or wall. In an attached garage, look for a branch line shut-off in your basement or crawlspace.
- Turn the valve to the “off” position.
- Open every faucet and flush every toilet in the garage. This relieves pressure and starts the draining process.
- Find the lowest point in the plumbing, often a drain valve or the faucet itself. Open it and let all remaining water drain out into a bucket. I leave the faucets open after draining.
For pipes that cannot be shut off, like a short run in an attached garage, insulation and heat are your backup. Slide foam pipe insulation sleeves over every inch of exposed pipe. For pipes in exterior walls, I add thermostatically controlled heat tape before the insulation. The tape from Frost King with a built-in thermostat turns on only when temps drop near freezing, which is safer and cheaper to run than constant-heat versions.
Plumbing Maintenance & Cleaning Routine
If your water heater lives in the garage, give it attention now. Sediment buildup is worse when things sit cold. Connect a standard garden hose to the drain valve at the base and run it to a floor drain or outside. Open the valve and let it flow until the water runs clear. This five-minute job extends the tank’s life.
Don’t forget the traps. The U-shaped pipe under your sink and the water in your toilet bowl can freeze and crack the porcelain. After draining the system, pour a cup of plumbing-safe, non-toxic antifreeze (like the stuff made for RVs) down each drain and into the toilet bowl. It’s cheap insurance.
The Gearhead’s Checklist for Pipe Protection
- Foam Pipe Sleeves: Get the slit polyethylene kind. They snap on easily. Measure your pipe diameter first.
- Heat Tape: Always choose a model with a built-in thermostat. I’ve used the Frost King HSPRO series for years without issue. Never let heat tape overlap itself.
- Teflon Tape: A small roll of pink or white tape for sealing any threaded fittings you might open during the process. I prefer the thicker “pipe seal” tape for a more dependable seal on water lines.
I insist on thermostatic heat tape because the old plug-in style can overheat insulated pipes, creating a fire hazard. The modern kind manages itself.
Choose and Manage a Safe Heat Source for Your Workspace
Heating a garage is about safety first, comfort second. I’ve tried most options in my own shop. Electric infrared heaters, like the Dr. Infrared model, are my top pick for most attached garages. They heat objects and you directly, not the whole air volume, which is efficient. They also have no open flame and pose minimal fire risk if mounted properly. But there are other garage heating options to consider too.
Forced air electric units, like a simple wall-mounted heater, work fast but can stir up dust and are costly to run for long periods. Vented propane heaters, like a Mr. Heater Big Buddy, provide serious warmth but are for detached, well-ventilated garages only. You must provide cross-ventilation and have a working carbon monoxide detector running anytime it’s on.
If you use any fuel-burning heater, a carbon monoxide detector with a digital readout is not optional, it’s as critical as the heater itself. Mount it at breathing height. Heating costs are real. I use a programmable thermostat and only heat the garage when I’m working in it, setting it back to just above freezing at night.
Heater Maintenance & Cleaning Routine
For forced-air units, check and clean or replace the filter monthly during heavy use. A clogged filter makes the heater work harder and become a dust fire. For any gas-powered heater, schedule an annual inspection with an HVAC pro to check vents, connections, and the burner. I do this every fall.
Keep a three-foot “clear zone” around any heater. That means no cardboard boxes, painting rags, or lumber piles. I use this ritual as a chance to sweep and tidy my entire workbench area to eliminate dust bunnies that could ignite.
The Gearhead’s Checklist for Garage Heating
- Heavy-Duty Extension Cord: If you must use one, ensure it’s a 12-gauge cord rated for the heater’s amperage. Better yet, have an outlet installed where you need it.
- Wall-Mounted Thermostat: A basic unit from Honeywell lets you control the temperature without constantly adjusting the heater dial.
- Fire Extinguisher: Keep a 5-lb ABC extinguisher mounted on a post near the garage entry. Not buried in a cabinet.
I mount my infrared heater high on the wall, angled slightly downward. This positioning directs warmth onto my work area and tools, not onto the ceiling where it’s wasted. It also keeps the unit safely out of the way of ladders and long materials.
Protect Your Garage Floor from Salt, Moisture, and Cold
A lot of homeowners ask me how to “winterize” a garage floor. The real goal is to install a moisture barrier. Your bare concrete floor acts like a sponge, pulling in water from melting snow and salt. When that moisture freezes, it expands and chips the surface, a problem called spalling.
Sealants, Coatings, and Mats
You have two main choices for a barrier: a concrete sealer or an epoxy coating. A high-quality acrylic or silicate sealer, like those from Foundation Armor, soaks into the concrete and blocks moisture. It’s a great first step. For more durability, I use a two-part epoxy kit.
An epoxy floor creates a thick, plastic-like shell that salt and water can’t penetrate, and it’s much easier to sweep and mop clean. Many compare epoxy vs paint for a garage floor to weigh durability and maintenance. In that epoxy vs paint decision, epoxy tends to outlast paint in exposed areas. I prefer the Rust-Oleum Rocksolid kit. It takes a full weekend to apply properly, but it lasts for years where paint would peel in one season.
For added insulation and comfort, interlocking rubber or plastic floor mats are a smart move. Brands like RaceDeck or simple horse stall mats from Tractor Supply keep your feet warmer and protect the sealed floor from heavy tools or winter tires.
Floor Maintenance & Cleaning Routine
Your new barrier isn’t a set-it-and-forget-it solution. Road salt is corrosive. When you pull in a wet car, that salty slush melts and sits on your floor. If it dries, the salt crystals are left behind to do damage.
Get a wide floor squeegee and use it to push standing water and slush out the garage door immediately. Follow up with a stiff-bristle broom. For a deeper clean, a monthly mop with a pH-neutral cleaner keeps the sealer or epoxy in good shape. It’s particularly effective for concrete, epoxy, or tile garage floors.
Every fall, do a close inspection of your floor. Look for any new hairline cracks. Fill them with a concrete crack filler like Sikaflex before winter hits. This stops water from seeping in, freezing, and making the crack much bigger by spring.
The Gearhead’s Checklist for Floor Care
- For a new epoxy coat: Concrete etching solution (muriatic acid works, but I use a safer phosphoric acid product), a two-part epoxy kit, a heavy-nap roller kit, and a quality squeegee.
- For maintenance: A stiff push broom, a floor squeegee, and a gallon of concrete cleaner.
- I always choose a two-part epoxy over garage floor paint. The paint is thinner, chips easier, and doesn’t bond as well to salt-damaged areas. The epoxy is more work upfront but saves repair work later.
Prepare Your Tools and Stored Items for the Cold

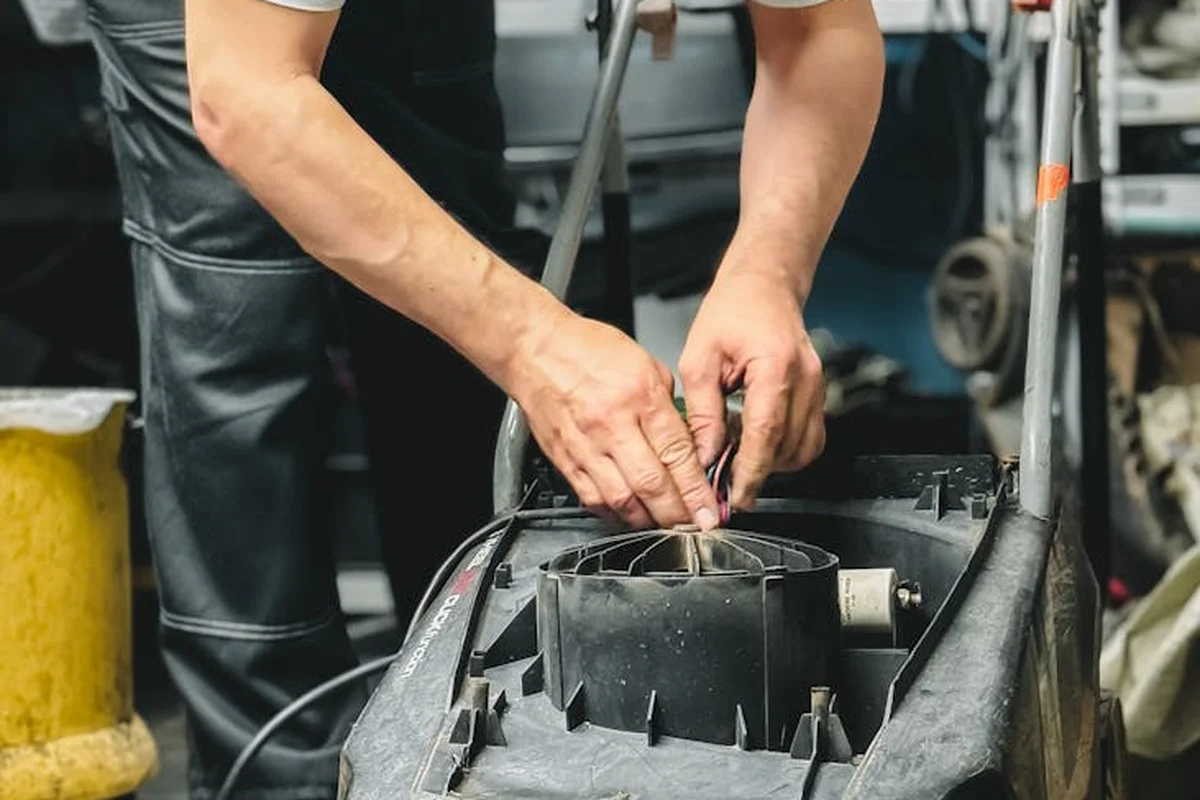
Cold temperatures can ruin your gear. Batteries lose charge faster and can be permanently damaged. Cans of spray paint, adhesive, and sealant can separate or not work at all. Fuel in lawn equipment turns to a gummy varnish that clogs carburetors.
My sorting system is simple. I break items into three groups:
- Bring indoors: All liquid chemicals (paints, adhesives), all battery-powered tool batteries, and any electronics.
- Cover in the garage: Lawnmowers, pressure washers, and grills after they are winterized. Use a breathable canvas cover, not plastic, which traps condensation and causes rust.
- Can stay: Hand tools, hardware, and properly stored power tools (with batteries removed).
If you have a garage refrigerator or freezer, its compressor has to work harder in the cold. Most are not designed for temps below 55°F. In a detached, unheated garage, I either unplug it and prop the door open for the winter or use a specialized garage-ready model. For safety, choose a garage-rated unit and follow the manufacturer’s guidance for unheated spaces.
Tool and Storage Maintenance & Cleaning Routine
For gas-powered equipment, you must deal with the fuel. Run the lawnmower dry if you can. For the leaf blower or trimmer, I add a fuel stabilizer like Sta-Bil to a fresh tank, run the engine for five minutes to get it through the system, then shut it off. This keeps the fuel from degrading.
An organized garage is a safe winter garage. Before the first snow, I do a full organization session. The goal is to create a clear, wide path from your car parking spot to where you store your snow shovel, ice melt, and snowblower. You don’t want to be tripping over summer items during a blizzard.
The Gearhead’s Checklist for Winter Storage
- Silica gel desiccant packs to toss in your metal toolbox to prevent rust.
- Breathable canvas covers for any large equipment you’re storing.
- Plastic storage totes with tight-sealing gasketed lids for spare parts or fabrics.
- I never store vehicle or tool batteries directly on the concrete floor, even in plastic cases. The cold transfers more efficiently and can drain them. I always place them on a wooden shelf or a rubber mat for insulation.
The Final Walk-Through: Your Pre-Winter Safety Check

Think of this walk-through as your dress rehearsal before the first big freeze. You’ve done the prep work inside, now you have to make sure the outside can handle the season. This step combines everything into one last inspection list to catch anything you missed.
Focus your eyes upward first, on the roof and gutters. I use my Little Giant ladder system to get a safe, stable look every fall. Clear every single leaf and pine needle from the gutters. If they’re clogged, melting snow has nowhere to go but back up under your shingles, creating ice dams that can cause major water damage. While you’re up there, scan the roof for any cracked, curled, or missing shingles that could become a bigger problem under snow load.
Back on the ground, verify your work. Run your hand along every door and window seal you installed-they should feel firm and even. If you have a garage heater, turn it on for a quick cycle to confirm it’s operational and the area around it is clear of clutter. Finally, check that your emergency kit, flashlights, and fire extinguisher are exactly where you need them, not buried behind summer gear.
Exterior Maintenance & Inspection Routine
The tiny gaps you ignore in September become icy drafts in January. Your mission here is to seal them up. Start with the caulk around all garage windows and, critically, the seam where the garage structure meets your house. This joint is a major source of heat loss. Pair sealing gaps with proper insulation to prevent garage freezing. Insulating the walls and ceiling will keep the garage warmer and protect pipes.
For this job, I always grab a tube of OSI Quad Max sealant and a basic caulk gun. The Quad Max stays flexible in extreme cold, which is key. If the old caulk is cracked, brittle, or peeling, you need to remove it. I use a 5-in-1 painter’s tool to scrape it out cleanly. Wipe the area with rubbing alcohol to remove dust, then apply a smooth, continuous bead of new sealant. Your goal is a clean line without gaps.
Next, handle your outdoor faucets. This is a five-minute task that prevents a thousand-dollar pipe repair. Inside your garage or basement, locate the shut-off valve for the exterior water line and turn it off. Go outside, open the faucet to drain the remaining water from the pipe. I then screw on an insulated faucet cover, like the simple ones from Frost King. They’re cheap foam domes that make a big difference.
The Gearhead’s Final Checklist
Before you call it done, grab these three last tools:
- A reliable flashlight (I keep a Streamlight ProTac in my toolbox).
- Your ladder.
- A notepad and pen.
You’re not just looking, you’re documenting. As you do your final pass, jot down any issues you see but can’t fix now-a wobbly fence panel, a loose piece of siding. This becomes your spring repair list so nothing gets forgotten.
Now, test your garage door’s auto-reverse safety sensors before snow piles up at the threshold. Place a roll of paper towels on the ground in the door’s path and close it. The door must reverse immediately upon contact. If it doesn’t, the sensors are misaligned or dirty. Clean the lenses with a soft cloth and adjust their brackets until the indicator lights are solid. This is a critical safety feature, especially in winter when kids might be playing in the driveway.
The Log Entry Pro-Tip
Here’s the single best habit I’ve learned from years of snowy mornings. Keep a full bag of ice melt and one dedicated, sturdy snow shovel just inside your garage’s service door or main door. Don’t let it get buried in a corner. Having them right there, where you can grab them the moment you need them, turns a frantic search into a simple task. You will thank yourself during the first unexpected overnight storm.
Garage Winterization FAQ: Quick Answers from a Pro
My garage sink/shower is on a line I can’t shut off. What’s my emergency plan?
You need a two-part defense. First, wrap all exposed pipes with thermostatically-controlled heat tape, then cover them with foam pipe insulation. Second, let a thin stream of water drip from the faucet on the coldest nights to keep water moving and prevent a freeze-up inside the walls.
I didn’t seal my floor before winter. Any urgent damage control?
Yes. Get a wide squeegee and use it immediately every time you bring in a wet, salty vehicle. Push all slush and standing water out the door before it can soak in and freeze. Sweep the area dry, and plan to apply a penetrating concrete sealer at the first thaw.
Is it safe to keep my beer fridge in an unheated garage over winter?
Most standard refrigerators aren’t designed for ambient temps below 55°F. In a cold garage, the compressor can fail and seals can crack. Either unplug it, prop the door open, and store beverages elsewhere, or invest in a garage-ready model specifically built for temperature extremes.
When does DIY garage door insulation hit its limit?
When you still feel a major draft after sealing or your door sections are dented/ warped. DIY kits can’t fix structural gaps or a damaged threshold. At that point, the most practical fix is consulting a door pro for adjustment or investing in a new, properly insulated door.
Final Thoughts on Winterizing Your Garage
In my shop, I’ve seen that preventing frozen pipes is the single most important step, as a burst line can flood your garage and ruin tools in minutes.
- Wrap all exposed water pipes with foam insulation sleeves; I use Armacell Tubolit because it’s thick and stays in place better than cheaper brands.
- Seal air leaks around the garage door with a heavy-duty weather strip-the Frost King pile-and-vinyl type I install holds up against ice and wind.
- Add an insulated thermal barrier to your garage door; a kit like Owens Corning’s polystyrene panels cuts drafts and keeps your space warmer.
- Monitor temperature drops with a wireless sensor; I keep a Govee unit in my garage to alert me before freezing risks damage.
Further Reading & Sources
- Blog : Seven Simple Tips for Weatherizing Your Garage
- How to Winter-Proof Your Garage | Cornwell Door
- 6 Essential Tips to Winter-Proof Your Garage This Season
- How to Keep Your Garage Warm in Winter: Tips to Prep and Winterize Your Space
- ProLift 101: How To Winterize Your Garage Door