
How Can You Transform Your Slippery Garage Floor into a Safe, Grip-Friendly Surface?
Concerned about taking a dangerous spill in your own garage? I’ll walk you through the straightforward, shop-tested solutions I use to eliminate slip hazards for good.
This article provides actionable steps, starting with a simple water test to gauge your floor’s risk, comparing durable options like epoxy chips versus anti-slip paints, and detailing my preferred application tools for a professional finish.
My advice comes from over a decade as a residential garage care pro, personally handling hundreds of floor safety upgrades.
What Makes a Garage Floor So Slippery and Dangerous?
Your garage floor is a unique hazard zone. In a living room, a spill is annoying. In a garage, it’s a genuine threat. The most common culprits are things you deal with every day, such as oil leaks and spills.
- Oil and Fluid Spills: A few drops of antifreeze, brake fluid, or motor oil create an invisible, slick film.
- Water and Snow Melt: This one seems obvious, but water on smooth concrete is like ice. It’s the main reason people slip carrying groceries in the winter.
- Dust and Concrete Sealing Powder: Bare concrete constantly sheds a fine, sandy dust. Some cheap sealers leave a powdery residue. Both act like millions of tiny ball bearings under your feet.
- Worn-Smooth Concrete: Over years, foot and tire traffic slowly polishes the surface, removing its natural texture.
The danger multiplies because you’re not just walking on it; you’re working around heavy tools, cars, and hard surfaces like workbenches. A slip in a garage has a much higher chance of leading to a serious injury compared to a slip on a kitchen floor. Your first line of defense is controlling these contaminants with good habits and the right floor surface. Garage floor mats are a common choice to improve that surface, but they have pros and cons. Understanding these can help you choose one that reduces slips without hindering workflow.
What Are Your Options for a Safer Garage Floor?
You have three main paths to a safer floor. I’ve installed all of them for clients, and each has its place depending on your budget, how you use the space, and how much work you want to do yourself.
- Coatings You Apply: These are liquids rolled or sprayed onto your cleaned concrete. They chemically bond to create a new, permanent surface. Common types are epoxy, the newer polyurea, and polyaspartic.
- Tiles or Mats You Lay Down: This is a floating floor system. Interlocking tiles made of plastic, polyethene, or rubber snap together over your existing slab.
- Treatments for Bare Concrete: This is for the “I just need more grip” approach. It involves using anti-slip additives or etching the concrete itself to roughen the surface.
Choosing between them comes down to durability, upkeep, and feel. Let’s break down how they really hold up.
The Durability Verdict: Coatings, Tiles, and Treatments Compared
I judge a floor solution by three things: how long it lasts against daily abuse, how it handles chemical spills, and how much effort it takes to get it right.
Coatings: A professionally applied coating is the gold standard for a permanent, sealed surface.
- Epoxy is the workhorse. A 100% solids epoxy kit, like the ones from Legacy Industrial, creates a thick, durable shield. I’ve seen these last 10+ years in active home shops. The downside? It can yellow in direct sunlight over time if you don’t use a UV-stable topcoat.
- Polyaspartic is the premium option. It cures rock-hard in a day, is completely UV stable, and has fantastic chemical resistance. I used a polyaspartic from ArmorPoxy for a client who parks his classic car in the garage and wanted zero fade. It’s excellent, but the material cost is nearly double that of a good epoxy.
Tiles: Tiles are about convenience and changeability.
- Plastic or polyethene tiles, like SwissTrax or Racedeck, are my go-to for a clean, dry garage. They’re lightweight, won’t stain from oil, and you can pull them up if you ever need to access the slab underneath. The interlock system is simple; I installed 400 sq. ft. of SwissTrax FreeFlow in an afternoon with a rubber mallet.
- Rubber tiles, often sold as horse stall mats or gym flooring, are softer underfoot and great for a workout area. But they are porous. I’ve seen them permanently stain from oil drips, and they can be very heavy to move.
Treatments: For bare concrete, adding grip is a must. You can broadcast anti-slip grit, like silica sand or aluminum oxide, into a wet coating or paint. This grit is what actually provides the traction, and when properly embedded in a coating, it will last as long as the coating itself. Simply sprinkling it on a floor paint will see it wear off in a season. Another option is to chemically etch the concrete with muriatic acid to open its pores, which restores some natural texture but doesn’t provide the same level of slip resistance as a coating with grit.
How Do You Prepare and Apply a Slip-Resistant Coating?
Think of your garage floor like a wall you’re about to paint. The finish only holds if the surface underneath is clean, dry, and sound. Most coating failures happen because of poor prep, not a bad product. Get this right, and your new floor will last for years.
The Critical First Step: Degreasing and Cleaning
You can’t just sweep and mop. Oil, antifreeze, and old wax sealers create a barrier nothing will stick to. I start every job with a commercial-grade, biodegradable degreaser. Pour it on, let it dwell for 10 minutes, then scrub with a stiff-bristle push broom. For a small garage, a pressure washer with a surface cleaner attachment rinses it best. For bigger spaces, I use an industrial wet vac. The floor must be completely free of soap residue and be bone-dry before moving on. This can take a full 24-48 hours with fans running.
Repairing Cracks and Leveling Trip Hazards
Any crack wider than a credit card needs attention. For hairline cracks, a simple epoxy crack filler syringe works. For larger gaps or crumbling edges, you need a vinyl concrete patching compound. I mix small batches because it sets fast. Trowel it in, feather the edges, and let it cure completely. For a sunken section or a noticeable lip, I use a self-leveling underlayment. It’s like pouring a thin pancake batter that finds its own level. Fixing these flaws isn’t just about looks; it removes the physical toe-catchers that cause trips and spills.
Your Step-by-Step Coating Guide
- Clear and Protect the Space. Move everything out. Tape plastic sheeting to the bottom of the garage door and wall edges. Wear old clothes, chemical-resistant gloves, and safety glasses.
- Mechanically Etch the Surface. For maximum coating adhesion, you must abrade the concrete. I use a rented floor grinder with a diamond grinding wheel. It’s dusty, but it creates a perfect profile. Sweep and vacuum every speck of dust afterward.
- Mix and Apply the Base Coat. For DIY, a 100% solids epoxy kit is the standard. Mix parts A and B exactly as directed. Pour it in a manageable section and spread it with a notched squeegee. Work in sections you can finish in 20 minutes. The clock starts ticking as soon as you mix, so have a helper and move with purpose.
- Broadcast the Anti-Slip Additive. This is the safety magic. While the base coat is still wet, I sprinkle a broadcast grade silica sand or aluminum oxide grit from a handheld shaker. I walk backwards, applying a uniform, dusty layer across the entire wet surface. This gets embedded into the coating.
- Apply the Protective Top Coat. After the base coat cures (usually overnight), you’ll have a rough, gritty floor. Sweep off any loose grit. Now, apply a clear polyaspartic or polyurethane topcoat. This seals the grit in place, provides chemical resistance, and makes the floor easy to clean. Use a roller with a long handle.
DIY Kits vs. Professional Installation
I’ve used the big-box store kits and the professional-grade materials. The DIY kits are a great entry point for a handy person with a weekend to spare. They often come with acid etch for prep, which works okay but not as well as grinding. The trade-off is that their chemical resistance and long-term durability can be lower. A pro install uses industrial-grade materials, professional surface prep, and typically comes with a multi-year warranty. The choice comes down to your budget, your skill level, and how much heavy use the floor will see. If you park daily drivers that drip road salt and chemicals, the pro route is worth the investment.
Recommended Products for Garage Floor Safety
Walking the aisles can be overwhelming. Don’t look for a brand; look for a product type that matches your needs. Here’s what to search for.
- 100% Solids Epoxy Kits: This is your base layer. “100% solids” means no solvents evaporate, so it cures thicker and more durable. Avoid water-based or solvent-based epoxies for a garage; they’re too thin.
- Polyaspartic Topcoat Kits: This is your clear, protective finish. It cures incredibly fast (often in a few hours) and has excellent UV and chemical resistance. Look for one designed for garage floors.
- Rubber Interlocking Tiles: These are a fantastic non-permanent solution. Look for tiles made from recycled rubber, at least 1/2″ thick. They provide cushion, great traction even when wet, and you can take them with you if you move.
- Commercial-Grade Degreasers: Skip the dish soap. Look for a concentrate labeled for automotive or industrial use. It should break down petroleum-based stains.
- Concrete Patching Compounds: For cracks, a “vinyl-reinforced” patcher is flexible and strong. For leveling, a “self-leveling” or “floor resurfacer” is what you need.
On labels, look for the coefficient of friction (COF) rating. A higher number means more slip resistance. For a wet garage environment, a COF of 0.6 or higher is a good target. Some products will also mention meeting OSHA or ADA standards for slip resistance.
How Can You Improve Traction Without a Full Coating?
A full floor coating is a commitment. If you’re not ready, these tactics can dramatically improve safety on a budget.
Liquid Anti-Slip Treatments are like an invisible sandpaper. You mop or roll on a clear coating filled with microscopic grit. It works well on clean, sealed concrete. I’ve used them on basement stairs and porch steps. The traction improvement is immediate, but it may need reapplication every year or two in high-traffic areas.
Acid Etching the Concrete is a classic prep step you can use as a finish. Muriatic acid (wearing full protective gear) opens the concrete pores and leaves a lightly textured, matte finish. It’s more slip-resistant than slick, sealed concrete. This is a low-cost way to permanently improve the bare concrete’s grip, but it offers no stain protection.
Adhesive Traction Tapes are your best friend for targeted spots. Look for heavy-duty, abrasive tapes meant for industrial stairs or ramps. I put a strip at the threshold of the man door, in front of my workbench where I stand, and a small square where my right foot always lands when I get out of the car. Replace them when the grit wears down.
Strategic Rubber Mat Placement solves problems where you stand still. A thick, ribbed rubber mat in front of your workbench absorbs fatigue. A large mat under the car catches water, salt, and grease drips. I prefer mats with a beveled edge so you don’t trip on them. This approach lets you spend money only where you need it most.
What Maintenance Keeps a Non-Slip Floor Effective?
Your floor’s grip isn’t a set-it-and-forget-it feature. It’s a surface you actively maintain. Think of it like the tread on your car tires. You wouldn’t ignore bald tires, and you shouldn’t ignore a slickening floor. A simple routine keeps it safe.
Your Simple Cleaning Schedule
This routine prevents dirt and oil from filling the textured pores that give your floor grip.
- Weekly: Sweep or dry mop. I use a heavy-duty push broom, the kind with coarse bristles. It gets into the texture better than a flimsy household broom. For rubber tiles, a rubber-bristle shop broom works great without snagging.
- Monthly (or after a big project): A damp mop with a pH-neutral cleaner. Avoid strong acids or degreasers on coated floors unless the product instructions say it’s okay; they can break down the coating over time.
Cleaning Different Surfaces the Right Way
You clean an epoxy floor differently than you clean rubber tiles. Using the wrong method can ruin the slip-resistance you paid for.
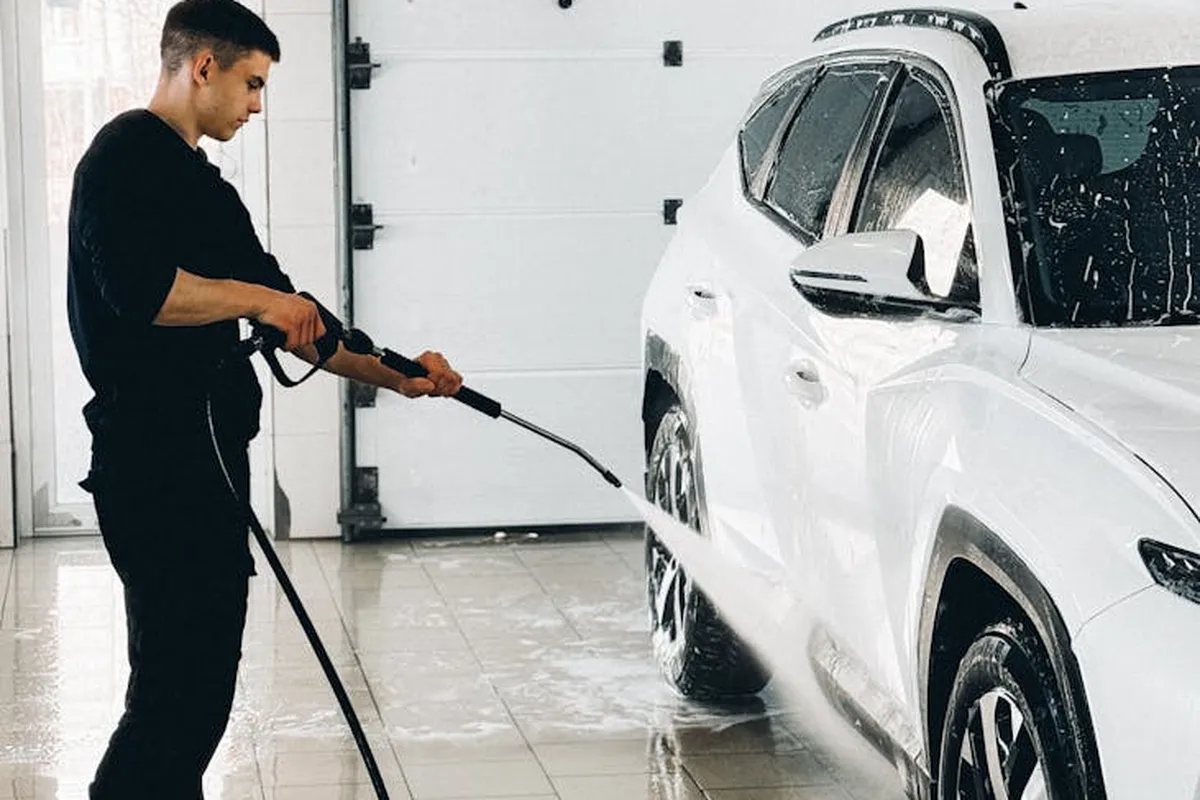
For a coated concrete floor (epoxy, polyaspartic, etc.): My go-to cleaner is Simple Green diluted in warm water. I mop it on, let it sit for a few minutes to lift grime, then use a stiff-bristle deck brush-like the ones for cleaning a patio-to scrub the textured surface. Rinse thoroughly with a mop and clean water. Avoid using a power washer on a high-pressure setting; it can chip and delaminate the coating.
For interlocking rubber or plastic tiles: Pull them outside if you can. Hose them down and scrub with a soft brush and mild dish soap. This prevents soapy residue from building up in your garage. Let them dry completely in the sun before reinstalling. If you can’t remove them, the damp mop method works, but be careful not to let water pool in the seams.
Inspection and Immediate Spill Response
Every few months, get down and look at your floor. You’re checking for two things: shiny, worn spots and any cracks or chips that collect grime. For spills, act fast. Oil, antifreeze, and transmission fluid are the worst offenders. Keep a bag of oil-absorbent granules, like Pig Universal Sorbent, in the garage. Dump it on a fresh spill, let it turn to a paste, and sweep it up. It’s the quickest way to prevent a permanent slick spot. To tackle any lingering marks, you may want to know how to remove oil stains from a concrete garage floor. There are simple, proven methods that lift those stains without heavy scrubbing.
Reapplication and Lifespan
Even the best floor wears. A high-quality epoxy floor in a home garage can last 5-10 years, while interlocking tiles can last a decade or more if not exposed to constant UV light. Maintenance is everything. When choosing a garage floor, many weigh epoxy vs interlocking tiles to balance durability and upkeep. A quick comparison can help you pick the right option for your space. A floor that’s cleaned regularly and protected from chemical spills will look and perform better for far longer. When your coated floor starts to look consistently slick or glossy in high-traffic areas, it’s time for a fresh topcoat. For tiles, you simply replace the worn tile-that’s their big advantage.
What Are the Real Costs and Smart Choices for Your Garage?
Let’s talk real numbers and trade-offs. Choosing a floor isn’t just about the sticker price of a kit. You need to factor in your time, tools, and the long-term value.
Breaking Down the Real Costs
Costs are always per square foot. For a standard two-car garage (about 400-500 sq ft), here’s a realistic breakdown from my experience: building a two-car garage costs can vary widely depending on location, materials, and finishes.
- DIY Epoxy Kit (2-coat system): $3-$6 per sq. ft. for materials. Add $50-$100 for a decent acid etcher, a quality squeegee, and spike shoes. Plan for a full weekend of your time.
- Professional Epoxy/Polyaspartic: $5-$12 per sq. ft., installed. This gets you a thicker, more chemical-resistant coat with a longer warranty, but it’s a significant investment.
- Interlocking PVC or Rubber Tiles: $3-$7 per sq. ft. for materials. Your main tool is a utility knife and a rubber mallet. Installation is a one-day project for most DIYers.
The hidden cost with coatings is floor preparation. If your concrete is badly cracked or spalling, repairing it adds cost and time, whether you DIY or hire it out.
Permanent Coating vs. Semi-Permanent Tiles
This is the core decision. An epoxy coating is permanent. When it’s down, it’s down. It adds a seamless, chemical-resistant shell to your concrete. The value is in its durability and how it transforms the entire space, but you’re married to it. If it fails due to installation error or you just get tired of the color, removal is a brutal, expensive process.
Tiles are semi-permanent. I’ve used RaceDeck and similar generic brands. You can install them over any flat surface and take them with you if you move. Spill containment is excellent. The value is in their flexibility and forgiveness; you can change your layout or replace a damaged section in an afternoon. They can feel slightly softer underfoot, which some people prefer.
Considering Eco-Friendly and Low-VOC Options
If you’re sensitive to fumes or use the garage as a workshop, pay attention to VOCs (Volatile Organic Compounds). Standard solvent-based epoxy kits have strong odors and require serious ventilation. For indoor air quality, look for 100% solids epoxy or water-based epoxy. They have much lower VOC levels. Polyaspartic coatings, often used by pros, also cure with very low odor. Most rubber and PVC tiles are inert once installed and off-gas very little, making them a good choice for attached garages. For ongoing safety, consider garage climate air quality equipment to monitor VOCs and optimize ventilation. Sensors, fans, and compact purifiers can help maintain a healthier workspace.
Matching the Solution to Your Life
Be honest with yourself about three things: budget, skill, and use.
- The Budget-Conscious DIYer: A quality DIY epoxy kit or economy-grade interlocking tiles are your best bets. Invest your time in perfect preparation.
- The “I Want It Done Once” Homeowner: Hire a reputable pro for a polyaspartic or high-solids epoxy coating. Get multiple quotes and ask for references you can call.
- The Hobbyist or Changing Needs: Go with interlocking tiles. The ability to pull up a section to access a floor drain or replace a tile stained by a battery leak is a huge practical advantage.
Your garage floor is a tool. Choose the one that fits how you actually live and work.
Garage Floor Safety: Your Questions, Answered by a Pro
Can you add anti-slip additives to existing paint or epoxy?
You can, but it’s a temporary fix for an already compromised surface. Broadcast grit like aluminum oxide onto a freshly applied coat of a compatible urethane topcoat. Simply sprinkling it onto old paint won’t bond properly and will wear off quickly, creating a grit-free slick spot.
How effective are rubber mats and interlocking tiles for garage floor safety?
They are highly effective for instant, dry-foot traction and are my top recommendation for containing spills in specific zones. The key is choosing the right material: solid PVC tiles for general use and chemical resistance, or thick rubber mats for cushioning in work areas. Ensure they have a beveled edge to prevent tripping.
What maintenance is required to keep a non-slip garage floor effective?
Your primary job is to prevent the texture from getting clogged. Weekly dry sweeping or mopping is non-negotiable. For coated floors, clean quarterly with a pH-neutral cleaner and a stiff brush. For tiles, pull them up annually for a deep clean. Immediately absorb oil spills with granules to prevent a permanent slick.
What safety standards or ratings should you look for in non-slip flooring products?
Look for a published Coefficient of Friction (COF) rating. For a wet garage environment, a static COF of 0.6 or higher is a strong target. Some products may also mention meeting ADA (Americans with Disabilities Act) or OSHA guidelines for slip resistance, which is a good indicator of tested performance.
Are there eco-friendly or low-VOC options for slip-resistant floor treatments?
Yes. For coatings, seek out 100% solids epoxy or water-based epoxy kits, which have low VOC emissions. Polyaspartic topcoats also cure with minimal odor. For tiles, most PVC and rubber options are inert once installed and are a great low-fume choice for attached garages or workshops. They are also considered eco-friendly options.
What is the expected lifespan of different non-slip garage floor solutions?
With proper maintenance, a professional polyaspartic coating can last 15+ years. A DIY epoxy kit may last 5-10 years. High-quality interlocking tiles can easily last a decade or more, as individual tiles can be replaced. Liquid anti-slip treatments on bare concrete typically need reapplication every 1-3 years.
Maintaining Your Safe Garage Floor
The single most important thing you can do is to make a simple weekly sweep and seasonal deep clean part of your regular garage routine. This regular attention prevents the slow buildup of dust and grime that turns any floor slippery. Keep these points in mind to make your garage a consistently safe space: