
Building an EV Garage: What Do You Really Need to Know?
Planning a new garage for your electric vehicle can feel overwhelming, with confusing electrical codes and safety concerns about high-voltage equipment. I’ll help you break it down into straightforward, safe steps based on real-world shop experience.
We will walk through the practical essentials you must plan for, from the ground up. This guide covers wiring capacity and future-proofing, charger selection and mounting, and the critical local code and safety requirements you cannot afford to overlook.
I base this advice on years of hands-on garage builds and system upgrades, dealing directly with inspectors and troubleshooting installations that weren’t done right the first time.
Start Here: Assessing Your Garage and EV Needs
The first step isn’t buying a charger. It’s getting a tape measure and opening your electrical panel. Grab a 25-foot tape and measure the path from your main electrical panel to where you want the charger. Go along the wall, across the ceiling, whatever route the wire will take. Write that number down.
This measurement is your single most important number for getting an accurate quote from an electrician.
Next, think about your daily driving. I drive a Chevy Bolt. Plugging into a standard 120-volt household outlet (Level 1 charging) gives me about 4 miles of range per hour. That’s fine if I drive 30-40 miles a day and plug in all night. If you drive 80 or 100 miles daily, you’ll be playing catch-up. A Level 2 charger, on a 240-volt circuit, can add 25-30 miles per hour. That’s a full recharge overnight for most people.
Is Your Electrical Panel EV-Ready?
Open your main panel door. Look for empty slots where a new breaker can snap in. Two side-by-side empty slots are what you need for a 240-volt circuit. Now, look at the big number on your main breaker. Most modern homes have a 200-amp service, which is often sufficient. Older homes might have 100 or 150 amps.
Having open slots doesn’t automatically mean your panel can handle the load; an electrician will need to perform a load calculation.
I see a lot of Square D Homeline and Siemens panels in my work. They’re reliable. The key thing to look for is the manufacturer’s label inside the panel door-it will list what types and sizes of breakers are compatible. Don’t mix brands.
Choosing Between Level 1 and Level 2 Charging
Let’s put real numbers to it. With my Bolt, a 12-hour overnight Level 1 charge gets me roughly 48 miles. If my daily commute is 20 miles, that’s perfect. If I drive 50 miles a day, I start every morning slightly more drained than the day before. A 40-amp Level 2 charger adds about 10 miles every 30 minutes. You plug in at 6 PM, and by 10 PM you’re done.
The cost-benefit is clear. Level 1 uses existing wiring, so it’s cheap. Level 2 requires a new circuit and hardware, costing more upfront. For a homeowner driving 40 miles a day, Level 1 might work. For anyone driving more, or who wants the convenience of a fast top-up, Level 2 is the only sensible choice.
Running the Wires: EV Garage Wiring Specs and Steps
This is where your project gets serious. EV garage wiring is not like adding a light. You’re dealing with a continuous high load for hours. Following garage electrical code requirements is essential. They govern conductor sizing, overcurrent protection, and dedicated circuits for EV charging.
You must install a dedicated circuit for your EV charger; sharing a circuit with a freezer, air compressor, or tools is a major fire hazard. As you plan the setup, consider EV garage flooring options that are durable and easy to clean. The right flooring can help create a safe, organized charging area.
For the wiring run, you have two good choices for conduit. I prefer EMT (thin-wall metal conduit) for garage walls because it’s tough and protects the wire from physical damage. It does require a conduit bender. For simpler runs, Schedule 40 PVC is fine. I’ve used Carlon brand PVC for many protected runs. Just know it can become brittle in very cold garages. If you’re planning a run to a detached garage, map the route in advance to keep the conduit protected from weather and damage. Proper planning like this helps ensure a safe, code-compliant wiring setup for a detached garage.
Understanding Wire Gauge and Amperage
Think of electrical wire like a garden hose. A skinny hose (small gauge wire) can’t carry much water (current) without building up pressure (heat). You need a fat hose for the job. The National Electrical Code (NEC) has strict rules for this to prevent fires.
Here’s a simple guide I follow for copper wire:
- For a 40-amp circuit (for a 32-amp charger): Use 8 AWG wire with a 40-amp breaker.
- For a 50-amp circuit (for a 40-amp charger): Use 6 AWG wire with a 50-amp breaker.
- For a 60-amp circuit (for a 48-amp charger): Use 6 AWG wire with a 60-amp breaker.
Notice the breaker is sized higher than the charger’s continuous load. This is a critical safety rule. Always buy wire labeled “THHN” for running in conduit.
Step-by-Step: Installing Conduit and Cable
If you’re doing this yourself, the sequence matters. First, shut off the main breaker to the entire house. Confirm the power is off with a non-contact voltage tester. Plan your route from the panel to the outlet location.
- Mount your outlet box on the wall where the charger will reach.
- Secure the conduit to the wall or ceiling joists with straps every 3 to 4 feet. Don’t let it sag.
- Keep bends gentle. For EMT, use a hand bender. For PVC, use a hacksaw and pre-formed elbows. Sharp bends make pulling wire impossible.
- Pull your wires through the conduit. Use wire lubricant-it makes a huge difference.
- Leave at least 8 inches of extra wire at the panel and 6 inches at the outlet box.
My best pro tip: Before you pull the wire, run a brightly colored pull string through the conduit and leave it there. If you ever need to upgrade the wire, you’ll thank yourself.
Making Safe Connections at the Outlet
You’ll likely be installing a NEMA 14-50 outlet (four prongs) or a NEMA 6-50 (three prongs). Check your charger’s plug first. I use the heavy-duty Hubbell or Bryant brand outlets, not the cheaper big-box store versions. They have better, larger terminals that handle the heat.
Strip the wire to the length indicated on the outlet. Loop the wire clockwise around the terminal screw and tighten it firmly. Never, ever use the quick “back-stab” holes on the side of an outlet for this application. They can’t handle the sustained current and will fail. For a truly solid connection, use a small torque screwdriver to tighten to the specification printed on the outlet, usually around 50 inch-pounds. A loose connection here will overheat and melt the outlet. I’ve seen it happen.
Mounting and Connecting Your EV Charger
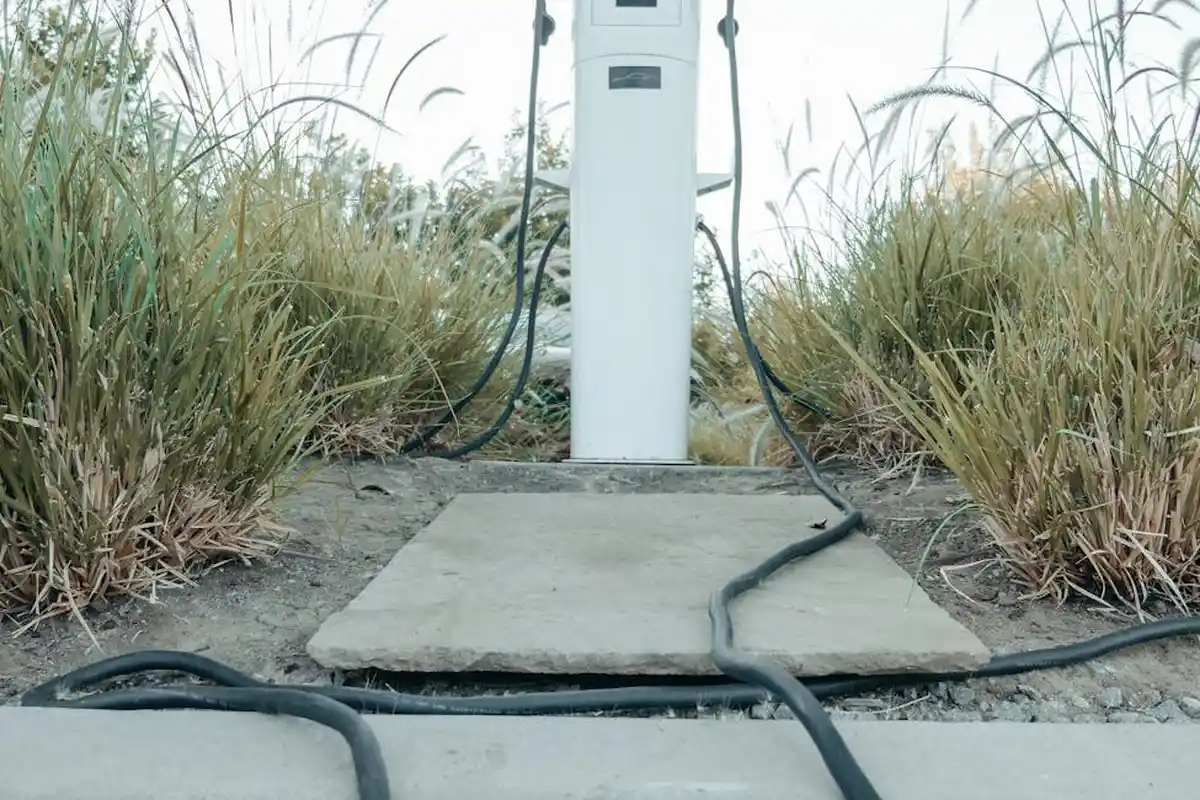
Now for the part that feels most like progress: putting the charger on the wall and making the final connections. Doing this right prevents problems down the road.
Hardwired vs. Plug-In: Which is Better for Your Garage?
I’ve installed both types. A hardwired charger, like the Grizzl-E Classic or a ChargePoint Home Flex, connects directly to your circuit wires. I used a Grizzl-E for my own setup because it’s a clean, permanent installation. The direct connection is slightly more efficient and eliminates any worry about a plug overheating. It also deters theft since it’s not easily unplugged.
A plug-in unit, such as many from ClipperCreek that use a NEMA 14-50 outlet, offers flexibility. If you move, you can take your charger with you. I installed one for a neighbor who was between homes. The trade-off is ensuring that heavy-duty outlet is installed perfectly to handle the constant plugging and unplugging load.
Positioning Your Charger for Daily Use
Think about your daily routine. Mount the charger on a wall stud, never just on drywall. The weight and tugging on the cord will pull a drywall anchor right out. I aim for the charge port’s center to be about 48 inches from the floor. This keeps the connector at a comfortable height and allows the cord to loop neatly without touching the ground.
Park your car where you normally would and measure. You want enough slack to comfortably reach your car’s port without stretching the cord tight. Leave a little extra. A wall-mounted holster for the charging connector is a small purchase that keeps things tidy and protects the plug from physical damage.
Making the Final Electrical Connections
Inside the charger, you’ll find terminals for your line wires (black, red), neutral (white), and ground (green or bare copper). Here’s my process:
- Turn off the breaker at the main panel and verify power is off with a non-contact voltage tester.
- Strip the wire insulation to the exact length specified in the charger manual-usually about 3/4 of an inch. I use a dedicated wire stripper, not pliers, for a clean cut.
- Insert each wire firmly into its labeled terminal and tighten the screw with a screwdriver until the wire is secure. Tug gently on it to make sure it won’t pull free.
- Neatly tuck the wires into the unit’s housing without pinching them before securing the cover.
The Final Circuit Test
Before you energize the system for the first time, do this quick check with a multimeter. It answers the ‘wiring garage for ev charger’ question by proving your work is safe.
- With the breaker still OFF and the charger disconnected, set your multimeter to measure resistance (Ohms).
- Place one probe on the ground wire and the other on the neutral wire in the panel. You should see a very high reading or “OL” (Open Loop). This confirms there’s no dangerous short.
- Place one probe on the ground wire and the other on a hot wire (black or red). Again, you should see “OL”. Any low reading means a fault you must fix.
This two-minute test can prevent a dangerous situation when you flip the breaker on. Only after this passes should you restore power and test the charger.
Non-Negotiable Safety and Electrical Code Rules
This isn’t about being fussy. The National Electrical Code (NEC) rules for EV chargers, found in Article 625, are written from hard lessons. Following them is how you build a system that’s safe for decades.
In nearly all areas, this work requires an electrical permit and a final inspection. Skipping this can void your homeowner’s insurance if a fire starts. The core rules boil down to three things: proper GFCI protection, a dedicated circuit, and correct labeling.
I’ve seen the hazards firsthand in garages I’ve been asked to fix: undersized wires that overheated, missing ground connections, and even someone trying to tap into an existing bathroom circuit. These are serious fire and shock risks.
GFCI Protection: Why It’s Mandatory for EVSE
GFCI (Ground Fault Circuit Interrupter) protection is required for all EV charger outlets and hardwired units. Think of it like a super-sensitive referee. A standard breaker only trips if there’s a massive overload, like a short circuit. A GFCI breaker monitors the current flowing out and back. If it detects a tiny mismatch-as little as 4 to 6 milliamps, which could be flowing through a person-it cuts power in a fraction of a second.
Here’s a key detail: some chargers have built-in GFCI protection. If yours does, using a GFCI breaker at the panel can cause nuisance tripping. Your charger manual will specify. For a plug-in charger on a NEMA 14-50 outlet, you must use a GFCI breaker.
Getting Your Installation Inspected
The inspection is your friend. The inspector is there to verify everything is safe. They will check:
- Wire Gauge: They’ll match the wire size (like #6 AWG) to the breaker rating (like 50-amp) at the panel.
- Secure Fittings: All conduit connectors and cable clamps must be tight. No loose wires in the panel or the charger.
- Overcurrent Protection: The breaker size must match the charger’s required circuit and the wire’s capacity.
- Labeling: Your panel directory will be updated to show “EV Charger” on the correct breaker.
Have your permit copy and the charger installation manual ready. Answer the inspector’s questions directly. A clean, code-compliant install typically passes without issue.
The Gearhead’s Checklist for EV Garage Setup

Installing an EV charger is different from plugging in a toaster. You need the right tools to do the job safely and to code. Over the years, I’ve found that having a dedicated kit for this project saves time and frustration. Here’s what’s in mine.
For wiring, I will only use copper. I prefer Southwire brand THHN wire for the individual conductors. It has a smooth jacket that’s flexible and doesn’t bind up when you’re pulling it through conduit, which makes a two-person job easier for one person. For the protective conduit running along your garage wall, Carlon PVC schedule 40 is my standard. It doesn’t rust, it’s easy to cut with a hacksaw, and the glue joints set fast. Your two big hardware items are the receptacle and the box. Skip the big-box store specials. You need a true industrial-grade NEMA 14-50 outlet, like those from Hubbell or Bryant. Pair it with a deep, single-gang metal weatherproof box. The cheap outlets can’t handle the constant high-amperage load and are a known failure point.
Essential Tools You Likely Already Have
You can probably grab these from your general toolbox. A standard claw hammer, a 25-foot tape measure, a reliable stud finder for mounting the charger unit on drywall, and a sharp utility knife for trimming wire sheathing and opening packages. Having a good, bright headlamp is a game-changer when you’re working inside a dark electrical panel or a cramped outlet box.
Specialized Hardware You Need to Buy
This is the trip to the electrical supply house. You must buy a double-pole circuit breaker that matches your panel’s brand and the amperage of your circuit (like a 50-amp or 60-amp). Get wire connectors (often called wire nuts) specifically rated for the gauge of your wires. For securing the PVC conduit to the wall, use PVC conduit straps and the correct wall anchors for your wall material. If you’re drilling into concrete block, lead anchors or concrete sleeve anchors are what you need. Don’t forget the little things: electrical tape and a tube of silicone sealant to weatherproof the entry point of the conduit into the outdoor box if needed.
Maintenance and Cleaning Routine for Your EV Charging Station

Think of your charging station like any other major appliance in your garage. A little regular attention keeps it safe and extends its life. I tell my clients to build these quick checks into their monthly garage tidy-up routine.
Once a month, with the charger unplugged, run your hand along the entire length of the charging cable. Feel for any nicks, cuts, or unusual stiffness. Give the connector a look for packed-in dirt or debris. Plug it into your car and let it charge for a few minutes, then carefully feel the face of the NEMA 14-50 outlet. It should be room temperature. If it’s warm or hot to the touch, that’s a red flag to stop use and call an electrician. For cleaning, a damp cloth with a drop of mild dish soap is all you need for the charger’s exterior. Harsh chemicals or a pressure washer can damage the electronics.
Seasonal changes demand a quick extra look. In winter, ensure the cable hasn’t become overly stiff from the cold, which can stress the internal wires, and keep the area clear of melting snow and ice. In dusty summer months, you might need to wipe down the unit more often.
Monthly Connection Check
Your car’s charge port and the plug on your charger handle see a lot of action. Once a month, take a close look at both. Use the light on your phone to look for bent pins, accumulated grime, or any signs of melting or discoloration on the plastic. If the metal contacts look dirty, a quick spray with a dedicated electrical contact cleaner on a microfiber cloth can clean them. Never use water, WD-40, or abrasive pads.
Annual Electrical Check
Once a year, it’s wise to do a slightly more involved check. With the power to the circuit OFF at the main panel, remove the cover plate from your NEMA 14-50 outlet. Using a screwdriver, gently check the tightness of the terminal screws where the wires connect. The heating and cooling cycles from charging can sometimes loosen them over time. Do the same for the screws on the circuit breaker in your panel if you feel comfortable. If your circuit includes a GFCI breaker, press the “Test” button to ensure it trips properly, then reset it. This simple yearly ritual helps prevent high-resistance connections, which are a primary cause of electrical fires.
When NOT to Try This as a DIY Project

I need to be blunt here. Installing an EV charger is not like swapping out a light switch or installing a regular electrical outlet. There are clear lines where your DIY skills should stop and a professional’s should begin.
Your first red flag is the main electrical panel itself. If it’s packed full with no open breaker slots, that’s a hard stop. You cannot safely add a high-amperage circuit. Even worse are old panels, like those made by Federal Pacific. I’ve opened dozens of these in older homes, and they have a known history of failing to trip during a fault, which is a serious fire risk. If you see any rust or green corrosion on the bus bars or wires, that’s another sign of age and moisture damage. I won’t touch those, and you shouldn’t either.
Hire a licensed electrician immediately if your project involves a long wire run, a detached garage, or a service upgrade. If the cable needs to travel more than 100 feet from the panel to the charger location, voltage drop becomes a real issue. Thinner wire can overheat. For a detached garage, you’re likely looking at trenching a conduit underground. I rented a trencher once for a simple low-voltage line and still hit a sprinkler pipe. The cost to fix that mistake was more than just hiring the job out from the start. Upgrading your home’s main service from 100 amps to 200 amps is a utility company job and absolutely requires a pro.
If the thought of opening your live panel makes your palms sweat, listen to that instinct. That’s your brain’s way of telling you the risk is too high. Working inside a panel with the main breaker on is dangerous, and a slip can cause a violent arc flash.
I learned this lesson on a job last year. A homeowner wanted a 50-amp circuit for a new welder and an EV charger in his attached garage. The panel was an old Zinsco, another problematic brand. The wiring path was convoluted, going through two finished walls. I started the project but stopped when I realized the sheer complexity of ensuring the existing household loads wouldn’t overload the system. I called in my go-to electrician. He found a faulty neutral connection I had missed and recommended a full panel replacement. My attempt to save him money would have created a latent, dangerous problem.
Signs You Need a Professional Electrician
Sometimes, your electrical system will tell you it’s in trouble before you even start your project. Pay attention to these warnings.
- A persistent buzzing or humming from the electrical panel is not normal. It often means a loose connection that’s arcing and generating heat. It’s a fire hazard.
- Do your lights dim or flicker when the refrigerator or air conditioner kicks on? This usually indicates an overloaded circuit or a voltage drop issue in your main wiring.
- Breakers that trip frequently, especially without a clear reason, are a sign of an overloaded circuit or a failing breaker. Don’t just reset it and ignore it.
You can do a simple capacity check. Look at the main breaker in your panel; it might say “200 Amp” or “150 Amp.” Now, add up the amperage of all the breakers. If that total is at or above your main breaker’s rating, your panel is at capacity. An EV charger adds a significant new load. I use a simple clamp meter to measure actual draw, but if the math looks tight, it’s time for a professional assessment.
Understanding the Limits of a Garage Circuit
Think of your new EV charger circuit like a dedicated highway lane. You built it for one type of vehicle to use continuously. In a home garage, that lane becomes a dedicated EV charger installation. Even with a sauna or other gear nearby, you want the charger on its own safe, clean circuit.
You cannot use that same circuit to power other high-draw tools at the same time. If you have a 50-amp circuit for a charger, you cannot also run a 30-amp MIG welder or a large air compressor from the same outlet. This will overload the breaker and trip it, or worse, overheat the wiring. In my shop, I have separate, dedicated circuits for my charger, welder, and compressor. I use a DeWalt locking outlet for the welder to prevent accidental plug-in mix-ups.
This is because of how electrical code treats “continuous loads.” An EV charger is considered a continuous load because it can operate at full power for three hours or more. The National Electrical Code requires that for continuous loads, we size the circuit at 125% of the load. So, a 40-amp charger needs a 50-amp circuit (40 amps x 1.25 = 50 amps). That extra capacity is a built-in safety buffer for the prolonged heat generated. A table saw you use for 10 minutes doesn’t have this same requirement. Sizing the circuit correctly from the start prevents melted wires and ensures safe, reliable charging every night.
EV Garage Wiring & Charger Installation: Garage Care Pro FAQ
My panel has two open slots. Can I just install a 50-amp breaker for my EV charger?
Open slots are just the first step. A proper load calculation by a licensed electrician is mandatory to determine if your home’s main service can handle the additional, continuous draw of an EV charger. This calculation assesses all your home’s electrical loads to prevent overloading the entire system, which is a critical safety check beyond just physical space.
How do I future-proof my garage wiring if I plan to get a second EV?
Plan for the highest total load from the start. Discuss installing a sub-panel in the garage with your electrician. This creates a dedicated power hub, allowing you to run multiple circuits later (e.g., for two chargers or high-power tools) without needing another long, costly wire run from your main house panel.
What’s the most common maintenance issue you see with hardwired EV chargers?
Physical strain on the cable where it enters the charger housing. Ensure the charging cable has a gentle, supported loop (often using the included holster) so no tugging or weight is on the connection point. Periodically check that the charger’s wall mounting remains absolutely secure to the stud.
Is an annual professional inspection really necessary if my charger works fine?
For a hardwired unit, it’s a wise investment in prevention. A pro can perform a thermal scan under load to detect hot spots at connections and verify torque on terminals inside both the panel and charger-things a homeowner shouldn’t routinely touch. This proactive check can identify issues long before a failure occurs.
Finishing Your EV Garage Right
The most critical step is getting your garage’s electrical system professionally designed and installed to handle the sustained, high-power demand of an EV charger. My years of working on garage upgrades have taught me that skipping this foundation leads to frustration and safety hazards. Focus on these core actions to complete your project with confidence:
- Hire a licensed electrician experienced with EVSE installations and local code.
- Future-proof your panel and wiring with extra capacity, even if you don’t need it today.
- Perform a simple monthly visual check of your charger, cord, and outlet for any signs of heat, wear, or damage.
Sources and Additional Information
- How To Prepare Your Garage for Charging An Electric Vehicle – Lectron EV
- How To Get Your Garage Ready For an Electric Car
- How Do I Prep My Garage for an EV?
- How to Prepare Your Garage of the Future for Electric Cars
- How to Wire a New Garage for an EV Charging Station? – Danley’s Garages
- How to Prepare Your Home and Garage for an Electric Vehicle