
Is Mold Growing in Your Garage?
Seeing fuzzy patches or smelling that musty odor in your garage is more than just an eyesore; it can damage your belongings and affect your home’s air. I will show you how to fix the problem for good, both by cleaning it up and stopping it from coming back.
This guide walks you through the process, covering how to spot mold versus mildew, the safest way to remove it with common tools, and the crucial steps to prevent it by controlling moisture.
I have dealt with countless garage moisture issues over the years, from simple cleanups to repairing the root causes like poor drainage or ventilation.
First, Know What You’re Up Against: Is It Mold or Just Dirt?
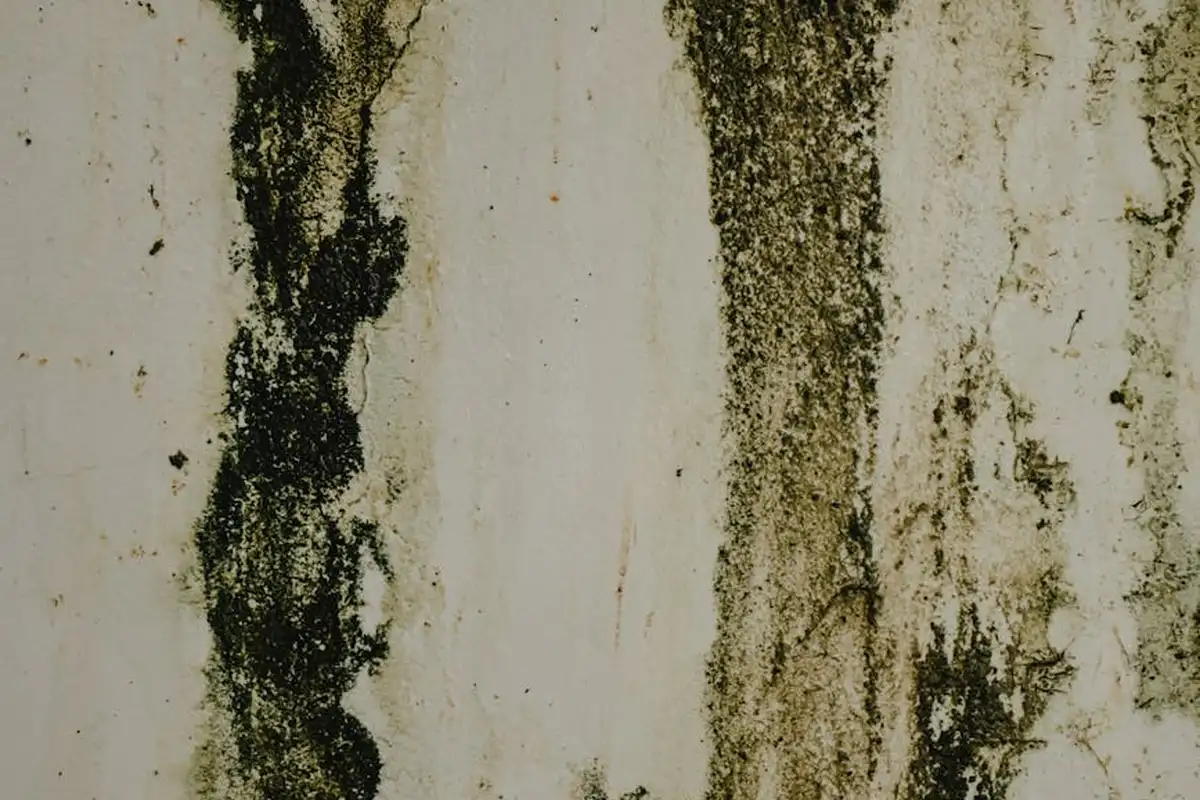
Before you grab a mop, take a close look. Mold and dirt look different. Dirt or dust is usually a consistent color, like brown or gray, and feels gritty. Mold is more varied. You might see splotches of black, green, or even white. It can look fuzzy or slimy, and it often grows in a circular pattern. The biggest clue is your nose. Mold has a distinct, damp, musty smell that dirt simply doesn’t have.
If you’re still unsure, here’s a simple test I use. Put on some gloves and safety glasses. Mix one part household chlorine bleach with four parts water in a spray bottle. Spray a small amount directly onto the suspect spot in an inconspicuous area to test for colorfastness first. If it’s mold, the bleach will usually lighten or dissolve the discoloration within a minute or two. Dirt or soot won’t react the same way.
Why bother with this step? It changes everything. Cleaning dirt is a chore. Cleaning mold is a health and safety project. Proper identification tells you to gear up with the right protection and alerts you to a potential moisture problem you need to fix. Treating it like simple dirt means you’ll likely just spread spores and won’t address the root cause.
Gearing Up: Your Safety Kit for Garage Mold Removal
Your regular cleaning clothes won’t cut it here. Mold spores are tiny and can irritate your lungs, skin, and eyes. I treat every mold cleanup like a mini hazmat operation. Here is the kit I assemble every single time.
- Respirator, Not a Dust Mask: A basic paper dust mask from the hardware store filters large particles, not microscopic mold spores. You need a respirator with a NIOSH rating. For most garage jobs, an N95 respirator is the minimum. For larger areas or if you’re sensitive, use a half-face respirator with P100 cartridges, like the 3M 6000 series. I prefer these because they seal better and the cartridges last.
- Gloves: Your skin can absorb irritants. I use long-cuffed nitrile gloves. They’re tougher than latex and provide better protection against both mold and cleaning solutions.
- Eye Protection: Simple safety glasses are fine, but I often use a full face shield if I’m scrubbing or spraying overhead. It keeps everything off your face.
With your PPE on, you must ventilate the space. I always open the main garage door and any side doors or windows. Then, I set up a box fan in a door or window, pointing outward, to actively pull the spore-filled air out of the garage. These steps align with garage ventilation requirements that specify adequate airflow and safe exhaust placement. This cross-ventilation is non-negotiable it protects you by continuously removing contaminated air.
The Step-by-Step Battle Plan for Removing Garage Mold

When you see mold, don’t just start spraying. A haphazard approach spreads spores and wastes effort. Follow this sequence to contain and eliminate it properly.
Your first move is always to gear up for safety with an N95 mask, goggles, and heavy-duty rubber gloves.
Choosing Your Cleaning Arsenal: Products That Work
Picking a cleaner isn’t one-size-fits-all. I’ve tested most of them on client jobs, and here’s what I’ve learned works best.
For a DIY mix, distilled white vinegar is my go-to for general surfaces. It’s acidic enough to kill many mold types and is safe on most materials. I keep a dedicated pump sprayer, like the Chapin 1-gallon model, filled with it. Bleach is a common choice, but I avoid it on porous surfaces like concrete or wood. It only bleaches the surface mold you can see, and the water in the solution soaks in and can feed the roots. Garages often carry gas- and oil-related odors that mold can feed on, so a dual approach helps. Pairing mold cleanup with garage odor removal strategies can address both issues.
For tougher, established growth, a commercial mold remover is worth it. I’ve had reliable results with products like RMR-86 or Concrobium. They cling to vertical surfaces better than vinegar and often don’t require scrubbing. Borax dissolved in water is another solid option for scrubbing floors; it kills mold and leaves a residue that discourages regrowth.
Your tool choice matters as much as your chemical: a stiff-bristled drill brush attachment saves your back on floors, while a sturdy hand brush is best for walls. A wet/dry vacuum is critical for sucking up dirty rinse water so it doesn’t seep into cracks.
Surface-Specific Tactics: Concrete, Wood, and Drywall
How you clean depends entirely on what you’re cleaning.
For unsealed concrete floors, you can be aggressive. Wet the area first to limit spore dispersal. Apply your cleaner, then attack it with a drill-powered brush. I use the TORQ brand brush with the coarse, black bristles for this. Rinse thoroughly with water and extract every bit of moisture you can with the wet/dry vac. After it’s bone dry, applying a penetrating concrete sealer is the single best thing you can do to prevent a repeat.
Painted walls or sealed floors are simpler. Use a milder cleaner like your vinegar solution or a commercial cleaner, scrub with a hand brush, and wipe clean. Avoid soaking the surface.
Wood and drywall need kid gloves. If mold is on the surface of sealed or painted wood, gentle cleaning can work, but you must dry it immediately with a fan to prevent swelling. For porous, unfinished wood or any drywall with more than a tiny speckled patch, cleaning is often a temporary fix. The mold roots deep into these materials. In my experience, cutting out and replacing the affected section is the only permanent solution.
Stop It from Coming Back: A Realistic Prevention Routine
Killing mold is a project. Keeping it away is a habit. Think of it as managing moisture, not just cleaning.
Here’s a simple routine I recommend to my clients: every month, do a quick walk-through looking for new condensation or leaks. Every season, especially spring and fall, do the full leak inspection and system check I describe below.
Control Moisture: Ventilation, Dehumidifiers, and Leak Checks
Stagnant, damp air is the problem. You need to move it out or remove the water from it.
If your garage feels muggy, improve ventilation first. Installing a passive gable vent is a great permanent upgrade. For a quicker fix, I often use a simple box fan pointed toward the door. Run it for an hour after you park a wet car inside or on humid days. Proper air circulation is key.
For chronically damp spaces, a dehumidifier is your best investment. Skip the small, portable ones; they can’t keep up with a garage’s air volume. Look for a 50-pint capacity or larger with a built-in pump and a hose connection. I’ve installed Frigidaire and hOmeLabs models that drain directly into a floor drain or out under the door, so you never have to empty a bucket. Check its energy rating; you’ll likely run it for months.
Twice a year, check for incoming water. On a dry day, go inside with a flashlight and scan where the walls meet the ceiling for stains. Outside, look for cracked caulk around windows, damaged roof flashing, or clogged gutters that spill over near your foundation. Run a hose along door and window seals while a helper watches inside for drips.
Smart Storage Habits to Deprive Mold of Food
Mold needs organic material to eat. Your storage choices can starve it.
Cardboard boxes are mold food and wick moisture from the floor. I tell every client to switch to plastic totes with tight-sealing lids. For workshop supplies like rags or pet food, I use sealed metal garbage cans. They’re rodent-proof and stay dry. I believe plastic bins perform better than cardboard boxes in garages.
Never store anything directly on a concrete floor. It will always be cooler than the air, causing condensation underneath. Use sturdy metal shelving units or place wood pallets down first to create an air gap. I’ve used the Husky heavy-duty shelving for years-it holds weight, resists rust, and keeps everything up where air can circulate.
If you store firewood, keep it outside until you’re ready to burn it. Bringing in a stack of damp logs is like inviting mold to a buffet. Finally, a decluttered garage has better air flow. Make it a rule to do a major purge once a year. Good airflow and less stuff make it hard for mold to get a foothold.
Recommended Products and Tools for the Job

You don’t need a pro’s truck full of gear, but having the right few items makes the job safer and more effective. I keep these categories stocked in my own shop.
Cleaning and Killing Agents
For a definitive kill on non-porous surfaces like concrete floors or cinder block, a concentrated chlorine-based bleach solution is the old reliable standard. It’s powerful and cheap. For painted drywall, wood shelving, or for a cleaner you can leave on surfaces, I prefer a quaternary ammonium chloride formula. It’s less harsh, doesn’t leave a strong bleach smell, and provides some residual protection.
You can find both types in the cleaning aisle of any big-box store. The concentrated formats you mix yourself are always more cost-effective than pre-mixed spray bottles.
Sealants and Moisture Barriers
Cleaning is half the battle; sealing is what keeps it from coming back. For floors, an epoxy or polyaspartic garage floor coating is your best defense. It creates a seamless, waterproof barrier that moisture can’t penetrate. For walls, a high-quality moisture-blocking primer, often labeled as a “stain killer,” is essential before you repaint. I’ve had good results with an alkyd-based primer over a cleaned and dried concrete wall. If you’re researching the best paint garage walls, look for a durable, washable finish that resists moisture. A good plan pairs this with a moisture-blocking primer for lasting results.
These products are found in the paint department of hardware stores. For floor coatings, specialty dealers online often have more durable, professional-grade options.
Tools for Application and Safety
Your tools are simple but critical. A heavy-duty plastic pump sprayer is perfect for applying your cleaning solution over large floor areas. For scrubbing, nothing beats a stiff-bristled deck brush with a long handle-it saves your back. A wet/dry shop vacuum is indispensable for sucking up the dirty water and debris after scrubbing.
Never skip the safety gear; mold spores are irritants you don’t want to breathe in or get on your skin. A basic half-face respirator with P100 organic vapor cartridges is my go-to. Combine that with nitrile gloves and safety goggles. You can find this PPE in the paint or safety section of hardware stores.
Understanding the Costs: DIY Effort vs. Calling a Pro
This decision often comes down to the scale of the problem and your comfort level. Let’s break down what each path really entails.
The DIY Cost Breakdown
For a typical two-car garage with surface mold on the floor and lower walls, your out-of-pocket cost is surprisingly low. A gallon of concentrated cleaner costs about $15. A quality respirator is a $30 investment you’ll use for years. A good brush and pump sprayer might run another $40. If you need to seal the floor, a DIY epoxy kit starts around $100. Your biggest cost is your time-plan for a full weekend to properly clean, dry, and apply a sealant. Even with these minimal expenses, it can still be one of the most affordable home improvement projects.
This DIY approach is perfect for contained surface mold where you can clearly see and reach all affected areas. It’s a manageable, sweaty Saturday project.
When and Why to Call a Professional
Professionals are for problems that have moved beyond a simple clean-up. If the mold has spread over more than about 100 square feet (a 10×10 area), if it’s inside your walls or ceiling, or if it has caused any wood rot, you need an expert assessment. They have industrial air scrubbers, commercial antimicrobials, and methods to contain spores so the problem doesn’t spread to your living space.
Prices for garage mold removal near New York or New Jersey will reflect local labor rates and the severity of the job. Nationally, you might see quotes from $1,500 to $5,000 or more. The cost is driven by square footage, the need for containment, and whether any structural materials need replacement. If your garage HVAC system or ductwork is involved, that immediately escalates the project and requires a specialist. Understanding how to remove and prevent garage mold mildew can help you plan for ongoing maintenance. Taking preventative steps now can reduce the chance of recurrence.
My rule is to call a pro if you see extensive discoloration, smell a persistent musty odor you can’t locate, or if anyone in the home has respiratory issues. It’s not worth the health risk or the potential for a DIY job to fail and let the problem grow unseen.
When You Should Not Try This Yourself
I love a good DIY project, but mold cleanup is one area where you must know your limits. Your health and your home’s integrity are not worth the risk. Here are the clear red flags that tell you to put down the spray bottle and pick up the phone.
The Big Three Red Flags
If you see any of the following, stop your cleanup immediately. This is the point where my shop experience tells me to call in a certified mold remediation specialist.
- Extensive Black Mold: If you see a patch of black, greenish-black, or slimy mold that’s larger than a standard trash bag (roughly 3 feet by 3 feet), do not disturb it. Attempting to clean a large colony yourself can send a massive cloud of spores into the air, spreading the problem throughout your home.
- Mold in the HVAC System: If you see mold growth on or inside your garage’s heating or cooling unit, or on the ductwork, this is a professional-only job. I’ve seen systems where mold was visibly coating the interior of the ducts. A pro has the equipment to safely contain and clean the entire system without contaminating every room.
- Pre-Existing Health Concerns: If you or anyone in your household has asthma, allergies, a compromised immune system, or chronic lung conditions, do not handle mold cleanup. Your reaction to the spores can be severe, even from a small amount. It’s smarter to have someone else do the work while you stay elsewhere for the day.
Handling Sentimental or Irreplaceable Items
We all keep treasured things in the garage-old photo albums, your dad’s leather tool belt, a child’s art project. If mold gets on these, your standard cleaner might ruin them.
For items like this, skip the DIY guesswork. Look for a professional content restoration company. They have specialized techniques, like dry ice blasting for books or ozone chambers for fabrics, that can save items you thought were lost. I once tried to salvage a mildewed canvas camping tent with a vinegar solution; it removed the stain but left a permanent, sharp smell. A pro could have done it right the first time.
Safety and Structure Always Come First
There’s no trophy for being a tough DIYer when it comes to mold. If the drywall or wooden framing feels soft, spongy, or crumbles to the touch, the moisture damage and rot go deep. Painting over it or just surface-cleaning is a waste of effort and money.
Your primary job as a homeowner is to protect your family’s health and your home’s structure. A certified professional will not only remove the mold safely but also find and fix the source of the moisture, whether it’s a leaking wall, poor drainage, or failed vapor barrier. Paying for that expertise now is always cheaper than repairing major structural damage later.
Frequently Asked Questions: Garage Mold & Mildew
How do I know if the mold in my garage is a serious, professional-grade problem?
Look for three clear signs: the affected area is larger than a 10’x10′ section, you see mold on or inside your HVAC system or ductwork, or you discover soft, crumbling drywall or wood, which indicates deep rot. These are structural and containment issues where DIY can worsen the problem.
What are the main factors that determine the price for professional garage mold removal?
Total cost is driven by the square footage requiring remediation, the level of containment needed to protect your home, and the cost of replacing damaged materials like drywall or insulation. The most expensive jobs involve fixing the root moisture issue, like a foundational leak.
Why are price estimates for mold removal near New York, NY, or New Jersey often higher than the national average?
Labor and insurance costs here are significantly higher. More critically, many garages in our region are attached to homes or have finished interiors, requiring stricter (and more expensive) containment protocols to prevent cross-contamination into living spaces, which a pro will factor in.
What’s a quick check I can do to decide between a DIY clean-up and calling a pro?
Perform the “bleach test” mentioned earlier on a small spot. If the discoloration wipes away easily and the surface underneath is solid and undamaged, DIY may suffice. If the stain persists or the material is soft, you’re likely dealing with a deeper infestation that needs professional assessment and tools.
Keeping Your Garage Safe and Dry
From my experience on hundreds of jobs, controlling moisture isn’t just part of the solution-it’s the entire foundation for a mold-free garage. Using garage vapor barriers is a key step in moisture control. Stick to these key actions to protect your space and your tools:
- Inspect and seal leaks around the garage door and foundation each spring and fall; I use DAP Alex Flex silicone caulk for its durability and easy application.
- Maintain airflow with a vent fan or a dependable dehumidifier; I rely on the Frigidaire 50-Pint model in my own shop for consistent moisture removal.
- Clean any mold growth promptly using protective gear and a borax-based cleaner, which I prefer over bleach for its longer-lasting spore control.
- Dispose of badly contaminated items like old boxes in sealed bags right away to prevent spores from circulating back into your clean area.
Citations and Authoritative Sources
- Common Signs, Causes and Prevention of Mold in the Garage
- Mold in Garage: Complete Removal & Prevention Guide
- Garage Mold Growth and Odor: Causes, Remediation, and Prevention
- r/Remodel on Reddit: Mold in the garage… what should i do?