
Should You Use Fiberglass or Spray Foam to Insulate Your Garage Walls?
Stuck deciding between fiberglass batts and spray foam for your garage insulation? I will cut through the noise with practical pros and cons from my own workshop projects.
We will cover material costs, DIY installation steps, real world R value performance, and moisture and air sealing capabilities.
Having insulated over twenty garages myself, I know which choices hold up and which ones let you down.
The Quick Answer for Busy Homeowners
Fiberglass batts are the affordable, readily available option you can install yourself over a weekend. Spray foam is a premium, professionally-applied product that seals every crack for superior temperature control and air sealing. Your choice comes down to budget versus long-term performance.
| Fiberglass Batts | Spray Foam | |
|---|---|---|
| Cost | Low ($0.50 – $1.50/sq. ft.) | High ($2.00 – $3.50+/sq. ft.) |
| DIY Difficulty | Moderate (6/10) | Very High – Hire a Pro |
| Best For | Budget projects, dry climates, DIYers | Maximizing comfort, humid climates, air sealing |
| Worst For | Areas with air leaks or moisture | Tight budgets, last-minute projects |
My shop default for most homeowner projects is fiberglass, thanks to its cost and accessibility. I would immediately choose spray foam, however, if you’re finishing the garage into a workshop or living space where consistent, draft-free temperature control is the top priority.
Getting to Know Fiberglass Batts: The Classic Choice
Fiberglass insulation is the pink or yellow fluffy material that comes in long rolls or pre-cut batts. You cut it to size and friction-fit it between the wooden studs in your garage walls.
I installed it solo in my first garage. Unrolling that first batt, the texture is like coarse cotton candy, and it releases a fine dust you immediately don’t want to breathe. I used a Milwaukee Fastback utility knife with hook blades for cutting-the hook grabs the material cleanly. Heavy-duty leather gloves are a must; the cheap cloth ones let the fibers right through.
Think of R-value, the measure of thermal resistance, like the warmth of a coat. A low R-value is a thin summer windbreaker. A high R-value, like R-13 or R-15 for garage walls, is a thick, puffy winter parka. Fiberglass provides that “parka” layer by trapping air in millions of tiny glass fibers.
Where Fiberglass Insulation Shines in a Garage
The biggest advantage is the low upfront cost. For a typical two-car garage wall (about 500 sq. ft.), you can fully insulate with quality batts for between $250 and $750, depending on the R-value you choose. When planning broader upgrades, consider the cost to install drywall insulation in a garage. It helps you compare total project costs more accurately.
You can buy it today. I’ve never walked into a Home Depot or Lowe’s and not found aisles stocked with fiberglass from Owens Corning or CertainTeed. There’s no waiting for a contractor’s schedule.
It’s a solid DIY project. If you can measure, cut a straight line, and handle a staple gun, you can do this. I rate the difficulty a 6 out of 10. The challenge isn’t skill, it’s dealing with the material itself and having the patience to cut precise fills around electrical boxes.
The Itchy, Gritty Reality of Fiberglass
The infamous itch is real. The microscopic glass fibers get everywhere. For any install, my non-negotiable kit is a disposable Tyvek suit, sealed goggles, and a 3M 6500 series half-face respirator with P100 filters. Trust me, a dust mask isn’t enough.
Gaps mean drafts. Even a perfect installation leaves tiny gaps at the edges of studs. A rushed job with imperfect cuts creates major air leaks. This is the batts’ biggest weakness. The insulation can have a great R-value on paper, but air moving through it steals its performance.
Moisture is its enemy. In a humid garage, fiberglass can act like a sponge. When it gets damp, it compresses, sags in the wall cavity, and its R-value plummets. I’ve seen it turn into a moldy, useless mess in poorly ventilated spaces, which is a real concern in many climates.
Spray Foam Insulation: The Premium Garage Seal

Spray foam is a liquid insulation that you spray onto your wall studs. It expands like shaving cream to fill every crack and gap, then hardens into a solid, seamless blanket. I’ve seen pro crews apply it, and it’s a sight to be seen. The chemical smell is strong, so ventilation is key, but the speed is impressive. In about an hour, they can coat a two-car garage, and the final result is a rock-solid, gap-free seal that looks almost industrial. That makes it a strong choice if you’re insulating and finishing a garage. It also forms a solid base for later drywall or paneling work.
You need to know about the two main types. Open-cell foam is softer and spongy. It’s great for sound dampening if you use the garage as a workshop. Closed-cell foam is rigid and dense. It acts as a moisture barrier, which is my top pick for most garages because it keeps the space drier and adds structural strength.
The Powerful Benefits of Spray Foam
Spray foam’s biggest win is that it seals air leaks first and insulates second. Fiberglass lets drafts sneak around the edges, but foam expands to lock them out, unlike fiberglass insulation. This makes your garage feel less like a drafty shed and more like a comfortable extension of your home.
Its R-value, which measures insulation power, performs consistently in the real world. A batt of fiberglass might be rated R-13, but if it’s installed with gaps, its real performance drops. Spray foam fills the cavity completely, so the rating on the can is the rating in your wall. Think of it like a winter coat versus a knit sweater with holes; the coat keeps the heat in much better.
Moisture resistance is a game-changer for garages. Closed-cell foam won’t absorb water. This protects your tools from rust and your vehicle from the damp, musty air that can seep through other insulations. For storing anything metal or valuable, this feature alone can justify the cost.
The Cost and Complexity of Spray Foam
The price tag is the main hurdle. For material costs alone, spray foam runs about two to three times more than fiberglass batts. When you factor in professional installation, the total project cost can be significantly higher.
I rate the DIY difficulty a 2 out of 10 for a homeowner. This is not a beginner project. The equipment rental involves a complex spray rig with heaters and precise chemical mix tanks. Getting the mix wrong leads to foam that doesn’t expand properly or, worse, off-gasses dangerous fumes. The safety risk of handling those chemicals without proper training is real.
Spray foam is a permanent choice. Once it’s in your walls, it’s there for good. If you ever need to run new electrical wire or add a plumbing line for a sink, you’ll be cutting and chiseling through a rigid, plastic-like foam. It adds major complexity to any future garage renovations.
Installing It Yourself: Tools, Time, and Tricks
Let’s talk timelines. For a standard two-car garage, installing fiberglass batts yourself takes about 8 hours of active work, which you can spread over a weekend. A professional spray foam job is much faster on site-often just 1 to 2 hours of spraying-but then you must leave the garage closed up for a full 24 hours for the foam to cure and the fumes to dissipate.
Gearing Up for a Fiberglass Project
Your tool kit is straightforward. You’ll need a sharp utility knife (I go through a lot of Olfa blades), a metal straightedge for clean cuts, a sturdy staple gun like an Arrow T50, a tape measure, and safety gear: a good N95 mask, goggles, gloves, and long sleeves to prevent skin irritation.
The critical step is cutting each batt about one inch wider than the stud cavity. Don’t measure exactly. You want a snug friction fit so the insulation stays put without sagging. Press it into the cavity, and it should stay in place on its own before you add any staples or wire supports.
Many fiberglass batts come with a paper or foil vapor barrier attached to one side. The rule is simple: face this barrier toward the warm side of the wall. In most climates, that means facing it into the garage if the garage is heated, or toward your house if the garage is unheated. If your garage walls already have a separate plastic vapor barrier installed, ignore the facing on the batt altogether and just tuck the plain insulation in.
Why Spray Foam is a “Call the Pros” Job
The equipment list is why this isn’t a DIY project. Pros use a truck-mounted spray rig with separate tanks for the two chemical components, heaters to keep the mix at the right temperature, and long hoses with a specialized spray gun. The personal protective equipment (PPE) is serious too: full-face respirators with organic vapor cartridges, coveralls, and gloves.
If the chemicals are mixed or applied incorrectly, the foam can off-gas for a long time or fail to expand, leaving you with a sticky, useless mess that voids all warranties. I’ve seen DIY attempts where the foam shrank away from the studs, creating thermal bridges that defeat the whole purpose. The precision needed is beyond most home tool kits.
Hiring a qualified contractor is your best move. Ask for their state contractor’s license and proof of insurance. Get at least three references and call them. Ask specifically about their experience insulating garages and what type of foam they recommend for your project. A good pro will do a free consultation and explain their process clearly.
Cost & Budget: The Real Numbers for Your Garage
Let’s talk about what this actually costs for a typical 24’x24′ two-car garage. I like to break it down into three simple tiers: Good, Better, and Best. This gives you a clear picture of what you’re paying for at each level.
Fiberglass Cost Tiers
Fiberglass is the material you buy yourself. The labor is the big variable.
Good: The DIY Basic. This is you buying the materials and doing the install. For standard R-13 unfaced batts to cover the walls of that garage, you’re looking at about $300 to $400 in materials from a big-box store. This price is just for the batts themselves.
Better: The Well-Equipped DIY. Here, you upgrade the material and factor in the right tools. You might choose a higher R-value like R-15 or go for kraft-faced batts for a vapor barrier. The material cost jumps to $450-$600. Now add the tools: a good utility knife like a Stanley, a staple gun (I prefer the Arrow T50 for this job), and proper safety gear like gloves and a mask. That’s another $50-$75.
Best: The Professional Install. You hire it out. A pro will charge for the materials plus labor. For a garage this size, expect a total installed price between $1,200 and $2,000. The labor is the bulk of that cost. One hidden cost many forget is disposal: you must properly bag and dispose of all the plastic wrapping and cutting scraps, which can mean a trip to the dump and a fee—just one of the hidden costs in DIY projects.
Spray Foam Cost Tiers
With spray foam, you’re almost always hiring a professional crew. The price is usually quoted as an installed cost per board foot.
Good: Open-Cell Application. This is the less dense, more expansive foam. For a pro to apply open-cell foam to your garage walls, expect a price in the range of $0.45 to $0.65 per board foot. For our example garage, that typically translates to a total cost of $1,500 to $2,500. The major advantage here is that the quoted price is almost always all-in, covering labor, material, and site cleanup.
Better: Closed-Cell for Walls and Ceiling. This is the dense, rigid foam with a higher R-value per inch. It’s a premium product. Installed prices for closed-cell foam run from $1.00 to $1.50 per board foot. Doing both the walls and the ceiling of your garage could land between $3,000 and $5,000.
Best: Full Encapsulation. This is the top-tier approach for a garage you plan to heat or cool like living space. The crew sprays not just the wall cavities, but also seals the rim joist (the band where the walls meet the foundation) and any other hidden gaps. This maximizes air sealing. For a full encapsulation job, budget from $4,500 to $7,000 or more for that 24’x24′ space.
Keeping It Working: Long-Term Maintenance for Each Type
Once the insulation is in, your job shifts to protecting that investment. A little routine attention prevents big problems later.
Fiberglass Maintenance Routine
Fiberglass needs you to keep an eye on it.
Make it a habit to do a visual inspection once a year. Use a good flashlight. You’re looking for batts that have sagged out of the bays, any tears in the facing paper, or, unfortunately, signs that mice or other pests have made a home in it (look for nesting materials or droppings).
If you need to add more insulation later, you can layer new unfaced batts over old ones, but always wear your gloves, a long-sleeve shirt, and an N95 mask to protect yourself from the fibers. Never compress the new layer; just let it sit loosely on top.
If fiberglass gets wet from a leak or flooding, it’s a problem. The batts hold moisture, lose their insulating value, and can lead to mold and wood rot. My rule is simple: wet fiberglass almost always needs to be pulled out, the area dried thoroughly, and new insulation installed. It’s not a fun job, but it’s the right one.
Spray Foam Maintenance Routine
Spray foam is famously low-maintenance, but it’s not no-maintenance.
Twice a year, just give the foam a look over. You’re checking for physical damage. Did a ladder scrape a long gouge in it? Did a stored box get shoved against it and crack the surface? These spots can be carefully trimmed and sealed with a can of spray foam like Great Stuff to maintain the air barrier.
Pay attention to smell for the first few months. A slight odor after installation is normal, but it should fade quickly. If you notice a strong, fishy, or chemical smell that doesn’t go away, or if one develops later, contact your installer. It could indicate the foam didn’t cure properly.
Finally, be mindful of extreme heat. If you’re welding or running a heater for hours, crack the garage door open a few inches. Providing some ventilation during intense projects prevents heat buildup that could theoretically stress the foam over many years.
Making Your Final Choice: Ask Yourself These Questions
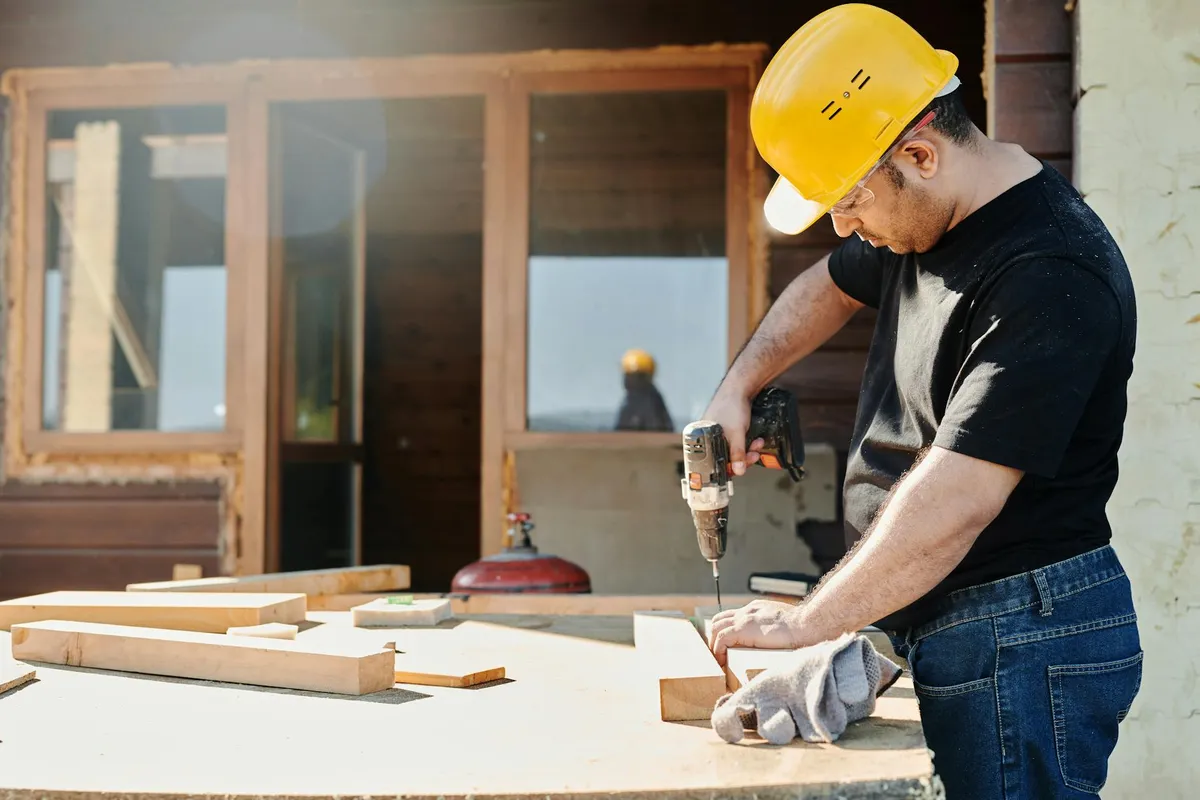
You’ve seen the core differences between the materials. Now, let’s get personal. Forget generic advice; the right choice depends entirely on what’s happening in your garage and your life. I always tell homeowners to answer these three questions before buying a single batt or calling a contractor.
Is this a workshop, storage space, or something else?
This question directly answers “What is the best insulation for garage walls?” because “best” is meaningless without a goal. Your garage’s job defines the tool you need—like the appropriate insulation R-values for your specific use.
If you’re building a proper workshop where you need stable temperatures for tools, finishes, or your own comfort while you work for hours, spray foam is your answer. That air seal is a game-changer. In my own shop, the spray foam keeps the winter chill and summer humidity out, which protects my tools and makes any project more pleasant. For a home gym, music studio, or any space you want to feel like part of your home, the superior performance of spray foam is worth strong consideration.
If your garage is primarily for storing lawn equipment, seasonal decorations, and the family bikes, fiberglass is a perfectly capable and cost-effective choice. Fiberglass in the walls will tame extreme temperatures enough to protect your stored items from the worst heat or cold without the premium investment. It’s a practical shield for a storage area.
What’s your budget and DIY confidence level?
This is where we tackle “Is spray foam insulation worth the money?” Let’s define “worth.” If your project is a workshop or converted space you’ll use daily, the long-term comfort and energy efficiency gains of spray foam often justify its higher upfront cost. It’s an investment in the space’s functionality.
For that basic storage garage, the math usually points to fiberglass. The price difference is significant. You must be brutally honest about your DIY skills for a fiberglass install, as a bad job ruins its effectiveness. It’s not just stuffing pink fluff into a hole. You need to:
- Precisely measure and cut batts with a sharp utility knife.
- Fit them snugly without compressing them, which lowers the R-value.
- Install a proper vapor barrier (usually polyethylene sheeting) over the batts, sealing all seams with sheathing tape.
- Wear serious safety gear: a tight-fitting N95 respirator, goggles, gloves, and long sleeves to prevent skin irritation.
If that sounds like more than you want to handle, hiring a pro for fiberglass is still far less than a spray foam job. For spray foam, DIY is rarely a good idea. The pro equipment and mixing chemistry are critical for proper expansion and safety.
What about the garage door?
This is a separate but critical project, whether you choose fiberglass or spray foam for your walls. A giant, uninsulated metal door defeats the purpose of your well-insulated walls. So, are insulated garage doors worth it? For climate control, absolutely. And yes, it is safe to insulate a garage door if you do it correctly. A garage wall door insulation guide can walk you through practical steps. It helps coordinate door insulation with wall insulation for best results.
I recommend a DIY garage door insulation kit. These typically use foil-faced foam board panels cut to fit your door’s sections. Brands like Owens Corning or Thermador make reliable kits. They’re lightweight and effective. To maximize the benefit, insulate the garage door itself as well. It will help keep heat in and cold out. Treat this as its own Saturday project that will noticeably improve your garage’s performance, no matter what’s on your walls.
Now, the vital safety warning. Your door is a heavy, moving object under high spring tension. Never impede the door’s movement, balance, or hardware with your insulation install. Follow the kit instructions to the letter. Keep all insulation material completely clear of the door’s tracks, rollers, hinges, and especially the spring assembly. If anything binds or rubs after installation, stop and fix it immediately.
Garage Insulation FAQ: Straight Talk from a Pro
1. I already have old, saggy fiberglass in my walls. Should I remove it before adding spray foam?
Yes, absolutely. A professional spray foam crew will remove old, compromised batts as a standard part of the job. Spray foam needs direct contact with the wall sheathing to properly adhere and create its air seal. Leaving old insulation in place traps moisture and prevents a proper bond, which can lead to big problems down the line.
2. Can I use spray foam in just some areas and fiberglass in others to save money?
I don’t recommend mixing types within the same wall assembly. The different thermal and moisture performance can create condensation points inside your walls. If budget is a major concern, a better hybrid approach is to use spray foam to air-seal the rim joist and ceiling line, then use fiberglass batts in the standard wall cavities.
3. Does my local climate make one choice definitively better than the other?
It heavily influences the “best” choice. In hot-humid or cold climates with wide temperature swings, the superior air and moisture sealing of closed-cell spray foam is a significant advantage. In dry, temperate climates, properly installed fiberglass with a separate vapor barrier is a robust and cost-effective solution that performs well.
4. I see a lot of debate online about insulating the garage door itself. Is it worth doing?
Yes, insulating the door is a high-impact project, regardless of your wall insulation. A DIY foil-faced foam board kit is my standard recommendation. It reduces radiant heat transfer, dampens noise, and makes the whole space more comfortable. Just ensure the added panels don’t interfere with the door’s balance or hardware.
5. What’s the one quick check I can do to see if my current insulation is failing?
On a cold, windy day, hold your hand along the edges of your interior wall panels, especially near outlets and the ceiling. If you feel distinct cold air drafts, your insulation’s air seal has failed. For fiberglass, this means gaps and compression. For foam, it could indicate improper installation or physical damage that needs patching.
Making Your Insulation Choice
My single piece of advice is this: don’t pick an insulation based on a chart alone; choose the material that best fits your specific garage project, budget, and long-term comfort goals. Your garage’s needs are unique, and the “best” insulation is the one that solves your particular problems. To make that choice, keep these takeaways in mind. Fiberglass batts offer a familiar, affordable DIY project that improves comfort, while spray foam creates a superior, seamless air and moisture barrier for maximum performance. The higher upfront cost of spray foam is an investment in long-term energy savings and a more controlled environment. Finally, always install fiberglass with proper vapor barriers and safety gear, and for spray foam, hire a certified, experienced contractor for a safe and effective application. Read more about insulating garages with fiberglass and spray foam.
Related Guides and Information
- r/Homebuilding on Reddit: Fiberglass vs Closed Cell spray foam?
- Spray foam insulation vs Fiberglass Batt Insulation | Master Building Materials
- An Insulation Showdown Between Spray Foam and Fiberglass: Differences, R-Values, and Costs
- iFoam Insulation | Spray Foam vs Fiberglass Insulation Comparison Guide
- Spray Foam vs. Fiberglass Blown-in Insulation: Pros and Cons | Energy Saving Pros