
What Garage Flooring Is Truly Safe for Your EV Charging Setup?
Installing an EV charger means more than just plugging in your car; you need a floor that handles chemical spills, resists sparks, and won’t degrade from constant use. I’ll help you cut through the marketing hype to find a durable, safe surface for your garage.
We’ll walk through the practical details, covering epoxy coatings versus interlocking tiles, the importance of fire-resistant materials, and proper installation steps for a DIYer.
Having installed floors in dozens of garages with Level 2 chargers, I know which materials hold up to daily EV ownership and which ones fail.
How to Choose a Flooring Material That Works with Your EV Charger
Picking a garage floor for an EV is different. You need a surface that can handle the constant drip of meltwater, occasional drops from a heavy charging plug, and the concentrated heat from charging equipment. I see three realistic options that work in a home garage, especially when you have an EV charging station installed.
The right choice balances wet traction, chemical resistance, and a surface that won’t trap dirt under your charging station.
Let’s break down the top materials. I’ve installed or maintained all of these in garages with EVs, and each has its place.
Professional-Grade Epoxy and Polyaspartic Coatings
These are liquid coatings that get applied directly to your concrete slab. A true professional-grade system is not what you buy in a kit from the hardware store.
Epoxy is the more common option and is somewhat DIY-friendly if you’re very meticulous. Polyaspartic is the pro’s choice for speed and UV resistance. The critical factor for both isn’t the product in the can, it’s the work on the floor before you pour anything.
Proper concrete prep is non-negotiable for a coating that lasts more than a year or two.
Acid etching, which many DIY kits recommend, just doesn’t open the concrete pores enough for a strong bond on a garage floor that sees daily use. You can even acid etch concrete for garage floor painting, but for a lasting job, you need mechanical abrasion. I use a walk-behind diamond grinder from a company like EDCO. It’s loud, messy, and creates a perfect profile for the coating to grip. Skipping this step is why most DIY epoxy jobs start peeling up at the edges within months, especially where your tires sit.
For EV owners, polyaspartic has a clear edge in areas with sunlight. It cures in hours instead of days and resists yellowing from UV exposure, which is important if your charger is near a window. Both offer excellent resistance to stains from tire marks, road salt, and most automotive fluids.
Rigid Interlocking Tiles (Polypropylene, PVC)
These are the plastic tiles you snap together over your existing floor. They create a floating floor that’s great for hiding imperfections and providing cushion.
The key for an active garage is to choose a tile with a solid, smooth surface. Many cheaper tiles have a pronounced ribbed pattern on top. Those ribs are a nightmare for rolling a floor jack, creeper, or even a simple tool cabinet. I recommend tiles with a coin or diamond plate pattern; they provide wet traction but still allow things to roll smoothly. It’s also important to weigh the pros and cons of epoxy versus interlocking tiles for your specific garage needs.
Look for tiles marketed as “solid” or “non-vented” to ensure you get that flat rolling surface you need for maintenance.
If you deal with a lot of snow and water, consider a drainage subfloor. Companies like RaceDeck offer their “FreeFlow” tiles. You install a grid subframe, then snap tiles with large openings on top. All the water, dirt, and slush drains straight through to the concrete below, keeping the surface dry around your charging area. It’s a more expensive system, but it solves the moisture problem completely.
Rolled Vinyl or Rubber Sheets
This is a less common but viable option, provided you go with a commercial-grade material. The thick, heavy rolls you see in school gyms or commercial workshops are what you want.
The biggest challenge is the installation. To prevent tripping hazards and to stop moisture from getting trapped underneath, you need a seamless installation. This usually means heat-welding the seams together, which is a professional technique. The thinner rubber mats from a big-box store will shift, curl at the edges, and trap water, leading to mold and a slippery surface.
A properly installed commercial sheet vinyl or rubber floor provides excellent chemical resistance and is very easy to clean, but it requires a perfectly smooth and level subfloor.
It can also be punctured by a sharply dropped tool or charging connector, which is a durability concern for a workshop space.
The Durability Verdict: Which Flooring Holds Up to EVs and Chargers?
Let’s put them side-by-side on the factors that matter most for an EV garage. This isn’t theoretical; it’s based on what I’ve seen on my service calls over the years.
| Feature | Pro Coatings (Polyaspartic/Epoxy) | Rigid Interlocking Tiles | Commercial Rolled Goods |
|---|---|---|---|
| Weight Support | Excellent. It’s your concrete slab. | Very Good. Check static load rating (aim for 20,000+ PSI). | Good. Depends on thickness and subfloor. |
| Wet Traction | Good. Add silica sand broadcast for best grip. | Very Good. Pattern provides natural grip. | Excellent. Naturally high-traction surface. |
| Chemical & Stain Resistance | Best. Sealed, non-porous barrier. | Very Good. Most fluids wipe up, but can seep seams. | Good. Can stain with harsh chemicals. |
| Heat Tolerance (Charger Area) | Best. Unaffected by charger heat. | Good. PVC/PP can soften slightly under extreme heat. | Fair. Can be marked by very hot items. |
| Impact Resistance (Dropped Connector) | Fair. Can chip if hit with sharp, heavy metal. | Best. Plastic absorbs the impact. | Poor. Can puncture or tear. |
For specific EV concerns, a dropped Level 2 charging connector is a real hazard. It’s a heavy piece of metal with sharp corners. A polyaspartic floor might chip. A rigid tile will just get a minor scuff. Battery acid leaks are rare on modern EVs, but coolant is possible. Any of these floors will handle a quick coolant wipe-up, but a professional coating provides the most seamless, spill-proof barrier for the long term.
My experienced-based recommendation for the most durable, all-around choice for an EV owner is a professionally applied polyaspartic coating. It creates a permanent, sealed, and easy-to-clean surface that directly addresses the moisture and chemical exposure of daily EV use.
Polyaspartic vs. Epoxy: The Long-Term Showdown
After five years, here’s what you’ll notice. On a floor that gets direct sunlight, a standard epoxy will have ambered or yellowed, especially near windows or garage doors. Polyaspartic stays crystal clear. Regarding hot tire pickup, where the rubber from warm tires slightly bonds to the coating, both can suffer if not formulated correctly. I’ve had better luck with polyaspartic systems resisting this stain, as they tend to have a harder, more chemically resistant top coat.
The trade-off is workability. Epoxy gives you more time to mix, pour, and spread, which helps a DIYer. Polyaspartic sets so fast that any mistake is permanent, making it a job strictly for experienced installers.
Tile Systems: Weight Capacity and Impact Resistance
If you go with tiles, you must check the static load rating. This tells you how much concentrated weight one tile can hold without deforming. Your EV is heavy, and if you ever put it on jack stands, all that weight presses down on four small points.
Look for a rating of at least 20,000 PSI. A tile rated for 5,000 PSI might be fine for walking, but it could permanently dimple under a jack stand.
For impact, polypropylene tiles are softer and more likely to gouge. PVC tiles are harder and more scratch-resistant, but they can become brittle in very cold temperatures. In my shop, I use a high-density PVC tile because it provides the best balance of durability and ease of cleaning.
Critical Safety Features Your EV Garage Floor Must Have
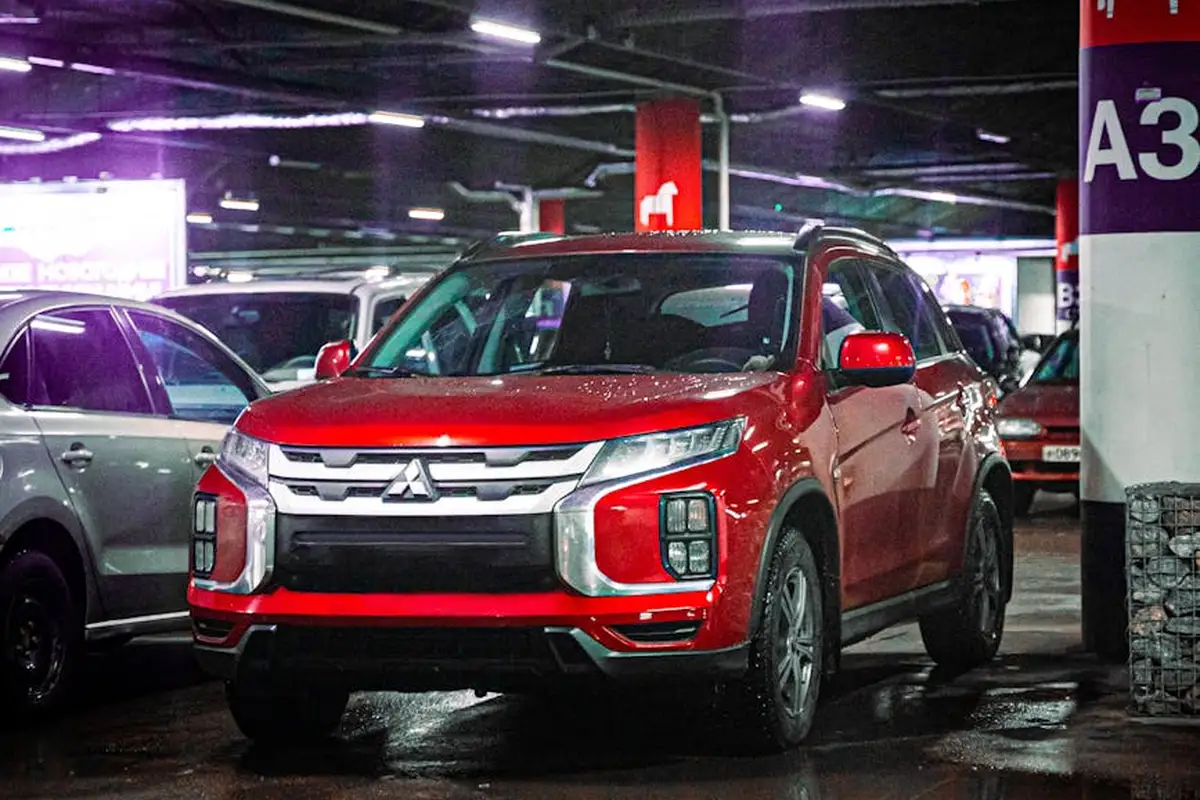
Your garage floor isn’t just a concrete slab anymore. It’s part of your car’s fueling system. That changes everything about how you choose the material.
Fire Safety is Non-Negotiable
Batteries and electrical systems generate heat. While a proper EV charger is safe, you need a floor that won’t add fuel to a problem. Look for a coating or tile system with a Class A fire rating, which means it won’t contribute to flame spread. In my shop, I use and recommend a 100% solids epoxy with this rating, like ArmorPoxy’s EV Shield kit. Standard big-box store epoxy kits often lack this specific certification. I avoid using simple sealers or paints here; they can be more flammable and offer zero protection from a thermal event.
Slip Resistance for Wet Tires and Spills
You’ll park with wet tires. You might spill a little windshield washer fluid. A slick floor is a hazard. The key is to choose a finish with a textured, abrasive additive broadcast into the surface. I use aluminum oxide grit, which is like sprinkling fine sand into the wet coating. It creates a surface with real tooth. For modular tiles, look for a pebbled or diamond-plate pattern. Avoid glossy, smooth finishes at all costs. Run your hand over a sample; it should feel rough, not slick.
Protecting Your Charging Hardware
The floor needs to safeguard your investment. First, it must be electrically non-conductive. A proper epoxy or polyurea coating creates a seamless, insulating barrier over the concrete. Second, you need to manage the charging cable. Dragging a thick, heavy cable across a rough floor will shred its jacket over time. I solve this by installing a simple cable ramp where the cord touches down. The Gorilla Grip ribbed ramp is affordable and does the job, guiding the cord safely over any floor lip or texture. For a cleaner look, some clients opt for a floor channel system during the coating install.
Installing Your EV-Ready Garage Floor: A Pro’s Guide
For durability and safety, a professional-grade epoxy or polyaspartic coating is my top recommendation. It’s a weekend project, but rushing it will cost you. Here’s how I do it.
The Tools You Actually Need
Skip the cheap kits. Get the right tools for a factory finish.
- Diamond Grinder: A handheld model from EDCO or Husqvarna is ideal for opening the concrete’s pores. Acid etching is outdated and inconsistent.
- Industrial Shop Vac: A Ridgid vac with a fine dust filter is mandatory. You must remove every speck of dust after grinding.
- Spike Roller: This isn’t a regular paint roller. The long spikes (I use the ones from Garage Floor Coatings Inc.) pop bubbles in the epoxy as you roll, preventing pinholes.
- Stiff-Bristle Squeegee: A heavy-duty rubber squeegee spreads the material fast and evenly before you follow with the roller.
Step-by-Step: The Coating Process
Follow this sequence. Deviating will affect the cure and final strength.
- Prep is Everything. Move everything out. Use the diamond grinder on the entire floor. It’s loud and dusty. Wear a respirator. Vacuum thoroughly, then vacuum again. Any dust left is a failure point.
- Mix and Pour. Mix your 100% solids epoxy base coat per the instructions. Pour it in a line across the back of the garage. Use the squeegee to spread it into a thin, even layer, working your way toward the door. This is a race against the clock.
- Roll and Spike. Immediately after squeegeeing a section, go over it with the spike roller. Use long, even strokes. This embeds the coating and removes air. Broadcast your aluminum oxide grit into the wet coat for slip resistance.
- Apply the Top Coat. After the base coat cures (usually 12-24 hours), apply a clear polyurethane or polyaspartic top coat. This provides UV protection and chemical resistance. Use a fresh, fine-nap roller for this layer for a smooth finish.
The Critical Waiting Game
Your floor’s strength depends on cure time, not just dry time. Temperature is the boss here.
The ideal application temperature is between 60°F and 80°F. Below 60°, the material thickens and won’t self-level. Above 80°, it cures too fast, making application nearly impossible. Check your forecast.
You cannot park your EV on it for a minimum of 72 hours. Even then, the full cure for maximum hardness and chemical resistance takes about 7 days. I put down painters’ tape and a sign on the garage door as a reminder. Driving on it too early will leave permanent tire impressions in the soft coating.
Your Maintenance and Cleaning Routine for an EV Garage Floor
Think of your floor’s topcoat as the wax on your car. You want to keep it clean without stripping it away. A good routine takes 15 minutes a week and saves you major headaches later.
The Weekly Wipe-Down
Every Saturday, before I plug in my own car, I grab my push broom. I use a simple, soft-bristle model from Quickie. It doesn’t scratch. Sweep up all the grit, road salt, and leaves. Grit is the enemy of any floor coating because it grinds away the sealant every time you drive over it. Next, I mix a pH-neutral cleaner with warm water in a bucket. My go-to is Simple Green All-Purpose. It cuts through light dirt without harming the floor’s chemical resistance. Use a microfiber mop, wring it out well so it’s just damp, and go over the swept area. The goal is to pick up dust, not flood the floor.
The Seasonal Deep Clean
Twice a year, usually in spring and fall, I do a thorough degreasing. Maybe you dripped some conventional oil changing your lawnmower, or a visitor’s car left a spot. You can’t use harsh acids or alkaline cleaners you’d find for driveways-they’ll permanently dull or damage a coated floor.
Here’s my shop-tested method:
- Apply a dedicated, gentle concrete degreaser. I like the Citra-Force brand from Legacy Industrial. Let it dwell for 10 minutes as the label says.
- Agitate it with a soft scrub brush on a pole. Don’t use a wire brush.
- Rinse thoroughly with a garden hose or a pressure washer on a LOW setting (under 1500 PSI). You’re rinsing, not blasting.
For a small, fresh oil spot, a mix of a few drops of Dawn dish soap and isopropyl alcohol often works. Scrub with a rag and rinse.
Catching Chips and Cracks Early
Every month, when the floor is clean and dry, take a quick walk around. Look for any small chips, often near where tires stop, or hairline cracks. Water and road salt from your EV’s undercarriage will find these and worsen them.
Repairing a small chip is a five-minute job that prevents a thousand-dollar problem. Here’s how I do it:
- Clean the chip with isopropyl alcohol and let it dry.
- Use a utility knife to gently rough up the edges of the chip so the repair material can bond.
- Fill it with a self-leveling epoxy sealant, like the ones sold in syringes from Rust-Oleum. I keep one in my toolbox. Smooth it with a putty knife and let it cure.
Ignoring these spots lets moisture into your concrete slab, which is a bigger fix and a potential safety issue near electrical charging equipment.
Cost Considerations: Investing in Your Garage’s Foundation
When homeowners ask me about cost, I tell them to forget the box price at the home center. You need to think about the total project cost and then weigh it against what you’re protecting.
The Real Price Breakdown
Let’s break down a typical 400-square-foot two-car garage. A DIY epoxy kit from a big box store might advertise $3 per square foot. That’s $1,200. But that’s just the starting line—actual cost estimates for epoxy garage floors can vary widely based on additional factors.
And that’s if your prep is perfect. If your concrete is damp, old, or wasn’t etched properly, that coating will peel. Now you’re paying to rent the grinder again and buy a full removal chemical kit. I’ve seen more failed DIY jobs from skipped prep than any other cause.
Professional installation for a superior material like a polyurea or polyaspartic coating runs $7-$12 per square foot, fully installed. For our 400 sq. ft. garage, that’s $2,800 to $4,800. The big difference is the product’s durability, UV stability, and the warranty that comes with the installer’s labor, which are significant factors to consider alongside the size-related costs of the garage itself.
Upfront Cost vs. The 2-Year Replace
Compare that $655 DIY project to the professional quote. It seems cheaper. But if that DIY floor yellows, peels near your charger, or stains from a battery leak in two years, you’re back to square one. You now have to pay for removal (a brutal job), disposal of the failed material, and a new installation. Your “savings” are gone, and you’ve wasted a lot of time.
A professionally installed floor with a 15+ year warranty might cost 4x more upfront, but it becomes a permanent part of your home. I installed a polyurea floor in my own garage five years ago when I got my first EV. Aside from the weekly mop, I’ve done zero maintenance to it. It looks the same as day one.
Protecting Your Real Investment
Frame this decision around what sits on the floor. You aren’t just buying flooring. You’re buying a protected foundation for a $50,000+ electric vehicle and a $500-$2000 charging station. A durable, chemically resistant floor prevents damage from dropped tools, battery acid, and road salt corrosion. It makes cleanup from accidental spills safe and simple. Your garage floor is the first line of defense for your vehicle’s most expensive components. Skimping here to save a few dollars per square foot is, in my professional opinion, a risk that doesn’t match the value of what you’re protecting.
Eco-Friendly and Recommended Product Categories
When you’re setting up a garage for an EV, the floor needs to do more than just look good. It needs to handle the weight, resist chemical drips, and be safe to stand on for long charging sessions. I’ve tested a lot of products in my own shop, and the best ones combine durability with smart, modern features. That means weighing the garage floor mats pros and cons as you plan the full setup. A thoughtful choice will balance durability, safety, and ease of maintenance for EV charging stations.
Start with the Right Foundation: Coatings and Tiles
For a seamless look that’s easy to clean, a poured floor coating is a top choice. You want to skip the cheap, big-box store kits. Look for a 100% solids epoxy or polyaspartic kit. The “100% solids” label means there are no solvents or thinners that evaporate, leaving a thinner, weaker coat. These kits cure into a much thicker, more chemical-resistant barrier. A proper 100% solids kit forms a single, hard shell that spilled battery fluid or charging cable abrasion won’t easily damage. For air quality during installation, seek out low-VOC or VOC-free formulas. They smell less and are safer for you and your family.
If you prefer tiles, look for interlocking floor tiles made from polypropylene or PVC with a high recycled content. I’ve used tiles with up to 95% post-consumer recycled material, and they held up just as well as virgin plastic tiles under a heavy toolbox. The key attribute is a textured, non-slip surface, even when wet. A smooth tile is a slip hazard the first time you track in rain or snow.
Zone Your Floor for Safety and Function
Your charging station area gets the most foot traffic and cable handling. I always recommend zoning this spot with a dedicated mat. A commercial-grade ribbed rubber mat is my go-to. The deep ribs trap dirt and water from your shoes and, more importantly, provide a cushioned, anti-fatigue surface for those times you’re plugging in or wiping down the car. The raised ribs also keep the charging cable connector and handle off the bare floor, protecting them from scratches and puddles. Make sure the mat has a beveled edge so you don’t trip over it.
Plan for Long-Term Cleanliness
Garages can get damp and promote mildew, especially under mats or in corners. For tiles, an excellent feature to look for is built-in antimicrobial protection. This isn’t just a coating; it’s mixed into the tile material itself during manufacturing. It inhibits the growth of mold, mildew, and bacteria. This is a smart, passive feature for any garage floor, but it’s especially valuable where you might have moisture from a wet EV or melted snow. Antimicrobial tiles help prevent musty odors and keep the space healthier without any extra work from you.
When comparing products, feel the sample. Does the tile surface have a gritty texture for traction? Does the rubber mat lie perfectly flat without curling? These hands-on tests matter more than a brand name. Your floor needs to be a tool for your new routine, not just a decoration.
FAQ: Garage Flooring for EV Owners
What are the best garage flooring materials for EV owners?
For a permanent, spill-proof solution, a professionally applied polyaspartic coating is my top recommendation. Rigid interlocking tiles with a high load rating (20,000+ PSI) are best for DIY impact protection. I do not recommend thin rolled vinyl for active EV bays due to puncture risk.
What safety features are non-negotiable for an EV charging station floor?
First, insist on a Class A fire-rated material to prevent flame spread. Second, the surface must have a textured finish for wet traction-look for coatings with broadcast grit or tiles with a pebbled pattern. Finally, always use a cable ramp where the charging cord meets the floor to prevent jacket damage.
How do I quickly check if my current floor is safe for an EV charger?
Conduct a simple water test: sprinkle water on the floor. If it beads up and stays slick, the surface is too slippery for safe EV use. Next, inspect for cracks or chips near your planned charging spot; these allow moisture to reach the concrete and pose a long-term risk. If present, plan for repair or replacement.
What’s the most common maintenance mistake EV owners make?
Using harsh, acidic cleaners or a high-pressure washer, which degrades the floor’s chemical resistance and topcoat. Stick to pH-neutral cleaners and a damp mop. Also, neglecting weekly grit removal-sand and salt act as abrasives, grinding down the finish every time you drive over them.
Final Thoughts on EV Garage Floors
The right choice isn’t about one perfect product, but about matching the floor’s toughness to the specific demands of your electric vehicle’s home. Your best bet is a flooring system that combines extreme durability with smart safety features designed for a charging station environment. Focus on these three principles from the start:
- Prioritize a floor that handles heavy, stationary weight without denting or degrading.
- Choose a surface that actively resists chemical spills and makes crack monitoring easy.
- Never skip a proper vapor barrier; it’s the unseen layer that protects your investment.