
How Do You Add Stencils, Flakes, and Metallic Effects to Your Garage Floor?
A plain concrete slab can drag down your whole garage’s look. I’ll break down the exact steps I use to apply decorative finishes that stand up to daily wear and tear.
We will cover surface preparation, stencil application for clean lines, flake broadcasting for texture, and metallic pigment mixing for shimmer.
My guidance is based on years of hands-on work with epoxy and polyaspartic coatings in residential garages.
Pick Your Decorative Method: Stencils, Flakes, or Metallic Effects
Think of this like picking a paint finish for your walls. The method you choose changes the look, the feel underfoot, and how it handles your garage’s daily life.
Stencils: Your Floor’s Wallpaper
A stencil is like applying wallpaper to your concrete. You lay down a base color, position a vinyl or plastic template, and roll a contrasting color over it. This gives you crisp, defined patterns like checkerboards, diamonds, or even custom logos right on the floor. I’ve used kits from Legacy Industrial and Rust-Oleum’s professional line for this. The Rust-Oleum stencils are a bit thinner, so you need to be careful they don’t lift when you roll over them. I prefer to tape them down thoroughly with painter’s tape on the edges.
Flakes: The Sprinkles on a Donut
Vinyl chips or “flakes” are like decorative sprinkles. You broadcast them by hand onto a wet base coat of epoxy or polyurea. They don’t just add color and texture; they help hide minor imperfections in the concrete and provide extra grip, which is a huge safety benefit in a workshop. You can get light, medium, or heavy coverage. For a home shop where you’ll drop tools, I recommend a medium to heavy broadcast. I buy my flakes in bulk from a supplier like GarageFlooring LLC because you get more color variety than with a boxed kit.
Metallic Effects: A Swirling Galaxy
This is a more advanced technique that creates a deep, dimensional, almost liquid-metal look. You apply a translucent “pigment powder” over a base coat and then manipulate it with a notched trowel or a special brush to create swirls. It’s the most custom and high-end look, but it requires a confident, quick hand because the working time is short. I’ve practiced with AcidStain’s metallic pigments, and they work well, but you absolutely must do a test board first.
Matching the Method to Your Garage’s Job
Your garage’s main job should guide your choice. For a busy workshop where you weld, wrench, or deal with heavy equipment, a flake system is your best friend. The texture hides dirt and oil stains better than a smooth finish. If you’re creating a clean “man cave” or showroom for a classic car, the sleek, uniform look of a stencil or a deep metallic coat makes a powerful statement. For general storage and parking, a simple flake or solid color epoxy is the most practical and cost-effective path.
Epoxy, Polyurea, or Polyaspartic? The DIY Reality Check
Everyone asks which coating is best. For a DIYer, the choice boils down to durability versus your skill and patience. A 100% solids epoxy, like the ones from ArmorPoxy or Epoxy-Coat, is the classic choice. It’s very durable, chemical-resistant, and forgiving for a first-timer because you have a longer “pot life” to get it mixed and down. The trade-off is it can take 24-72 hours to cure enough for light foot traffic, and it can yellow slightly if exposed to direct UV sunlight over years.
Polyurea and polyaspartic coatings are the professional favorites for a reason. They cure incredibly fast (often walkable in a few hours), are UV-stable, and are even more resistant to heat and chemicals. The catch is they can set up in 10-20 minutes. I use a Graco airless sprayer for these on pro jobs. For a DIYer trying to roll it, that speed leads to a panicky, messy application and a ruined floor. Unless you have a helper and have practiced mixing small batches, I steer homeowners toward a high-quality epoxy for their first project. It’s the right balance of performance and do-ability.
The Gearhead’s Checklist for a Pro-Grade Job
Using the right stuff separates a job that lasts a year from one that lasts a decade. This isn’t the place to cheap out. Here’s exactly what you’ll need on hand.
Materials: What Goes on the Floor
- Concrete Prep: A diamond grinding cup wheel (I use a Husqvarna brand for my Milwaukee angle grinder) OR a high-quality acid etching solution like SureBone. Grinding is messier but far more reliable.
- Crack & Spall Repair: A two-part epoxy concrete patch, such as Rust-Oleum EpoxyShield Patch or Legacrete.
- Primer (if needed): A moisture-blocking epoxy primer for damp slabs.
- Base Coat: A two-part, 100% solids epoxy coating. Get a full kit sized for your garage square footage.
- Decorative Elements: Your chosen vinyl chips, stencil kit, or metallic pigments.
- Top Coat: A clear polyurethane or polyaspartic topcoat. This is your wear layer. A 100% solids polyurea topcoat is ideal for durability. I often use ArmorClad from SealMaster.
Tools: The Application Arsenal
- For Prep: A heavy-duty shop vacuum (like a Shop-Vac 5-gallon), a stiff push broom, and a pressure washer for final rinse.
- For Mixing: Multiple clean 5-gallon buckets, drill-powered mixing paddles (one for each part – base, topcoat, etc.), and a kitchen scale for accurate two-part mixing.
- For Application: 18-inch epoxy roller frame, several 3/8-inch nap roller covers (get more than you think), a 4-inch trim brush for edges, and a broadcast bucket for flake spreading.
- For You: Spiked shoe covers (called “sole spikes”) to walk on the wet coat without leaving footprints.
Safety Gear: Non-Negotiable Protection
This stuff isn’t optional. These chemicals are serious.
- Respiratory Protection: A half-face respirator (like a 3M 6000 series) fitted with organic vapor/acid gas cartridges (3M 60926). A dust mask is completely useless here.
- Eye Protection: Tight-fitting sealed safety goggles, not just glasses. Splash risk is high.
- Skin Protection: Heavy-duty chemical-resistant gloves (nitrile or neoprene) and coveralls. Once epoxy gets on your skin, it doesn’t come off easily.
- Ventilation: Box fans placed in garage doors to create cross-ventilation. Keep air moving the entire time.
How to Prepare Your Concrete Floor for a Decorative Coating
Let’s be clear. The work you do before you open a single paint can is what makes your floor last for years or fail in months. Proper floor prep is the single most important factor for a durable, professional-looking result. Skip a step here, and you’ll see your hard work peel and bubble.
Step 1: The Full Garage Clean-Out and Scrub
You need a completely empty and clean slab. This isn’t just sweeping.
- Remove everything: cars, cabinets, storage, everything.
- Sweep thoroughly, then use a shop vacuum to get the fine dust a broom leaves behind.
- Wash the floor with a heavy-duty degreaser. I use Simple Green or Zep Citrus. For old oil stains, a product like Oil Eater is my go-to. Scrub it in with a stiff bristle brush, let it dwell, and rinse.
I rely on a gas-powered pressure washer, like my Simpson Megashot, to blast away grime and old paint chips, because a garden hose simply won’t cut through garage filth.
Step 2: Repairing Cracks and Spalls
Inspect every inch of the floor. Mark cracks and holes with chalk. For repairing these, I choose my filler based on the job.
- For hairline cracks (less than 1/8 inch), I use a high-quality epoxy crack filler like PC-Concrete Epoxy. It’s thin enough to seep in and bonds like iron.
- For wider cracks, holes, or spalled areas, I reach for a hydraulic cement, specifically SikaFast Fix. It sets rock-hard in 3-5 minutes, even in damp conditions, which is perfect for garage slabs.
You must overfill the repair slightly, then sand it flush with the surrounding concrete once it’s fully cured. A palm sander with 80-grit paper works well for this.
Step 3: Profiling the Concrete (The Step Most DIYers Miss)
Cleaning is not preparing. Your concrete needs “teeth” for the coating to mechanically lock onto. Acid etching, which many DIY kits recommend, is often insufficient for a garage floor that has seen years of traffic and contaminants. Proper prep and etching set the stage for the coating to bite. In the next steps, we’ll guide you through preparing, etching, and painting your concrete garage floor.
For a guaranteed bond, you need to mechanically profile the concrete with a diamond grinder or a scarifier. I rent a 7-inch diamond grinder from my local Sunbelt Rentals. The goal is to open the pores of the concrete, removing the weak, dusty “laitance” layer on top to reveal a fresh, gritty surface. You’ll know you’re done when the concrete looks uniform and feels like 80-grit sandpaper.
Step 4: The Final Clean and Moisture Test
After grinding, you’ll have a colossal mess. Vacuum everything twice. Then, mop with clean water and vacuum up the slurry until the water you pick up is clear.
Now, the critical test. Concrete holds moisture, and that moisture will destroy your coating from below. You must perform a moisture test. I use a simple plastic sheet test. Tape a 2’x2′ square of clear plastic sheeting tightly to the floor in a few spots. Wait 24 hours. If you find moisture, then test mitigation methods to address it.
If you see condensation under the plastic, your slab is too damp to coat. You need to wait or consider a moisture-blocking primer. A bone-dry surface is non-negotiable.
DIY Difficulty & Time Estimate for This Project
This isn’t painting a bedroom wall. Be realistic with your skills and time.
Ease of Installation Rating
I rate this project a 6 out of 10 for overall difficulty, but it varies by technique.
- Flake Systems: Easier (7/10). Spreading the base coat and broadcasting the flakes is forgiving. The topcoat seals it all in.
- Stencils: Moderate (6/10). Precision taping and careful rolling are needed to avoid bleed-under. Patience is key.
- Metallic Epoxy: Harder (4/10). The epoxy has a short “pot life,” you must work very fast, and creating the swirl patterns is an art. A second person is not just helpful, it’s required.
Realistic Time Commitment
For a standard two-car garage (about 500 sq ft), here’s what you’re in for:
- Active Work Hours: 14-18 hours. This includes prep, repair, grinding, and the actual coating application spread over 2-3 days.
- Total Project Days: 4-5 days minimum. This accounts for crucial cure times between coats. Your garage will be out of commission during this period.
You absolutely need a dedicated helper for any metallic epoxy pour due to its fast 15-20 minute working time; one person mixes while the other pours and spreads. For flake or stencil jobs, a helper saves half a day but isn’t strictly mandatory if you’re organized and work in manageable sections.
How to Apply Stencils for a Custom Garage Floor Design
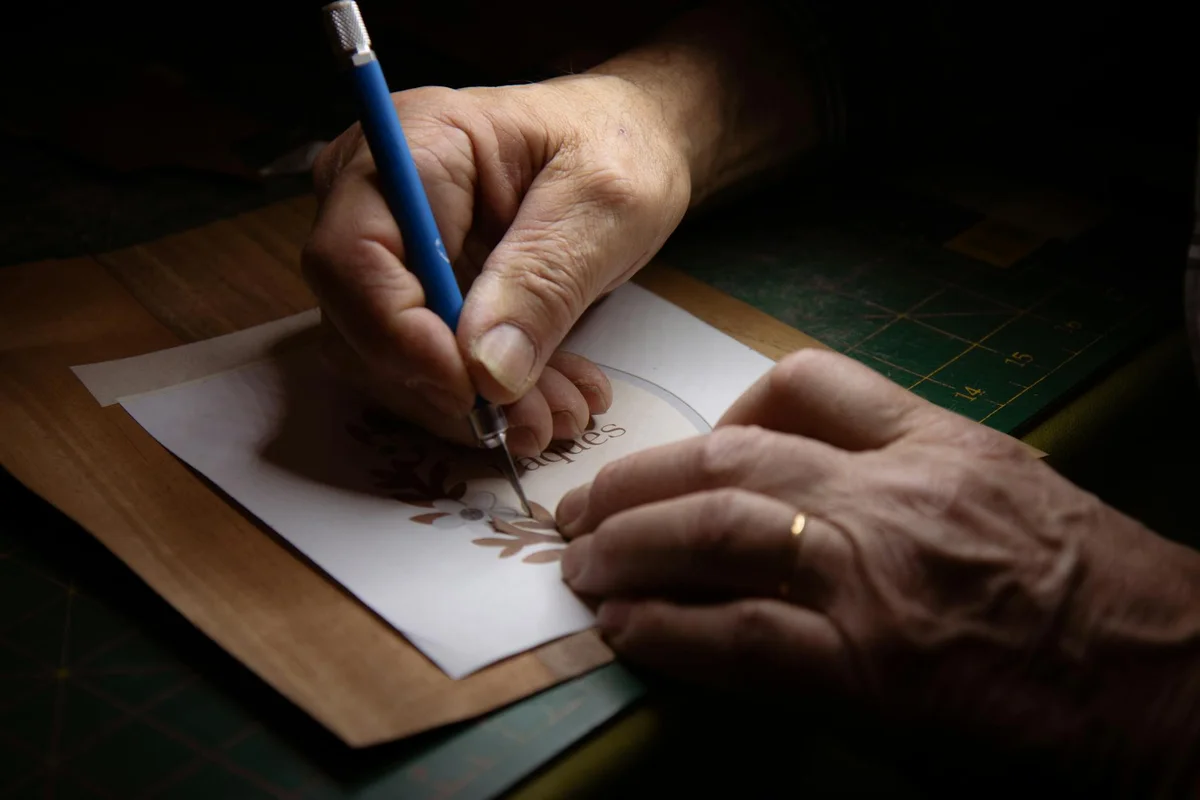
For a truly custom floor, stencils are your best tool. I’ve used two main types: vinyl and Mylar. Vinyl stencils, like those from Garage Floor Stencils or EZ Stencilworks, are affordable and great for simple borders or single logos. For more complex, multi-layer patterns, a reusable Mylar stencil is the professional’s choice because it doesn’t curl up as you work. You can find these online from specialty coating suppliers.
The key to a crisp stencil is a perfectly cured base coat and precise placement. Here is the process I follow in my shop.
- Let your colored base coat cure until it’s just tacky to the touch. This usually takes 4 to 8 hours, but always check your product’s instructions.
- Lay your stencil onto the floor. Use low-tack painter’s tape, like FrogTape for delicate surfaces, to secure all the edges and corners. Smooth out any air bubbles.
- Pour a small amount of your accent color paint into a roller tray. I use a 4-inch high-density foam roller for small areas or a specialized stencil brush for tiny details. The firm foam applies paint without soaking it.
- Load your roller or brush lightly. The biggest mistake is using too much paint, which will run under the stencil edges. Roll on the accent color in thin, even coats. You’ll likely need two coats for solid coverage.
- Carefully lift the stencil straight up before the paint dries. If you’re doing a repeating pattern, clean the stencil with water and a rag between uses.
My pro tip is to press down on the stencil edges with a plastic putty knife as you roll to prevent any bleed-under. It adds an extra second per foot, but it saves you from fuzzy lines. For a simple border stencil in a low-traffic area, you might skip the topcoat. For any stencil in a main parking bay or with a complex design, a clear epoxy or polyurea topcoat is non-negotiable. It locks the design in and provides a unified, durable surface that’s easy to clean.
How to Apply Color Flakes Without Making a Mess
Flakes add texture and hide minor floor imperfections. The process, called broadcasting, is simple but messy if you’re not prepared. First, mix your chosen base coat color thoroughly. I prefer a 100% solids epoxy for this because its thicker consistency holds the flakes better than a water-based paint.
You control the final look by how many flakes you toss. Think of it like seasoning fries.
- Light coverage: Flakes are visible, but you still see a lot of the base coat color. This uses about a quarter-pound of flakes per square foot.
- Medium coverage: This is the standard “salt and pepper” look. The base coat is about 50% visible. Use roughly a half-pound per square foot.
- Heavy coverage: The flakes are densely packed, almost hiding the base coat completely. This uses three-quarters to a full pound per square foot and is the most durable finish.
Work in small sections, about 4-foot by 4-foot areas. Pour your mixed base coat and spread it with a notched squeegee. Immediately, take a handful of flakes and sprinkle them from about waist height. Letting them fall from a height helps them spread evenly and stick in the wet coat at different angles. Have a helper follow behind you with the flake bucket to keep the process moving before the epoxy sets.
You will always have extra flakes that don’t stick, and you should collect them for reuse. After the base coat has fully cured (usually overnight), sweep up all the loose flakes with a soft-bristle shop broom. I pour them through a coarse sieve back into their original container. This saves money and keeps your workspace clean.
A clear topcoat is not optional for a flake floor; it’s what makes the system work. The topcoat embeds the flakes, creates a smooth, sealed surface, and provides the chemical and abrasion resistance you’re paying for. Never skip this final, critical step.
How to Create a Metallic Epoxy Effect on Your Garage Floor
The deep, swirling galaxy or flowing river look of a metallic floor comes from special pigment powders. You mix these fine, almost glitter-like powders into a clear resin base. When you pour it and move it around, the heavier metallic particles sink and swirl, creating that unique, three-dimensional depth you can’t get with standard paint.
This is a one-shot, high-pressure process. Once the two parts of your epoxy are mixed, you typically have a 20 to 40-minute “pot life” to get everything down and looking right.
I work with a partner for this. Here is our typical process once the base color coat is down and cured:
- We mix the clear epoxy resin and hardener in a 5-gallon bucket per the manufacturer’s ratio. I use a heavy-duty drill with a Jiffy mixer paddle. You must scrape the sides and bottom to get a perfectly homogeneous mix.
- We divide the mixed epoxy into smaller buckets. This is where we add the metallic powders. A little goes a long way. I start with about half an ounce of powder per gallon of epoxy, mixing it in thoroughly with a stir stick. You can always add more for a denser effect.
- We pour the pigmented epoxy in random puddles or long, thin lines across the floor.
- Using a notched squeegee, we drag the material across the surface in broad, overlapping arcs. The goal is to create thin, uneven layers that allow the metallic bits to move and separate, not to spread it into one uniform coat. You will see the effect develop instantly.
Right after spreading, you need to address bubbles and enhance the flow. I own both a heat gun and a propane torch. For small areas, a heat gun works. But for a whole garage, I always use a propane torch, like a basic Bernzomatic from the hardware store.
You pass the flame quickly over the surface, holding it 8 to 12 inches away. The heat does two critical jobs: it pops microscopic air bubbles trapped in the epoxy and it thins the material slightly, which encourages the metallic pigments to swirl and move further. Do not hold the torch in one spot or you will scorch the finish.
A high-quality 100% solids metallic epoxy system is designed to be the final wear layer. It’s incredibly durable on its own. I often apply a final clear urethane topcoat, not for extra thickness, but for added UV resistance. This prevents any potential ambering or yellowing of the clear epoxy over years, especially if your garage gets sun. This isn’t because the epoxy itself requires additional protection.
Drying, Curing, and When You Can Drive on It
This is where I see homeowners get into trouble. “Dry to the touch” and “fully cured” are not the same thing. Your floor may feel firm in 12 hours, but the chemical reaction inside is only about 10% complete.
Putting weight on a floor that is dry but not cured will cause permanent dents, imprints, and a weakened surface. Curing is when the epoxy reaches its maximum hardness and chemical resistance.
Here is my general, conservative timeline. Always defer to your specific product’s datasheet.
- Foot Traffic: You can usually walk on it in socks or clean shoe covers after 24 hours. Avoid heels or dirty shoes for at least 48-72 hours.
- Parking a Car: This is the big one. For a standard 100% solids epoxy flake system, I tell clients to wait a minimum of 5-7 full days. For thicker metallic epoxy pours, I recommend a full 7 days. In cooler weather (below 70°F), I add another 2-3 days to that.
Several factors will make these times longer. Cool temperatures are the biggest slowdown. Epoxy chemistry loves heat; 77°F is often the ideal baseline. High humidity traps moisture on the surface and can cause cloudiness or slow the cure. Most importantly, if your concrete slab has excess moisture vapor coming up from below, it can ruin the bond and prevent curing altogether. That’s why a moisture test before you start is non-negotiable, especially when moisture can come from the roof or concrete floor.
Maintenance & Cleaning Routine for a Decorative Floor
Your new floor is durable, but it’s not magic. Think of the epoxy or polyaspartic coating like a clear, tough skin on top of your concrete. It protects, but you still need to wash it. A simple routine is the difference between a floor that looks new for a decade and one that looks tired in a few years. I tell my clients it’s easier than keeping a kitchen floor clean.
Your Simple Weekly Cleanup
This isn’t a deep clean. It’s about preventing grit from becoming an abrasive paste under your shoes or tires. Every Saturday, I grab my heavy-duty push broom. I prefer a model with soft, flagged polypropylene bristles; they grab dust without scratching. I sweep the entire floor, pushing debris toward the door.
For a true clean, I use a microfiber mop and a bucket of warm water. The key is to avoid soaking the floor; a damp mop is perfect for lifting dirt without leaving a soapy film. If I need a cleaner, I use a few ounces of a neutral pH, non-abrasive cleaner like Simple Green diluted in the water. I rinse the mop head often and let the floor air dry. It takes me 15 minutes for a two-car garage.
Act Fast on Spills
Oil, coolant, brake fluid, or harsh solvents are your floor’s biggest enemies. They won’t hurt the concrete underneath, but they can stain or dull the decorative coating if left to sit. My rule is simple: never let a spill dry, especially when they can stain your garage floor.
I keep a spill kit in my garage: a bag of oil-dry absorbent, a plastic dustpan, and a dedicated rag. Here’s my process for cleaning up oil spills in the garage.
- Immediately pour the absorbent over the spill. Don’t rub it in.
- Let it sit for a few minutes to soak everything up.
- Scoop up the soaked material with the dustpan and dispose of it.
- Wipe the area with that damp rag and a bit of that diluted Simple Green.
By acting in under five minutes, you prevent a permanent spot and save yourself a major cleaning headache later.
Fixing a Nick or Scratch
It happens. You drop a wrench, drag a jack stand, or a piece of gravel gets embedded in a tire. You’ll see a small chip down to the concrete. Don’t panic. Most coating manufacturers sell small touch-up kits. I’ve used the ones from Rust-Oleum and Legacy Industrial. They usually include a tiny bottle of primer, color coat, and clear coat.
The repair is more about patience than skill:
- Clean the chip with isopropyl alcohol and let it dry completely.
- Use a small artist’s brush to dab a tiny amount of primer into the chip. Let it cure as directed.
- Apply the color coat in thin layers, letting each dry, until it’s flush with the surrounding floor.
- Finish with a thin layer of the clear coat to seal and blend the sheen.
It will never be completely invisible, but from a standing height, it will disappear, and more importantly, it reseals the concrete to prevent moisture from getting underneath.
Choose Cleaners and Mats Wisely
Your floor is not a laboratory sink. Avoid aggressive cleaners. I’ve seen people use strong acids, heavy-duty degreasers, or abrasive powders with bleach. These can etch or yellow the clear coat over time. Stick with the neutral pH, non-abrasive types I mentioned.
Be very careful with floor mats. Rubber-backed mats, especially cheaper ones, can actually react with the floor coating over months. They trap moisture and can leave a permanent, discolored imprint. If you want a mat, look for ones labeled as “non-staining” or “coating-safe.” Better yet, I use anti-fatigue mats with an open PVC weave that allows air and moisture to pass through. I got mine from Costco, and they haven’t left a mark in three years.
Garage Care Pro FAQ: Your Decorative Floor Questions, Answered
What’s the real difference between epoxy, polyurea, and polyaspartic coatings for my garage?
When considering epoxy vs polyurea performance, think of it as a spectrum of performance versus workability. A 100% solids epoxy is the durable, DIY-friendly choice with a longer working time. Polyurea and polyaspartic are pro-grade: they cure faster, are more UV-stable, and handle heat/chemicals better, but their rapid set makes them risky for solo DIYers. For a garage floor, you’ll weigh epoxy’s forgiving open time against polyurea’s fast cure and quicker return to use. In many cases, epoxy remains the practical starting point, with polyaspartic or polyurea considered when you need faster or higher-traffic performance. Choose epoxy for your first project; upgrade to polyaspartic if you’re coating a sun-exposed showroom.
Can I combine stencils, flakes, and metallic effects on one floor?
Yes, but plan your layers carefully. A common pro method is a flake broadcast over your base coat, followed by stenciled designs, all sealed under a clear topcoat. Integrating wet-look metallic effects with other elements is advanced; it typically requires a metallic base layer first, with decorative chips or stencils applied *before* the final clear pour. Always practice sequence and timing on a test board.
The product says “dry in 24 hours.” When can I actually park my car on it?
“Dry” and “fully cured” are different. While it may be dry to the touch, the coating hasn’t reached full hardness. Parking too early causes permanent tire impressions. For a standard epoxy system, wait a minimum of 5-7 days. For thicker metallic pours, allow a full 7 days. Cool temperatures or high humidity add more time-always check your product’s full cure spec.
What’s the one maintenance mistake you see most often?
Using the wrong cleaners or mats. Harsh acids, abrasive powders, or strong solvents can etch and dull the clear topcoat over time. Also, cheap rubber-backed mats trap moisture and leave permanent discoloration. Stick to neutral pH cleaners and use only “coating-safe” or breathable anti-fatigue mats to protect your investment.
If I use a metallic epoxy kit, do I still need a clear topcoat?
Most 100% solids metallic epoxies are formulated as a durable wear layer. However, I always apply a clear polyurethane or polyaspartic topcoat for two reasons: superior UV resistance to prevent any ambering, and enhanced chemical resistance against oil or fuel spills. The topcoat is your final, sacrificial shield.
Your Garage Floor: Built to Last and Look Great
In my shop, the rule is simple: a flawless decorative floor starts with immaculate concrete prep, every single time. Keep these core practices in mind as you move forward with your project:
- Never skip the deep clean and etch – I rely on a Wagner sprayer and phosphoric acid from a brand like Sunnyside to open the pores for a permanent bond.
- Use a two-part epoxy as your foundation – I find brands like Rust-Oleum Professional are consistent for DIYers, providing the toughness a garage needs.
- Broadcast flakes or spray metallics onto a tacky coat – working in 10×10 foot sections helps me achieve an even, professional look without rushed mistakes.
- Protect your work with a clear, abrasion-resistant top coat – for my floors, I use a polyaspartic topcoat because it cures hard and handles oil spills without staining.