
Is Your Garage Too Hot, Too Cold, or Just Right?
Keeping your garage comfortable and your tools safe shouldn’t feel like a full-time job. I’ll show you how a smart climate system can automate the task for you.
We will cover picking a Wi-Fi thermostat that can handle garage conditions, placing temperature and humidity sensors where they matter, integrating automatic smart vents for airflow, and creating simple automation rules that protect your belongings.
I’ve wired and tested these components in my own shop and for clients to find setups that are both reliable and simple to use.
What Parts Make Up a Smart Garage Climate System?
Think of a smart garage climate system like a team with specialized jobs. You need a brain to make decisions, senses to gather information, and muscles to act on those commands. That’s exactly what these three parts do.
The Smart Thermostat is the system’s brain. I’ve installed several, and for a garage, you need one that can handle wider temperature swings than your living room. The Ecobee SmartThermostat is a favorite of mine because it comes with a room sensor you can use right out of the box, which is perfect for a garage. I’ve also used the Honeywell Home T9 for garages with an existing furnace because its remote sensors are extremely reliable and the app is straightforward. Choosing the right smart thermostat is just one part of having an efficient garage heating system.
The Sensors are the system’s nerves. They report back to the brain. You’ll mainly use temperature and humidity sensors. A good system uses multiple sensors. Place one near the ceiling (where heat rises), one near the floor, and one by the large garage door. This tells the “brain” the full story of your garage’s climate, not just the temperature by the wall where the thermostat is mounted.
The Smart Vents are the muscles. These are register covers with tiny motors that open and close to direct airflow. Brands like Keen Home or Flair make them. They let you shut off air to unused areas or push more heat to a cold corner where you’re working. This is how you move from just monitoring your climate to actively controlling it.
Gearhead’s Checklist: The Smart Components
Before you start, get your parts and tools together. Here’s what you’ll need on your workbench:
- Smart Wi-Fi Thermostat: Like the Ecobee or Honeywell models I mentioned.
- Compatible Remote Sensors: Usually sold with the thermostat or as add-ons.
- Smart Vent Registers: Ensure they match your duct size and are compatible with your chosen app (like SmartThings or HomeKit).
- Cordless Drill/Driver: I use a Milwaukee M12 for jobs like this-plenty of power and light.
- Wire Strippers & Voltage Tester: Non-negotiable for safety when dealing with thermostat wires.
- Drywall Anchors & Screws: For a solid mount if you’re not hitting a stud.
- Your Smartphone: For the app setup which is half the battle.
A critical note on power: Most smart thermostats need a constant 24-volt power source, provided by the “C” or common wire from your HVAC system. Many garages don’t have this wire run to the thermostat location. If that’s your case, you’ll need to install a plug-in 24v transformer, like the Venstar Add-a-Wire kit. It’s an extra step, but it’s a clean solution I’ve used many times.
DIY Difficulty & Time Estimate
I rate this project a 6 out of 10. It’s not just screwing things to the wall; you need to be comfortable with basic electrical safety and patient with app configuration. If you’ve swapped a light fixture or installed a doorbell camera, you have the right skills.
For a two-person team-one to hold the thermostat and run wires, the other to drill and fasten-plan for 3 to 5 hours of active work. The helper is a big time-saver for keeping things level and neat. After everything is mounted, budget another hour for the app setup, linking all the devices, and letting the system run its first calibration cycle.
How Do You Install and Connect the Core Components?
Let’s get into the installation. We’ll tackle it in order: brain, nerves, then muscles.
Step 1: Mounting the Wi-Fi Thermostat and Solving Power
Always start by turning off the power to your furnace at the breaker panel. Use your voltage tester to confirm the wires are dead. This is the most important safety step in the entire project.
- Remove your old thermostat and take a picture of the wire labels. You’ll need this reference.
- If you have the required wires (usually including a red (R), white (W), and hopefully a blue or black (C) wire), you can connect them directly to the new thermostat’s base per its manual.
- If you’re missing the “C” wire, this is where you install the 24v transformer. You’ll wire it to the furnace control board first, then run a new thermostat cable to your wall location. It sounds complex, but the kits come with excellent instructions.
- Secure the new thermostat base to the wall, connect the wires, snap on the faceplate, and restore power.
Step 2: Placing Your Sensors Strategically
Sensor placement is what separates a basic setup from a smart one. Don’t just stick them all on one wall.
- High & Low: Mount one sensor about 12 inches from the ceiling. Mount another near the floor, but not directly on it (place it on a shelf or a small bracket). This shows the thermostat the temperature difference so it can run the system more efficiently.
- Problem Spot Monitor: Stick a third sensor on the wall adjacent to your main garage door. This area is often the coldest spot in winter and hottest in summer. The system can now respond to that specific zone getting too cold.
Most sensors are battery-powered and use adhesive strips. I always clean the mounting area with rubbing alcohol first to ensure the adhesive holds for years.
Step 3: Installing and Sealing the Smart Vents
For smart vents to work, they need a good seal. A leaky vent is a waste of energy.
- Remove your existing metal vent register.
- Measure the duct opening. If there are large gaps between the duct and the drywall, use metal foil tape (I use Nashua 322) to seal them. This prevents conditioned air from dumping into your wall cavity.
- Insert the smart vent, ensuring its motor housing has clearance. Secure it with the provided screws.
- Download the vent’s companion app and pair it. Then, link it to your main thermostat app (like the Ecobee or Honeywell app). This integration is what allows the “brain” to command the “muscles.” You can now create rules like, “If the sensor by the garage door is below 50°F, open the nearest vent 100%.”
The biggest installation challenge is usually Wi-Fi signal strength in a detached garage. If your devices struggle to connect, a simple Wi-Fi range extender plugged in your house near the garage door often solves it. I keep a TP-Link RE220 in my truck for troubleshooting this exact issue.
Which Sensors Do You Really Need for Garage Climate Control?
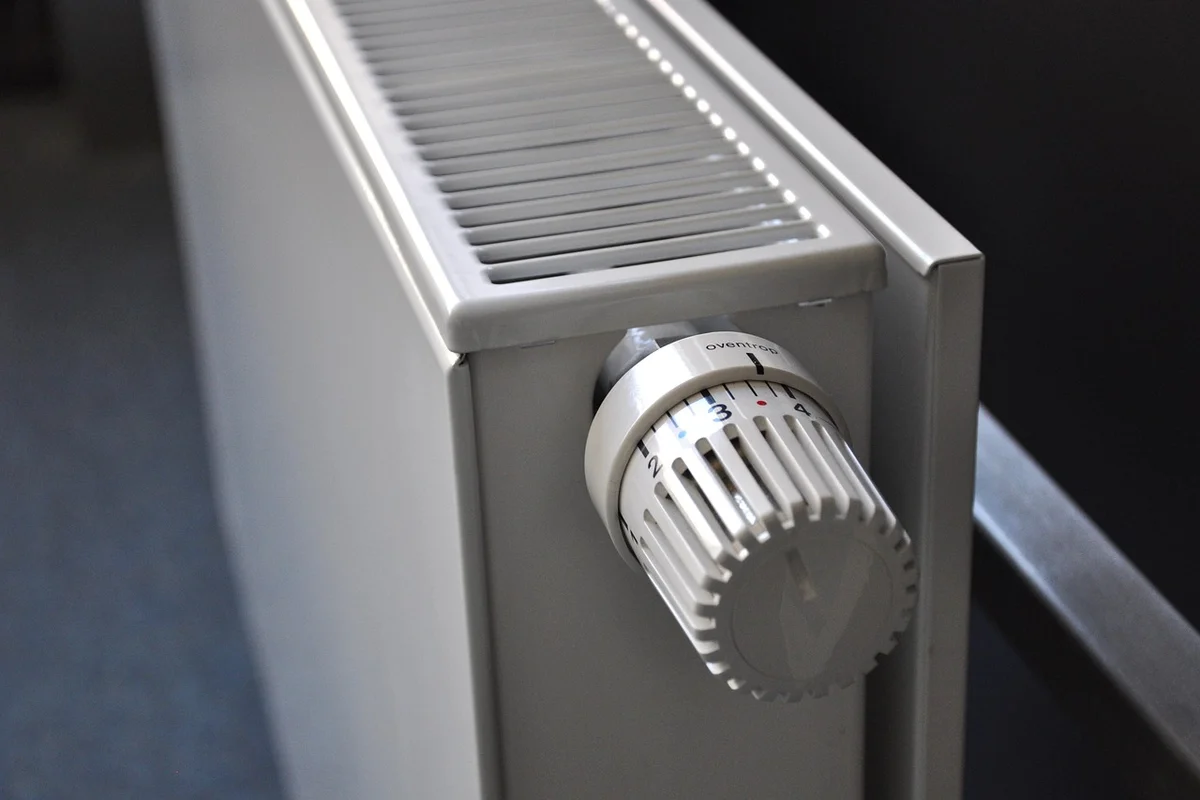
Think of sensors as the nervous system for your smart climate setup. They tell your thermostat what’s really happening so it can make smart decisions. You don’t need every sensor, but you do need the right ones.
Start with a temperature and humidity sensor; it’s your foundational duo for any climate control. I mount these away from direct sunlight or your heater to get an honest room reading. For years, I used an AcuRite sensor paired with a generic smart hub, but now I prefer the Aqara Temperature and Humidity Sensor because it’s small, reliable, and talks directly to most smart home platforms.
Once your core sensors are in place, layer in safety. A garage is not a living room. Adding a carbon monoxide sensor, like the Kidde Nighthawk, and a natural gas detector is a non-negotiable safety upgrade if you have any fuel-burning appliance or vehicle. I also install a simple water leak sensor, like the Moen Flo, near the water heater or floor drain. It’s cheap insurance.
For true automation, motion or door sensors add a layer of convenience. An automation triggered by a motion sensor can tell your system, “Someone’s in the workshop, start bringing the temperature to 68 degrees,” so it’s comfortable when you’re ready to work. I’ve had good luck with the Philips Hue motion sensor for this; it’s responsive and the battery lasts forever.
What types of sensors are essential for garage climate automation?
The essential sensors are temperature and humidity. Everything else builds on that. Consider safety sensors (CO, gas, leak) as critical for a protected garage. Motion or door sensors are for convenience and efficiency, letting you automate climate changes based on your presence, especially near your garage door.
How Does Automation Logic and Smart Vent Control Work?
This is where the magic happens. Your sensors collect data, but the automations-sometimes called “recipes” or “routines”-are the brain. You set the rules.
Creating an automation is like programming a simple “if-then” statement. In your smart home app (like Apple Home, Google Home, or SmartThings), you’ll create a rule. A basic rule looks like this: IF the garage temperature sensor reads above 90°F, THEN open the smart ceiling vent and turn on the exhaust fan. You can get more complex, adding humidity conditions or time-of-day limits.
Smart vents, like those from Keen Home or Flair, are motorized registers you install in your ductwork or walls. Smart vents manage airflow by opening and closing specific ducts to direct cool or warm air exactly where it’s needed, preventing hot or cold spots and reducing overall system strain. In my setup, I have one vent high on a wall to let hot air escape and another lower one to draw in cooler air, creating a passive cooling loop controlled by an automation.
The system can proactively handle weather extremes. For a coming cold snap, I have an automation that checks the forecast at 6 PM; if the overnight low will be below 20°F, it sets my Wi-Fi thermostat to hold at 45°F to protect pipes and finishes. It’s all about setting these guardrails so you don’t have to constantly micromanage.
How do smart vents contribute to efficient control?
They replace guesswork with precision. Instead of your whole HVAC system working to condition the entire garage, smart vents zone the space. They can close off areas or prioritize airflow to a hotspot, which reduces cycle times and can lower energy use.
How does the system handle extreme temperature fluctuations?
It acts before the problem starts. By linking weather service data to your automations, the system can engage heating or cooling in advance of a temperature swing. For example, it can start ventilating on a sunny morning before the garage becomes an oven, maintaining a more consistent environment with less energy.
What Are the Real Benefits and Security Considerations?

When I talk about these systems with clients, I don’t lead with “smart home tech.” I talk about protecting your investment. The primary benefit is stopping rust on your table saw, drill press, and other metal tools before it starts. I’ve opened toolboxes in damp garages and seen the damage firsthand. A stable climate prevents that.
You save real money on energy by not heating or cooling a massive, unused space on days you aren’t working out there. Your main home’s HVAC doesn’t have to work as hard to compensate for a freezing or broiling garage. I set my own system to keep the space just above freezing in winter unless I’m about to go work, which saves a noticeable amount on my gas bill.
For many of us, this automation turns the garage from a storage shed into a true year-round workshop. You can schedule it to be a comfortable 65 degrees by the time you get home from work on a Tuesday, without ever touching a thermostat. That’s a practical example of controlling the garage temperature climate with smart automation. With sensors and schedules, you can fine-tune comfort without lifting a finger.
Now, putting your garage on Wi-Fi makes some folks nervous, and that’s smart. Security isn’t something to gloss over. Treat these devices like your online banking.
- Always, always change the default password on the device and its app to something strong and unique.
- Enable Two-Factor Authentication (2FA) if the app offers it. This is a major roadblock for anyone trying to get in.
- Keep the firmware updated. When your app says an update is available, do it. These often patch security holes.
- I use a separate Wi-Fi network for all my smart home devices, isolated from my main computers and phones. Many modern routers, like those from TP-Link or Netgear, make this easy to set up.
How can these systems improve energy efficiency? It’s about precision and zones. Instead of your whole-house system fighting the temperature of the garage, a dedicated mini-split or heater only runs when and where you need it. Smart vents can close off the garage from the house, and sensors ensure it only runs to maintain your set limits.
What Routine Maintenance Keeps the System Running Smoothly?

Smart systems are low maintenance, but they aren’t no maintenance. A little care prevents most headaches. I follow a simple quarterly check that takes maybe 15 minutes.
- Unplug and vacuum the louvers of smart vents with a brush attachment. Dust buildup makes the motor work harder.
- Gently dust the exterior of temperature and leak sensors with a dry microfiber cloth. Don’t use cleaners.
- Open your app and check the reported battery level for any wireless sensors. Proactively replacing batteries avoids failures.
- Manually test your safety sensor alarms, like for water leaks or carbon monoxide. Press the test button and make sure you get an alert on your phone.
Maintenance & Cleaning Routine
| Every 3 Months | Wipe down sensors with a dry cloth. Vacuum vent covers. Confirm all devices are online in the app. |
| Every 6 Months | Test CO/gas/water leak sensor alarms. Check that physical vent louvers open and close fully without obstruction. |
| Annually | Review your automation rules. Are the schedules still matching your life? Update them based on your current usage patterns. |
When something acts up, 90% of the time it’s a simple fix you can handle yourself. If a temperature sensor seems inaccurate, recalibrate it using the instructions in its manual, often involving an ice bath or salt test. If a device keeps going offline, take your phone out to the garage and check your Wi-Fi signal strength. I had to add a simple Wi-Fi extender in my shop to get a solid connection in the far corner.
What maintenance is required for smart vents and sensors? Beyond the cleaning and battery checks, the most important thing is ensuring the mechanical parts move freely. Once a year, power down the vent and manually move the louvers through their full range to feel for grit or binding. For sensors, the maintenance is mostly digital: keeping their software current and ensuring their placement isn’t blocked by a new box or shelf you’ve stored.
If a smart vent gets stuck or unresponsive, a power cycle usually fixes it. Turn it off at the breaker or unplug it for 30 seconds, then power it back on. Let it reconnect to Wi-Fi. This solves more problems than you’d think.
Should You Do It Yourself or Hire a Pro?

Let’s be clear about one thing upfront: you’re not plugging this into a standard outlet. This project involves your home’s 120-volt electrical system, and that’s where the decision between doing it yourself and hiring someone gets serious.
Comparing the Two Paths
If you’re comfortable with a multimeter and have replaced a light switch or outlet before, the wiring part for a single smart thermostat might be within reach. Most Wi-Fi thermostats like the Ecobee or Nest come with a detailed installation app that walks you through connecting the low-voltage wires from your HVAC system. The real DIY hurdle isn’t the wiring diagram; it’s confidently identifying your system’s wires at the furnace control board and ensuring you’ve shut off the correct circuit breakers. For smart vents, like those from Keen Home or Flair, installation is usually tool-free and just involves swapping out your existing register covers.
Programming the automation is the fun DIY part. Setting up schedules in an app or creating routines in Apple Home or Google Home is intuitive. The challenge comes when you want a true, integrated climate zone. Getting a thermostat, multiple sensors, and smart vents to communicate and act as one cohesive system often requires using a third-party platform like Home Assistant, which has a steep learning curve.
Hiring a licensed HVAC technician changes the game. They’ll handle the wiring from start to finish, which is the safest approach. Their biggest value is in system design and integration. They can ensure your garage thermostat properly interfaces with your home’s main HVAC unit, set up the dampers for optimal airflow, and calibrate the sensors. Most importantly, a professional installation often preserves the warranty on both your new smart devices and your existing furnace or air handler, which a DIY mistake could void.
The Real Cost of Professional Help
If you decide to hire a pro, you’re paying for their expertise and insurance, not just their time. A realistic breakdown for a single-zone garage system looks like this: Additionally, check whether the installer carries garage keepers liability insurance to cover any property damage during installation. This coverage adds protection and can guide the next steps with the relevant policy details.
- Equipment: You’ll provide the thermostat, sensors, and vents. A robust setup from reputable brands typically costs between $400 and $700.
- Labor: This is where it varies. For a straightforward install of one thermostat and a few vents, expect 3 to 5 hours of labor. At standard rates of $85 to $150 per hour, labor can range from $250 to $750.
So, your total for a professional installation will likely land between $650 and $1,450. For a complex setup involving a new low-voltage wire run from the furnace or integration with a whole-house system like Control4, the price will be at the higher end of that scale.
When to Make the Call
I recommend calling a professional in two specific situations. First, if you look at the bundle of colored wires at your furnace and feel any uncertainty. Incorrect wiring can damage your HVAC control board, a repair that costs far more than an installation. Second, if your goal is deep, whole-house integration where your garage system reacts to the climate in your living room. That level of programming requires a pro who can navigate multiple control systems and balance your home’s entire airflow and climate.
A common question I get is about integration with existing platforms. The answer is usually yes. Most Wi-Fi thermostats and vents work with Alexa, Google Assistant, and Apple HomeKit. For more advanced automation, platforms like Samsung SmartThings or Hubitat can tie devices from different brands together, which is often a DIY-friendly project after the hardware is installed.
Smart Garage Climate Systems: Your Questions, Answered
What installation challenges might arise when integrating these systems?
The two most common hurdles are a missing ‘C’ wire for thermostat power and weak Wi-Fi signal in a detached garage. For power, a plug-in 24v transformer is a reliable fix. For connectivity, a simple Wi-Fi range extender positioned near the garage door almost always solves the problem.
How can these systems improve energy efficiency in a home?
They prevent your main HVAC from fighting the garage’s temperature extremes. By creating a separate, minimally-conditioned zone and using smart vents to seal it off, your home’s system runs less frequently and more efficiently, which lowers overall energy consumption. This is especially useful for garages that are properly insulated.
What security considerations are important for a Wi-Fi enabled garage system?
Treat these devices like a digital front door. Always use strong, unique passwords and enable Two-Factor Authentication (2FA) in their apps. I also recommend placing all smart garage devices on a separate, isolated Wi‑Fi network from your personal computers and phones. If you’re setting up a smart garage door opener, its first step is to connect it to your home Wi‑Fi. Keep it on the isolated network to maintain security and ease management.
Can the system be integrated with existing smart home platforms?
Yes, most core components are designed for it. Major thermostats and vents work directly with Alexa, Google Home, and Apple HomeKit. For more complex automation across brands, a central hub like Samsung SmartThings or Hubitat provides the necessary integration layer.
What is the typical cost range for a professional installation?
Expect to invest between $650 and $1,450 total. This includes the cost of the smart devices you supply ($400-$700) and professional labor ($250-$750). The final price depends on system complexity and whether new wiring is required at your furnace.
Keeping Your Garage Safe with Automation
The single best piece of advice I can give you is to always let your climate system enhance your garage’s safety, not just its comfort. Garage climate control air conditioning can be a smart upgrade that keeps humidity and temperatures steady for safer, more reliable work.
- Placement is everything: Mount your temperature and humidity sensor away from doors and direct sunlight for an accurate reading of the whole space.
- Set clear alerts: Use your thermostat’s app to notify you if temperatures drop near freezing or humidity spikes, so you can act before problems start.
- Trust, but verify: Make it a habit to walk out and do a manual check of your space and equipment once a month, no matter how smart your system gets.
Research and Related Sources
- What temperature should you keep in a garage? – Ruuvi
- What’s The Ideal Garage Temperature In Winter? (It Might Surprise You)
- Garage temperature – Carbide 3D Community Site
- What Temperature is your Garage in the Winter? | The Garage Journal