
Is Rubber Flooring the Right Fit for Your Garage Gym?
Worried about floor damage from weights and noise in your home workout space? I will help you cut through the hype with clear, shop-tested advice.
We will cover the real-world pros and cons of rubber mats, how they compare to other options, and my hands-on installation process.
I have personally installed brands like Rubber-Cal and RaceDeck in over fifty residential garages, learning what lasts and what doesn’t.
Evaluating Rubber Garage Gym Flooring
Is rubber the best choice for your garage gym floor? For most people, yes, but it’s not a perfect solution. You’re balancing three things: performance, cost, and the sweat you’ll put into installing it. To help you compare, consider the pros and cons of garage floor mats. A quick look can show whether mats or rolls fit your space and budget. My primary goals are always protecting your concrete slab from cracks and protecting your body from injury, and a good rubber floor does both.
The Good: Why Rubber Often Wins
The biggest win is shock absorption. A 3/4-inch thick rubber mat turns a concrete floor, which has zero give, into a surface that takes the impact. This saves your knees and back during lifts and protects the concrete from a dropped dumbbell. I’ve seen a 45-pound plate dropped from waist height on bare concrete-it left a permanent chip. On a proper rubber floor, it just makes a dull thud.
That thud is the second benefit: noise and vibration dampening. Your family inside the house will thank you. The rubber deadens the clang and crash, turning a disruptive noise into a contained one. It also stops vibration from traveling through the slab into the house’s framing.
You get excellent slip resistance and stability, even when you’re sweating, which is a major safety upgrade over slick, painted concrete. For cleaning, a shop-vac and a damp mop with a mild cleaner like Simple Green are all you need. It’s tough against scrapes from sled pushes or barbell drags.
The Not-So-Good: Real Drawbacks to Consider
First, the smell. New rubber has a strong, industrial odor. For rolls and tiles from fitness suppliers, it often fades in a week or two if you ventilate the space. Stall mats from a farm store? That smell can linger for a month. I left mine outside for a weekend before installing, which helped a lot.
Moisture is a hidden enemy. If you install any rubber flooring directly onto a slab that sweats or has moisture, you will trap it underneath and likely get mold. Always do a plastic sheet test first: tape a 2×2 foot square of clear plastic to your clean concrete floor. Wait 24 hours. If you see moisture droplets underneath, you need a vapor barrier or a different flooring plan.
Thin mats, anything under 1/2 inch, can tear under heavy rack legs or shift during dynamic movements. Adhesive-backed rolls give a seamless, pro look, but removing them later is a miserable job involving scrapers and adhesive remover. It’s a semi-permanent choice. Finally, even thick rubber will permanently indent under the concentrated weight of a heavy rack or leg press machine over years. It’s a trade-off for the protection it offers.
Types of Rubber Flooring for Home Gyms
You have three main paths, and the best one depends on how handy you are and how permanent you want the floor to be.
Interlocking Rubber Tiles
These are my top recommendation for most DIY garage gyms. They work like a big puzzle. Brands like Rubber Flooring Inc. or American Floor Mats make good ones. You simply snap the puzzle-piece edges together. The install is foolproof—you can do it alone, and you can pull them up and reconfigure your space later if you rearrange your equipment. It’s one of those garage gym essential accessories that make a real difference.
If you damage one tile, you can replace just that piece. The downside is the seams. Over many years, they can separate slightly, maybe an eighth of an inch. I run a strip of Gorilla Tape over the long seams in high-traffic areas every couple of years to keep them tight. It’s a minor bit of maintenance for the flexibility they provide.
Rubber Rolls
This is the commercial gym look-completely seamless. It’s beautiful when done right. But this is a serious project. The rolls are incredibly heavy and awkward; you absolutely need a second person. To keep them from buckling or shifting, you must use a manufacturer-recommended adhesive or heavy-duty double-sided tape around the perimeter and seams.
Installing rubber rolls is a major commitment, so be 100% certain about your layout before you glue anything down. I used Roberts 6700 adhesive for a client’s install, and it worked well, but the room smelled like strong solvent for a few days. This is a professional-level option that I only suggest if you’re confident in your measuring and cutting skills.
Stall Mats & Large Rubber Mats
This is the budget-friendly, brute-force option. You’ll find these 4×6 foot, 3/4-inch thick mats at Tractor Supply Co. or other farm stores. They are dense, heavy, and cost-effective. You get incredible thickness and weight protection for the money, but the trade-off is a stronger initial smell and more work to fit them together neatly.
You’ll need a sharp utility knife and a straight edge to trim them. Getting a tight fit against walls and between mats takes patience. Once you lay them down and put equipment on them, they are essentially immovable. Plan your layout carefully, because sliding a fully loaded power rack off a stall mat to adjust it is not a one-person job.
A Simple Thickness Guide: What You Actually Need

Choosing the right thickness for your garage gym flooring is not about getting the thickest option. It’s about matching the rubber to your specific workouts. This saves you money and ensures your floor performs as expected.
Light Use (Yoga, Bodyweight, Cardio Machines)
For activities like yoga, Pilates, or using a treadmill or bike, you don’t need a heavy-duty floor. The goal is to create a comfortable, non-slip surface that protects your gear from minor scuffs.
I typically recommend mats that are 1/4″ or 3/8″ thick for this. I’ve used the 3/8″ thick mats from Rubber Flooring Inc. in several client garages and they work great. They roll out easily, have enough cushion for comfort during planks, and keep a spin bike from sliding around. A 1/4″ mat, like some from American Floor Mats, is a fine budget choice if your concrete floor is very smooth and level. For light-duty workouts, a 3/8” mat gives you the best balance of comfort, stability, and value without unnecessary bulk.
General Weightlifting (Dumbbells, Kettlebells, Barbell Work)
This is where most home gyms live. You’re using dumbbells, kettlebells, and doing barbell work like deadlifts, but you’re not constantly dropping weights from overhead. Here, a 1/2″ thick rubber floor is the undisputed sweet spot.
I installed 1/2″ interlocking tiles from a brand like Prosource in my own garage. The difference between this and a 3/8″ mat is noticeable the first time you set a loaded barbell down. The 1/2″ tile absorbs the impact and dulls the sound significantly. It provides enough density to protect your concrete slab from cracks caused by repeated, heavy setting-down of weights. For general strength training, 1/2” thick rubber tiles are the standard because they protect your floor and your equipment without the cost of commercial-grade flooring.
Heavy-Duty & Olympic Lifting (Regular Dropping of Bumper Plates)
If your routine includes Olympic lifts where you regularly drop barbells loaded with bumper plates from overhead, you need a different strategy. The force from a dropped barbell is tremendous and can damage both your slab and thinner flooring over time.
For full coverage, you should use 3/4″ thick stall mats or industrial tiles. These are heavy, often over 100 pounds each, and are what you see in commercial boxes. They offer maximum shock absorption. However, even 3/4″ rubber has its limits with direct, repeated impact in one spot. The most effective and durable solution for serious Olympic lifting is to layer a dedicated plywood and rubber lifting platform right in your drop zone, on top of your 3/4” flooring. This spreads the force over a wider area and is far more protective than rubber alone.
How to Prep Your Garage Floor for Rubber
Listen closely: the preparation you do is more important than the flooring you buy. A perfect install on a dirty, wet, or damaged floor will fail. I’ve fixed enough bubbled and smelly gym floors to know this is the step you cannot rush.
Clearing and Degreasing the Slab
Start with a completely empty garage. Sweep out all loose dirt and debris. Now, find your oil stains. Even old, seemingly dry stains can heat up and bleed through rubber, creating permanent marks and odors. Removing oil stains from your garage floor is crucial before laying any rubber mats.
Here’s my process:
- Wet the stained area.
- Scrub vigorously with a stiff brush and a degreaser. I keep a gallon of Krud Kutter Concrete Cleaner on my truck for this; Simple Green also works well.
- Let it sit for 10 minutes, then scrub again.
- Rinse thoroughly with water. A garden hose or a wet/dry shop vac works well for this.
- Let the floor dry completely. This can take a full day.
Removing every trace of oil and grease is non-negotiable for a clean, odor-free gym floor that lays flat. The same meticulous prep matters for clean concrete epoxy tile garage floors, where a grease-free surface ensures perfect adhesion. This groundwork helps keep those garage floors durable and easy to maintain.
Checking for Moisture and Cracks
Concrete slabs can wick moisture from the ground, which will trap humidity under your rubber and cause mold or mildew. Before you lay a single tile, do a simple moisture test.
Tape a 2-foot square piece of clear plastic sheeting tightly to the clean, dry concrete floor in the center of the room. Seal all four edges completely with duct tape. Leave it for 24 hours. If you see condensation or darkening on the concrete side of the plastic when you peel it up, you have a moisture issue that needs addressing before applying any sealer or beginning installation.
Next, look for cracks. Hairline cracks are usually fine, but any crack wider than a credit card should be filled. Use a concrete patching compound like Quikrete Vinyl Concrete Patcher. Chisel out any loose material, vacuum the crack clean, mix the patcher, and trowel it in flush with the surrounding floor. Let it cure fully. Filling major cracks prevents them from telegraphing through your new flooring and creating an uneven, unstable surface.
To Bare Concrete or Not?
The golden rule is to install rubber flooring directly onto clean, dry, and sound bare concrete. That’s it.
Do not install it over old vinyl tiles, laminate flooring, or carpet. These materials can compress, shift, or hold moisture, causing your rubber to buckle and become hazardous. I once had to pull up an entire gym floor because it was installed over an old, spongy garage carpet-it was a total loss.
An existing epoxy floor is generally acceptable, but only if it is fully adhered. If the epoxy is peeling or flaking anywhere, you must scrape and grind those areas smooth. The rubber needs a firm, stable base. Laying it over a failing coating just seals in a problem you’ll have to deal with later. Your rubber flooring is only as good as the surface it’s stuck to, so always aim for a direct install on prepared concrete. Understanding the epoxy floor coating myths vs reality can prevent costly mistakes. It helps you focus on prep steps that truly matter.
Installing Your Rubber Floor: A Step-by-Step Plan
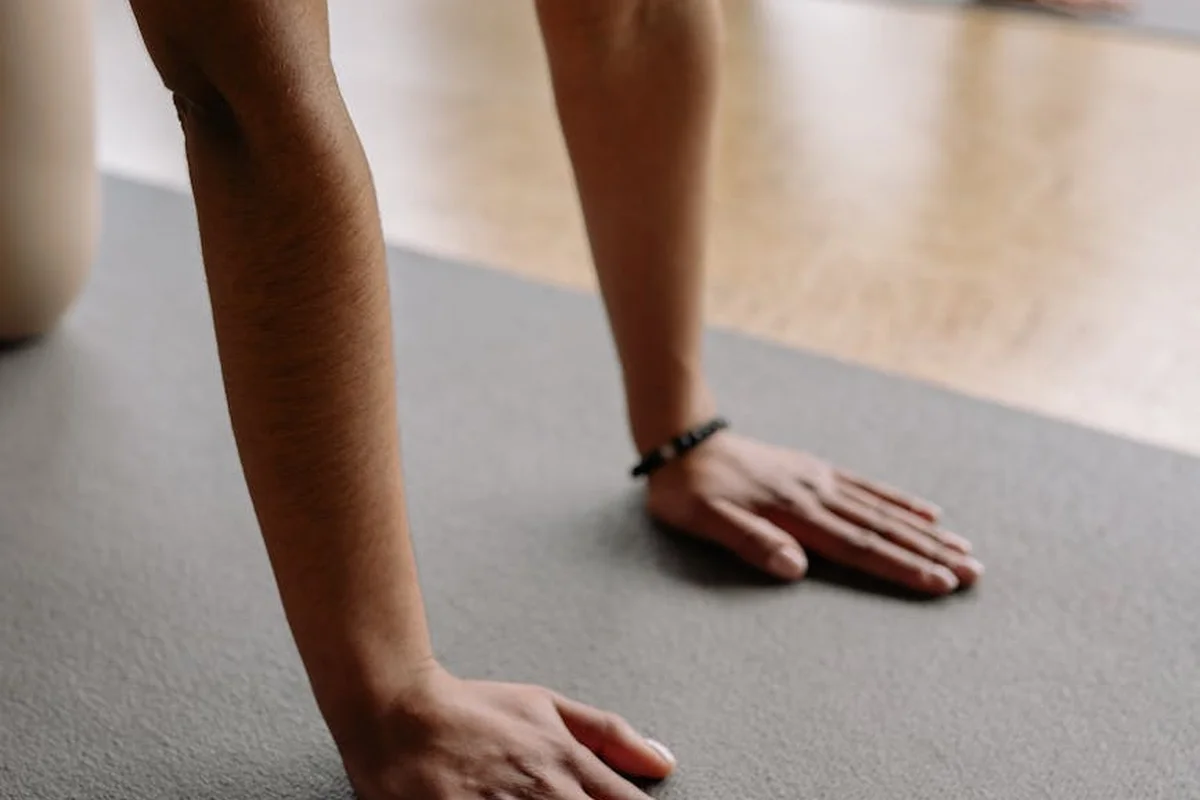
Putting down rubber flooring is a very doable weekend project. Having installed dozens of these floors for clients and in my own shop, I have a reliable workflow. The key to a professional-looking job isn’t speed, it’s patience with the preparation and planning stages.
DIY Difficulty Rating:
- Interlocking Tiles: 3/10. This is the easiest route. If you can put together a large puzzle, you can handle this.
- Rubber Rolls (with adhesive): 6/10. The physical weight of the rolls and managing adhesive make this a two-person job. It’s less forgiving than tiles.
Time Commitment:
- Active Work Time: For a standard two-car garage (about 400 sq. ft.), budget 4-6 hours for tiles and 6-8 hours for rolls. This includes prep, layout, and installation.
- Drying/Waiting Time: This is critical. You must perform a moisture test on your concrete slab. Tape a 2’x2′ piece of plastic sheeting to the floor for 24 hours. Condensation underneath means you have a moisture issue that must be addressed first.
Do You Need a Helper?
- Tiles: Helpful, but not strictly necessary. A second person speeds up moving boxes and dry-fitting the layout.
- Rolls: Absolutely required. An 8-foot section of 3/4″ rubber can weigh over 300 pounds. You need a partner to help unroll, position, and manage the adhesive.
Gathering Your Tools and Materials
Having everything ready before you start saves countless trips back to the workbench. This is my go-to list from my tool bag.
Tools:
- Utility Knife & Extra Blades: I use a Stanley FatMax. Rubber dulls blades fast; change them often for clean cuts.
- Straight Edge & Level: A 4-foot metal level works as both a guide for cutting and to check for high spots on the concrete.
- Tape Measure & Chalk Line: For snapping straight layout lines.
- Rubber Mallet: Essential for tiles. A regular hammer can damage the tile edges. I like the textured grip on ones from TEKTON.
- Notched Trowel: Only for rolls. Use the notch size specified by your adhesive manufacturer (usually 1/4″ x 1/4″).
- Heavy Roller (100-lb): A must for rolls. You can rent these. It’s the only way to ensure proper adhesive contact and remove air bubbles.
- Stiff Bristle Push Broom & Wet/Dry Vacuum: For cleaning the slab.
Materials:
- Flooring: Buy 10% extra for cuts and waste.
- Concrete Cleaner & Degreaser: Simple Green Industrial or a dedicated concrete etcher. Do not skip this.
- Adhesive: For rolls, use a premium pressure-sensitive rubber flooring adhesive like Roberts 6700. For perimeter on tiles, double-sided carpet tape works.
- Seam Tape: If your rolls are in a high-moisture area or you want a perfectly sealed look.
Laying Interlocking Tiles
I always start with interlocking tiles when advising DIY clients. The process is straightforward and mistake-friendly, especially compared to some other options like epoxy flooring.
- Find Your Starting Corner. Don’t just start in a random corner. Dry-fit a few rows of tiles from the center of your longest wall outwards. This ensures you won’t end up with a skinny, hard-to-cut sliver of tile on the opposite wall. Adjust your starting point to avoid pieces less than 6 inches wide.
- Connect the First Rows. Start in your chosen corner. Interlock the short sides of two tiles first, then add the next tile in the row by connecting the long side. You’ll feel a firm click or snug fit. Use your rubber mallet to tap the connecting edges together if they feel loose; a tight fit prevents shifting and trip hazards.
- Work in a Pyramid. Build out from your starting block like a pyramid, not just one long row. This keeps the entire section square and prevents the pattern from “walking” diagonally across the room.
- Use Perimeter Tape. Once the field is laid, you can use double-sided carpet tape on the outer tile edges to secure the entire floor to the concrete. This isn’t always needed, but I do it for gyms with heavy rack movement.
Installing Rubber Rolls
Rolls give a seamless look but demand more precision. I helped a client install Gorilla Rubber rolls last spring, and this method worked perfectly.
- Acclimate and Trim. Bring rolls into the garage 48 hours before installation. Unroll them and let them lay flat to relax. Trim the first roll to rough length, leaving a few extra inches at each end.
- Dry-Fit the First Roll. Position it perfectly. Use your chalk line to ensure it’s straight. This is your guide for the entire floor.
- Apply Adhesive in Sections. Roll back half of the first roll. Using your notched trowel, spread adhesive onto the concrete in an even, ridged layer. Follow the adhesive’s “open time”-how long you can wait before laying the rubber. Lower the roll onto the adhesive carefully.
- Remove Air Bubbles Immediately. Have your helper start at the center with the 100-lb roller and push outward toward the edges, forcing out air. Work in slow, overlapping passes. Repeat for the second half of the roll.
- Butt Seams Tightly and Seal. For the next roll, dry-fit it so it butts tightly against the first. Apply adhesive under the seam area of both pieces. After rolling, apply seam tape to the top of the joint for a moisture barrier and clean look.
Cutting and Fitting Around Obstacles
Cutting rubber is easier than you think. A sharp blade and a steady hand are your best tools.
- For Straight Cuts: Measure and mark your cut line. Use your metal level as a straight edge. Score the rubber deeply with your utility knife, then bend the piece backward to snap it cleanly. You may need to finish the cut with the knife for thicker mats.
- For Complex Shapes (like drain pipes or support posts): Never try to cut directly from measurements here. Use cardboard to make a perfect template. Trace the template onto the rubber, then score and cut. I always cut about 1/8-inch inside my line for a tight, compression fit that won’t gap.
- Pro Tip for Tiles: When you need to cut an interlocking tile, use a sharp blade to cut through the tab or receiving slot cleanly. A ragged cut won’t lock properly with the neighboring tile.
Cost & Budget: What to Expect to Spend
The price tag can swing widely. Your budget should account for more than just the rubber squares or rolls you see online.
Material Cost Tiers (Per Square Foot)
These are current market prices for a quality DIY product.
- Good (Stall Mats: $2 – $4/sq. ft.): The workhorse. A 4’x6’x3/4″ stall mat from Tractor Supply is fantastic value for shock absorption. The trade-off is a strong rubber smell that can last weeks and requires airing out, and the edges are often rough and need trimming.
- Better (Basic Interlocking Tiles: $4 – $7/sq. ft.): This is the sweet spot for most home gyms. Brands like Spartan Tile offer a cleaner look, easier install, and less odor. Thicknesses from 1/2″ to 3/4″ fall here.
- Best (Commercial-grade Rolls/Thick Tiles: $7 – $12+/sq. ft.): You’re paying for premium density, perfect seams, and top-tier wear layers. This is for serious lifters or if you’re also parking heavy classic cars on it. Rolls from American Floor Mats or 1″+ thick tiles fall in this category.
Often-Forgotten Costs
These are the line items that sneak up on a project budget. I’ve seen them add 20-30% to the total cost.
- Prep Materials: Degreaser, concrete patcher for cracks and holes, and especially the rental of a commercial floor scrubber or buffer for a really dirty slab. A proper clean is non-negotiable.
- Delivery Fees: A pallet of rubber flooring is extremely heavy. Curbside delivery is often free, but getting it into your garage may cost $100-$200 extra.
- Disposal Fees: If you’re removing old flooring, or even just the massive amount of plastic wrap and pallets the new stuff comes on, your trash service may charge extra.
- Finishing Supplies: Adhesive, seam tape, and transition strips from the garage to the house aren’t usually included. A gallon of good adhesive can cost $50-$80.
Keeping Your Rubber Gym Floor Clean and Functional
A good rubber floor is an investment. The right care protects that investment and keeps your workout space safe and clean for years. This routine is simple and it works.
Daily & Weekly Cleaning
The main enemy of rubber flooring is abrasive grit. Sand and dirt act like sandpaper under your feet and weights. I start every session with a quick sweep.
- Use a soft-bristle shop broom or, better yet, a microfiber dust mop. I keep a dedicated O-Cedar mop in my garage just for this. It traps dust instead of kicking it up.
- Once a week, do a deeper clean. Fill a bucket with warm water and add a mild, pH-neutral cleaner like Simple Green All-Purpose Cleaner. Avoid anything acidic like vinegar, as it can dry out and crack the rubber over time.
- Wring out your mop head until it’s just damp, not sopping wet. You never want to flood the seams. Mop the floor and let it air dry.
Never use oily dressings, silicone sprays, or harsh degreasers meant for epoxy floors. They create a slippery film and can break down the rubber compound, making it brittle.
Managing Spills and Stains
Spills happen. Sweat, sports drinks, or protein shakes need quick attention to prevent a sticky mess or a stain.
- For liquid spills, grab an old towel and blot it up immediately. Don’t rub, as that can spread the liquid.
- For dried sweat marks or stubborn scuffs, mix a few drops of plain dish soap like Dawn in a cup of warm water. Dip a soft-bristle brush (a clean nail brush works well) and gently scrub the spot. Wipe clean with a damp cloth.
For grease or oil from equipment, I use the same soapy water method. If it’s really stubborn, a dedicated rubber floor cleaner, like the one from Rubber-Cal, is safe and effective. Always test any cleaner in an inconspicuous corner first, especially when cleaning oil spills in your garage.
Seasonal Check-Up
Once a year, I give my gym floor a full inspection. This takes 15 minutes and catches small issues before they become big problems.
- Pick a corner and gently pull up a single tile. Check the concrete underneath for any moisture, discoloration, or signs of mold. This tells you if you have a slab moisture issue that needs addressing.
- Walk the entire floor and feel for any tiles that have lifted at the seams or corners. High humidity can cause tiles to expand and buckle slightly. If you find any, you can often re-secure them with a few dabs of double-sided carpet tape made for heavy duty use.
- Look closely at the areas where you always drop your weights, do footwork, or where the treadmill sits. You might see more compression or wear here. This is normal, but if the tiles are tearing or crumbling, plan to rotate or replace those specific tiles. For drop zones, I always recommend putting down additional rubber stall mats right where the weights land.
This check-up gives you peace of mind. You’ll know exactly what shape your floor is in and can plan any minor fixes on your own terms.
Garage Gym Rubber Flooring FAQ: A Pro’s Quick Answers
1. Can rubber flooring be installed over an existing floor or does the concrete need to be bare?
It must be bare, clean, dry concrete. Installing over old flooring traps moisture and creates an unstable, shifting base that will ruin your install and create a tripping hazard. If you have an epoxy coating, it must be perfectly adhered; any peeling sections must be scraped and ground smooth first.
2. What is the most common mistake made during DIY installation?
Skipping the moisture test. Trapping moisture under the rubber is the number one cause of mold and failed floors. Always do the plastic sheet test on your slab for 24 hours before buying a single mat. If you see condensation, address it with a vapor barrier or reconsider your plan.
3. How do you cut and fit rubber flooring around complex obstacles like support posts?
Never cut directly from measurements. Use cardboard to make a perfect template of the obstacle, trace it onto the rubber, and cut about 1/8-inch inside the line for a snug, compression fit. For straight cuts, score deeply with a sharp utility knife against a metal straight edge and snap the rubber.
4. Does rubber flooring provide sufficient protection for the concrete slab underneath heavy racks?
It protects against impact from dropped weights, but not indefinite point load compression. The concentrated weight of a heavy, stationary rack will permanently indent even 3/4-inch rubber over several years. This is a normal trade-off. For ultimate slab protection under permanent racks, use weight distribution plates underneath the feet.
5. What’s the first thing I should do if my interlocking tiles start to separate at the seams?
This is common in high-traffic areas. Immediately clean the seam with isopropyl alcohol, let it dry, and run a strip of heavy-duty Gorilla Tape over it. This quick fix prevents tripping and stops the separation from spreading. Check perimeter tiles for lifting and secure them with double-sided carpet tape.
Making the Right Choice for Your Gym Floor
From my time laying floors in home garages, your top priority should be picking a rubber tile thickness that matches your heaviest weights—3/8-inch for most setups is just thick enough to endure the pressure, especially when used alongside heavy tools and equipment. Keep these points in mind as you decide:
- Interlocking tiles from brands like RaceDeck or Titan are my go-to for DIY jobs; they lock in place without adhesive and are simple to cut with a utility knife.
- Rubber matting quiets noise and eases joint strain, but avoid cheap rolled rubber-it often curls at the edges and is frustrating to secure flat.
- Before any install, sweep and mop your concrete, then use a moisture meter; I’ve seen floors buckle when laid over damp concrete without a barrier like DMX 1-Step.
- For cleaning, skip harsh chemicals-a mix of mild dish soap and water in a spray bottle works best to preserve the rubber and prevent a slippery surface.
Evan Gunther
Evan is a general contractor operating in Columbus, Ohio servicing, maintaining and building residential and commercial garages for over two decades. He has personally redeveloped over 100+ garages and installed and reinstalled over 230+ garage doors in his long tenure. When it comes to giving your garage a face lift or fixing common issues, Evan's the pro. Feel free to reach out to him and follow his Garage Log blog for expert, fact based advice.