
Is Your Garage Floor Strong Enough for Heavy Tools and Equipment?
Worried about cracks or dips under your workbench or car lift? I will help you plan a floor that handles the weight, using material strength and load ratings.
We will cover how to calculate your exact load needs, choose between concrete mixes and coatings, and install a floor that lasts.
I have installed and repaired dozens of garage floors, learning which materials hold up under real shop conditions.
How Much Weight Can Your Garage Floor Actually Hold?
Let’s get straight to the core question. Your garage slab was built to a standard, but that standard often isn’t enough for a serious shop. The first thing to understand is how weight is applied.
You have two main types of load. A point load concentrates a lot of weight on a very small area. Think of a car lift post, the leg of a heavy drill press, or a floor jack on a single wheel. A point load is the biggest threat to your concrete, like a stiletto heel on a wood floor. A uniform (or distributed) load spreads weight over a larger footprint. Your full tool chest, a pallet of pavers, or a heavy workbench are good examples.
Start by adding up your planned equipment. Get the actual weight. Don’t guess. For machinery, find the manual or spec sheet online. For a tool chest, weigh it loaded. Add the weight of your cars, storage racks, and everything else. Write it all down.
A typical residential garage slab is 4 inches thick with 3000 to 3500 PSI concrete, poured over a compacted gravel base. It’s designed to handle the distributed weight of family vehicles and general storage. That 4-inch slab is not engineered for the intense point loads of a 2-post car lift or a 1,000-pound milling machine on three small feet, especially when it lacks the necessary reinforcement like rebar or wire mesh.
Here’s a lesson from my shop: I once installed a used industrial vise on a 4-inch slab. It weighed about 400 pounds on three small pads. Within a year, I had a spider web of cracks radiating from each foot. The slab couldn’t handle the stress.
You must check your local building codes. They dictate required slab thickness and reinforcement for garages, and some areas have rules for “shop” or “heavy storage” loads. Understanding these codes helps you choose the right garage foundation method. From there, you can compare options like slab-on-grade, floating slabs, or pier-and-beam setups. The best move is a quick call to your local building department. Tell them your plans.
Assessing Your Starting Point: Is Your Floor a Candidate?
Before you spend a dime on new flooring or equipment, you need to inspect what you have. A flawed foundation will ruin any surface you put on top.
Start with a visual inspection in good light. Get down on your hands and knees. You’re looking for three things:
- Cracks: Their pattern tells a story.
- Spalling: This is when the surface flakes or chips away, often revealing the gravel aggregate underneath. It means the top layer of concrete is failing.
- Uneven Settling: Look for obvious dips or slopes where water pools.
Not all cracks are equal. A few hairline cracks are usually just shrinkage and are cosmetic. Be concerned about cracks wider than 1/8 inch, cracks where one side is higher than the other (this is called heaving), or a pattern that looks like a map with cracks intersecting. These can signal movement in the base or a structural issue.
Next, check for level. A 4-foot metal straightedge is a great tool, but a laser level is what I use in my business. Shine it across the floor. Are there dips or humps over 1/4 inch in 10 feet? That’s a problem for heavy, precise machinery.
Moisture is a silent killer. Do a simple plastic sheet test. Tape a 2-foot square of clear plastic sheeting (like a painter’s drop cloth) tightly to the clean, dry concrete. Seal all edges with duct tape. Leave it for 24 hours. If you see condensation or darkening on the underside when you peel it up, you have significant moisture vapor coming up through the slab. This will cause adhesives to fail and metal to rust.
So, when can you reinforce versus replace? If your slab has only minor shrinkage cracks and is generally level and dry, you might be a candidate for reinforcement before adding heavy loads. This often involves core drilling and installing steel piers or a process called slab jacking to stabilize it. For a new two-post lift, many installers now use “thickened slabs”-they’ll core out sections and pour new, deeper concrete footings exactly where the lift posts will go.
If your floor has major heaving, widespread map cracking, or severe moisture issues, a full replacement is almost always the smarter, long-term investment. Patching or covering up a bad slab is like putting new shingles on a rotted roof. You fix the foundation first. I’ve seen too many homeowners waste money on a beautiful epoxy coat only to watch it blister and crack within months because they ignored the wet, crumbling concrete underneath.
Material Showdown: The Best Garage Flooring for Heavy Loads
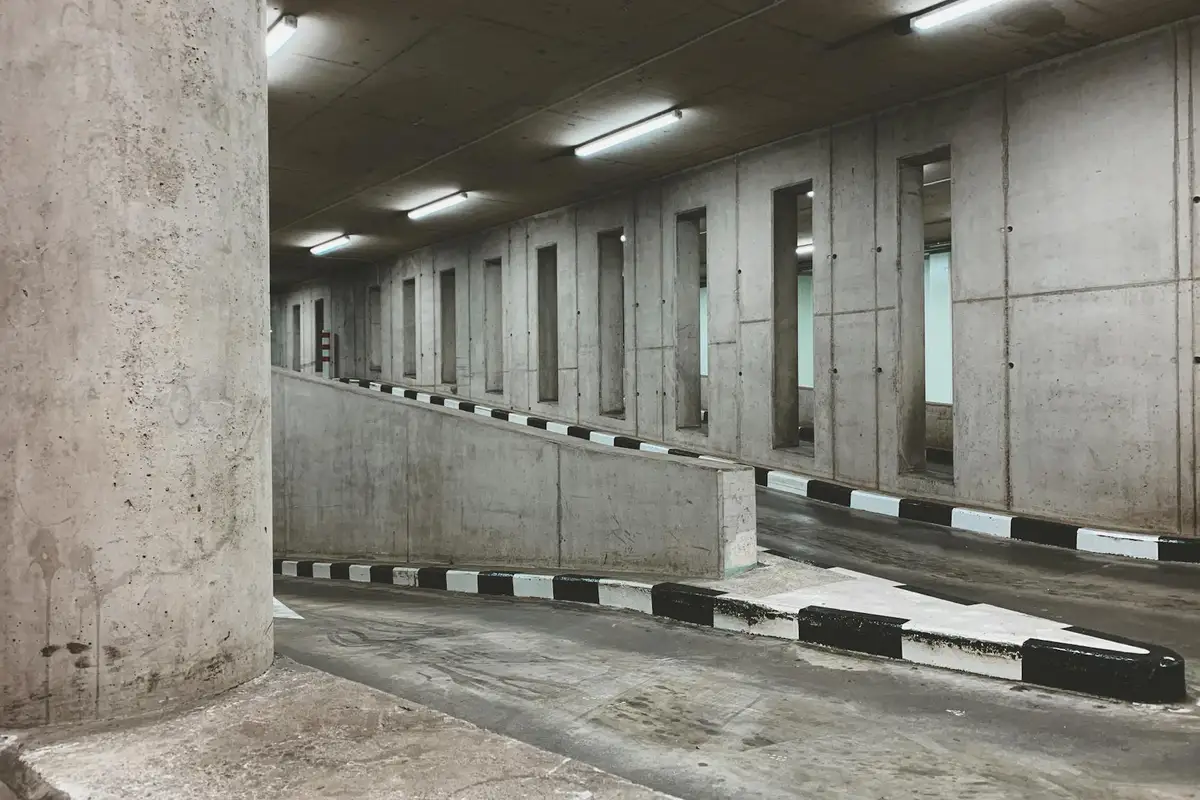
Choosing a floor is about matching the material’s personality to your shop’s demands. I’ve installed and lived with all of these in various projects.
Industrial-Grade Coatings: Epoxy and Polyaspartic
For a truly monolithic surface, you want a 100% solids epoxy or a polyaspartic coating. These aren’t the thin paint kits from the hardware store. A professional-grade epoxy kit, like the ones from Legacy Industrial or ArmorPoxy, creates a thick, seamless shell over your concrete. The seamless nature is the key benefit for heavy equipment, as there are no joints for fluids to seep into or for a jack stand leg to catch on. I’ve spilled brake fluid, oil, and solvent on my shop’s epoxy floor and just wiped it up with no stain.
Polyaspartic is the premium cousin. It cures much faster (often walkable in a few hours) and has even better UV and abrasion resistance. I used a polyaspartic topcoat from Euclid Chemical over an epoxy base on a client’s car lift bay, and it has held up perfectly for years. Both resist chemicals incredibly well, but polyaspartic generally wins for ultimate durability if budget allows.
Interlocking PVC or Polypropylene Tiles
These tiles, like SwissTrax or Racedeck, are a fantastic option for an uneven or damp slab you can’t fully remediate. They float over the concrete. The flex in the tiles is a feature, not a bug-it helps distribute the intense point load from a jack stand or heavy tool leg over a wider area of the subfloor. I have Racedeck FreeFlow tiles in my home gym area of the garage. Dropping a heavy kettlebell doesn’t crack the tile; it just flexes and bounces back.
Installation is the most DIY-friendly option here. You can do it in a weekend with a rubber mallet and a utility knife. The hollow design allows moisture to pass through and provides a bit of cushion underfoot, which is easier on your knees and back during long projects.
Reinforced Concrete (New Slabs or Overpours)
Sometimes, the best solution is to go back to the base. If you’re pouring a new slab or doing a major structural overpour (2+ inches), reinforcement is non-negotiable for heavy loads. You must use rebar, set on chairs, in a grid pattern. I always specify #4 rebar on 18-inch centers for a residential shop floor. Fiber mesh added to the concrete mix helps control plastic shrinkage cracking but does not replace rebar for structural strength. A 4000+ PSI mix with proper curing is the standard.
This is not a DIY job. You need a professional concrete crew. As a homeowner, your job is to understand what goes into the quote: slab thickness (6-inch minimum), rebar specification, and concrete mix design. For a concrete garage floor installation, factors like garage slope for drainage and finishing options also matter. Understanding these details helps you compare quotes and plan for a durable, long-lasting floor.
Specialized and Niche Options
For welding areas or under a hydraulic press, a welded steel floor pan is the ultimate defense against sparks and impact, but it’s costly and complex. For a simple, durable finish on a solid existing slab, a penetrating siliconate or lithium-based densifier/sealer can harden the concrete surface and repel stains. It won’t add thickness, but it will improve durability significantly over bare concrete.
DIY-Friendly vs. Pro Territory
Here’s my rule of thumb from doing it myself and hiring it out. Interlocking tiles are solidly in the DIY camp. A high-quality 100% solids epoxy kit is a demanding but achievable DIY project if you are meticulous. Polyaspartic coatings and any new concrete work are firmly in “hire a pro” territory due to their fast cure times and critical technical requirements. Getting them wrong is expensive and hard to fix.
The Durability Verdict: Which Material Wins?
There’s no single winner, only the best tool for your specific job. This table breaks down the key factors.
| Material | Impact Resistance | Point Load Handling | Chemical Resistance |
| Thick Epoxy Coating | Excellent. Can chip from a sharp, direct hit with a heavy tool. | Excellent. Distributes weight across the entire sealed surface. | Excellent against oils, fuels, common shop fluids. |
| Polyaspartic Coating | Superior. More flexible, resists chipping better than epoxy. | Excellent. | Superior. Handles a wider range of harsh chemicals. |
| Interlocking Tiles | Very Good. Flexes on impact. Can be damaged by sharp, hot metal. | Very Good. Flex distributes load, but heavy point loads can permanently dimple. | Good. Most fluids sit on top, but aggressive solvents can damage plastic. |
| Reinforced Concrete | Good. Can spall or crack from a severe impact. | Good. Strength depends entirely on thickness and reinforcement. | Poor (if unsealed). Stains easily. Good (if sealed with a densifier). |
Long-term wear varies. Epoxy and polyaspartic can be scratched by dragging sharp metal, but they can be patched and recoated. Tiles can be replaced individually if one gets damaged. A damaged concrete slab is the most difficult and costly to repair properly.
For underfoot feel, tiles are the warmest and quietest, with a slight give. Coatings are hard and can be loud, but they sweep clean effortlessly. Concrete is simply hard and cold.
My recommendations based on your shop type:
- Home Hobbyist with a Drill Press & Welder: A high-quality 100% solids epoxy kit. It handles occasional heavy items and protects from sparks and spills.
- Car Enthusiast with Jack Stands & Tools: Either a professional polyaspartic coating (best) or a thick-gauge interlocking tile system. Both excel at point loads and fluid cleanup.
- Woodshop with Heavy Cast-Iron Tools: Interlocking tiles. The cushioning protects dropped tools and is much kinder to your legs and your lumber if a board falls.
Installing Your Heavy-Duty Garage Floor
Success is 90% preparation. Skipping steps here guarantees failure, no matter how good your product is.
The Non-Negotiable Prep Work
First, the concrete must be clean, sound, and rough. I use a 7-inch diamond grinding cup on a floor grinder from Sunbelt Rentals. It’s dusty, but it’s the only way to properly open the pores and remove contaminants. You must diamond grind; acid etching is not sufficient for a heavy-duty bond. Fill any cracks wider than a credit card with a flexible epoxy crack filler like Sikaflex. Finally, vacuum every speck of dust and clean with a degreaser. The floor should be “hospital clean.”
DIY Coating Application Steps
If you’re tackling a 100% solids epoxy, here’s the sequence I follow:
- Mix Part A and Part B exactly per instructions. Use a drill with a Jiffy mixing paddle. Do not rush mixing.
- Pour the mixed material in a long, thin line across the floor.
- Use a high-quality 18-inch roller frame with a 3/8-inch nap roller cover to spread the epoxy. A cheap roller will shed fibers into your finish.
- Work in sections you can manage before the material starts to set. Maintain a “wet edge” to avoid lap lines.
- Broadcast color flakes (if using) into the wet epoxy for texture and to hide future scratches.
- After it cures, apply a clear polyurethane or polyaspartic topcoat for added UV and chemical resistance.
Climate is critical. Work in 60-80°F (15-27°C) temperatures with low humidity. High humidity can cause the coating to blush (get a cloudy film).
Installing Interlocking Tiles
This is the easier path. Start from the center of your garage’s longest wall and work outwards. Dry-fit a few rows first. Always use a rubber mallet to tap the tiles together-never hit the plastic directly with a hammer. For cutting, a sharp utility knife and a straight edge work for a few cuts. For a big job, I use a small table saw with a fine-tooth blade, which gives a perfectly clean edge. Finish the perimeter with matching trim pieces for a professional look.
What a Professional Concrete Pour Entails
If you hire this out, you should see the crew: forming the perimeter, placing and tying the rebar grid on support chairs, pouring the mix, vibrating it to remove air pockets, screeding it level, and then power floating and troweling the surface. They should cover it with plastic or spray a curing compound to let it harden slowly and prevent cracks. Expect to stay off a new 4-inch slab for at least a week, and wait 28 days for a full cure before applying any coating.
Critical Safety Gear
- For Grinding/Coating: A half-face respirator with P100 organic vapor/particulate cartridges (like from 3M), chemical-resistant gloves (nitrile), and sealed safety goggles. Knee pads are a must.
- For Tile Installation: Safety glasses for cutting and knee pads.
- For Concrete Work: Sturdy boots, gloves, and eye protection if you’re observing.
Recommended Products for a Strong Garage Floor
Don’t waste your money on weak products. Look for these proven categories.
- 100% Solids Epoxy Kits: Legacy Industrial’s Garage Kit or ArmorPoxy’s ArmorUltra. These are sold online by specialists, not in big-box stores.
- Polyaspartic Topcoats: Euclid Chemical’s EUCOHSP or Sherwin-Williams’ Fast-Clad system. These are typically sold to contractors, but some suppliers will sell to informed homeowners.
- Thick-Gauge Interlocking Tiles: SwissTrax RibTrax Pro or Racedeck Diamond. Look for a thickness of at least 16mm (5/8 inch).
On the product data sheet, ignore the marketing and look for the technical specs: coverage rate (thicker is better), pot life (how long you have to work with it), and chemical resistance listings (like ASTM standards). A long cure time before heavy use (often 7 days) is a sign of a more durable, slower-curing product.
Essential tools I keep in my kit:
- A floor grinder with diamond cup wheels.
- A heavy-duty shop vacuum (Rigid brand holds up well).
- A professional roller frame (Wooster Sherlock or similar) and epoxy-grade roller covers.
- 5-gallon mixing buckets and Jiffy mixer paddles.
A final warning: those attractive, inexpensive epoxy kits at the home improvement store are usually epoxy-*style* paints. They have low solids content. They will peel under hot tires and degrade quickly from chemical spills, leaving you with a mess that’s harder to fix than your original concrete. There are epoxy garage floor myths that can mislead homeowners. Understanding these myths helps you invest in the right product from the start.
Maintaining Your Garage Floor for the Long Haul
Your garage floor is a tool itself, and like any good tool, it needs proper care. I see too many homeowners install a great floor and then forget about it. A simple, consistent routine prevents small problems from becoming expensive, permanent damage. Think of it like changing the oil in your truck; skip it, and you’ll pay a much higher price later. Proper garage floor maintenance can help extend the life of your investment.
Your Simple Weekly Cleaning Routine
A weekly five-minute sweep does more than you think. Grit, sand, and road salt are like sandpaper underfoot. Every time you walk or roll a tool chest over them, you’re microscopically grinding your floor’s finish. My routine is a quick dry sweep followed by a damp mop, which traps dust and prevents it from becoming abrasive grit. I use an O-Cedar EasyWring spin mop and bucket because it wrings out perfectly-too much water can seep into seams or cracks. For the sweep, any stiff-bristle push broom works, but I lean towards the Garageman heavy-duty model for its wide path.
Handling Spills: The Immediate Cleanup Rule
Oil, brake fluid, coolant, and solvents are the arch-enemies of any garage floor coating. The key is speed. Don’t let them “dwell.” For a fresh oil spill, I immediately pour a generous amount of an oil-absorbent like Oil-Dri or cat litter over it, let it soak for a minute, then sweep it up. For a tougher, sticky residue, I keep a gallon of Zep Citrus Degreaser on my shelf. Spray it on, let it work for two minutes (no longer, to protect the coating), and scrub with a stiff brush before rinsing. Immediate action keeps these fluids from breaking down the chemical bonds in your epoxy or staining your concrete. If stains set, you’ll need more intensive cleaning methods to remove oil stains from concrete garage floors.
Strategic Protection for High-Impact Areas
Even the strongest floor benefits from a little armor in specific spots. I always recommend using thick, anti-fatigue mats directly under your workbench and under any heavy, stationary equipment like a drill press or band saw. This cushions the point load and catches metal shavings or dropped tools. I’ve had good luck with the Horse Stall Mats from Tractor Supply; they’re dense, affordable, and easy to cut to size. For parking, a high-quality drip pan is non-negotiable. It catches oil, coolant, and condensation from your vehicle’s undercarriage, which is the most common source of floor stains. Think of it as a cheap insurance policy.
The Semi-Annual Inspection
Twice a year-I do it when I change my smoke detector batteries-take ten minutes to really look at your floor. Get down on one knee with a bright flashlight. You’re looking for three things:
- Coating Failure: Check for chips, peeling, or bubbles in epoxy or paint, especially near edges and where tires rest.
- Tile Movement: For interlocking tiles, press down around the edges. They should feel solid. Any lifting or rocking means the subfloor may have shifted.
- New Cracks or Stains: Trace any new hairline cracks in concrete. A new dark stain means something leaked and was absorbed.
This proactive check lets you spot a minor issue before it becomes a major repair project.
Making Small Repairs Yourself
Finding a chip or a loose tile isn’t a failure; it’s a chance for a quick fix. For a small chip in an epoxy coat, the repair is straightforward. I use a two-part epoxy patching compound, like the one from Quikrete. The trick is to clean the chip out with a wire brush and denatured alcohol first, ensuring a perfectly clean, dry surface for the new epoxy to bond to. For a damaged interlocking tile, the beauty of the system is its modularity. Using a utility knife and a rubber mallet, you can usually dislodge the bad tile by carefully cutting through the interlock tabs and tapping it out from underneath, then snap a new one in its place. I keep a box of spare tiles from my original installation in the rafters for this exact reason.
Garage Floor Strength: Your Top Questions, Answered
I’m not pouring a new slab. How can I check if my existing floor is strong enough right now?
Perform a simple, real-world test. Use a floor jack and a piece of plywood to simulate a point load in your proposed equipment area. If you see existing cracks widen or hear concrete crunching, the slab is already compromised. For a definitive answer, hire a structural engineer to perform a nondestructive evaluation; it’s a few hundred dollars that can save you thousands.
How do I know if I need to plan for point loads or uniform loads?
Look at the equipment feet. A car lift post, machine leg, or jack stand creates a devastating point load. A full shelving unit or a parked vehicle is a uniform load. Your floor plan must account for the worst-case point load scenario, as this is what causes immediate cracking and failure, not the total weight of your tools.
What’s the most common mistake when reinforcing an old floor?
Attempting to band-aid a bad base. Applying a thick coating or tiles over a cracked, heaving, or wet slab is wasted money. The only fix for a failed foundation is replacement. Reinforcement (like piers or footings) is only for slabs that are structurally sound but under-specified for the new load.
I have moisture in my slab. Does that eliminate all my flooring options?
No, but it dictates your choices. Do not use any adhesive-bound coating like epoxy. Your best bets are a floating interlocking tile system that allows vapor to pass through or a new, properly vapor-barriered concrete slab. Ignoring moisture guarantees coating delamination and equipment rust.
How should I prioritize my budget for this project?
Budget in this order: 1) Structural integrity (fix or pour the slab right), 2) Surface durability (choose the right coating or tile), 3) Aesthetics (color, flakes). Spending on a decorative finish over a weak slab is the costliest mistake you can make. Allocate at least 60% of your budget to the base structure.
The building department wasn’t helpful. What’s my next step?
Go straight to a licensed professional. Hire a local concrete contractor who specializes in shop floors or lift installations. They know the local soil conditions and practical code interpretations. For complex loads, a consultation with a structural engineer for a stamped drawing is non-negotiable and will clear any permit hurdles.
Making Your Choice for a Heavy-Duty Floor
The most important step is matching your floor’s rated strength to the actual weight of your tools and vehicles. Focus on your heaviest single point load, like a jack stand leg or a milling machine foot, not just the total weight spread out. Keep these points in mind: always verify the product’s PSI rating from the manufacturer, a proper subbase is non-negotiable for concrete, consider adding control joints for thicker slabs, and protect any floor with mats under heavy, stationary equipment.
Evan Gunther
Evan is a general contractor operating in Columbus, Ohio servicing, maintaining and building residential and commercial garages for over two decades. He has personally redeveloped over 100+ garages and installed and reinstalled over 230+ garage doors in his long tenure. When it comes to giving your garage a face lift or fixing common issues, Evan's the pro. Feel free to reach out to him and follow his Garage Log blog for expert, fact based advice.