
Is Your Garage Door Opener Safe for Kids and Pets?
That clicking sound and moving door can be a major attraction for little ones and animals, and it’s smart to worry about the risks. I’ve seen the close calls, and I’ll walk you through the exact features and habits that prevent them.
We will cover the non-negotiable safety features your opener must have, how to test and use them correctly, the house rules that create layers of protection, and what to do if your older system doesn’t measure up.
I base this advice on years of installing openers, like Chamberlain and LiftMaster models, and troubleshooting safety sensors in real family garages.
What Garage Door Safety Features Are Non-Negotiable?
From my years in the trade, I’ve seen what happens when these basic features fail or are ignored. Treating them as optional is not a risk worth taking for any family.
Photoelectric Safety Sensors (The “Eyes”)
These are the small plastic boxes mounted about six inches off the floor on either side of your garage door track. They create an invisible beam. If anything-a child’s toy, a bike wheel, a pet-breaks that beam while the door is closing, the door will immediately stop and reverse. Proper alignment is everything; I use a simple torpedo level and a quick-adjust wrench to get them perfectly square every time. Test them monthly by waving a broom handle through the beam during a close cycle; if the door doesn’t reverse, you need to clean the lenses, realign them, or call for service.
Automatic Reverse Function
This is your door’s second line of defense. It should reverse if the closing door hits any solid object. Federal law requires it to reverse on contact with a 1.5-inch tall object (like a standard 2×4 laid flat). I test this with a roll of paper towels. Close the door and slide the roll into the door’s path as it’s about three quarters of the way down. If the door touches the roll and keeps going, the force setting is dangerously high and must be adjusted immediately. On modern openers, like a Chamberlain with MyQ, you can often adjust this sensitivity through the app or a dial on the motor unit.
Safety Cables and Contained Springs
This is about containing catastrophic failure. The high-tension springs above your door are under immense pressure. If a standard extension spring (the long ones along the horizontal track) breaks, it can whip out with lethal force. Always ensure a safety cable is threaded through the center of any extension spring; this cable will contain the metal if it snaps. For newer doors with a torsion spring system (the single, large spring on a bar above the door), the spring is already contained within the bar. Never, under any circumstances, attempt to adjust these springs yourself.
Manual Release and Lock
That red cord with a handle hanging from your opener’s rail is your emergency release. Pulling it disengages the motor, letting you operate the door by hand during a power outage or opener failure. Every adult in the house should know how to find and use the manual release, and you should test its operation quarterly to ensure it moves freely. Once the door is manually closed, engage the built-in lock or use a sturdy, slide-bolt lock on the inside. I recommend the Master Lock sliding bar lock for its simplicity and strength.
Wall-Mounted Control Design
The button on your garage wall isn’t just a switch. By law, it must be a “hold-to-run” or “momentary contact” button. This means you have to continuously press it for the door to move; taking your finger off instantly stops the door. This design prevents a child from accidentally tapping it and then wandering into the path of a closing door. If your wall button is a simple “push on, push off” toggle, it’s outdated and unsafe. Replace it with a modern unit; the LiftMaster 883LM is a reliable, easy-to-install option I’ve used dozens of times.
How Do You Create a Family Safety Action Plan?
Safety features are tools, but your daily habits are the real protection. A plan makes those habits consistent for everyone.
The Golden Rule: Door Stays Shut
Make this your family’s mantra. The garage door should only be open for the minute or two it takes for a vehicle to enter or leave. An open garage door is an open invitation for a child or pet to dart out into the driveway or street, and it removes the primary barrier between them and the heavy, moving door. Never leave it open for ventilation or while you’re doing yard work on the other side of the house. Practice a secure close every time the door finishes its cycle, making sure it’s fully shut. A secure close minimizes gaps and keeps kids and pets safely inside.
Secure Remote and Opener Storage
Treat your remotes like car keys. Do not leave them in cars parked in the driveway where they can be easily grabbed. Inside the house, store them up high in a locked cabinet. I use a simple, small key lockbox mounted on a high shelf in my mudroom. For wireless keypad codes, change the default PIN and create a code your kids won’t guess, like a grandparent’s birthday year. Don’t use your street address or a simple sequence like 1-2-3-4.
Remove the Car Visor Clip When Parked
This is a simple, physical habit that prevents a huge risk. When you pull your car into the garage, take the remote out of the visor clip and put it in the locked cabinet. A child playing in the car can easily find the remote and press the button, potentially trapping someone or letting themselves out unsupervised. It takes five seconds and becomes second nature.
Have a Clear Safety Talk with Kids
Use plain language they understand. “The garage door is a big, heavy machine, not a toy. We never play near it when it’s moving. We never touch the buttons unless mom or dad says it’s okay.” Role-play what to do if a ball rolls under the door as it’s closing: they should let the door stop on its own from the safety sensors, not try to grab the ball. Make it a rule, not a suggestion.
Active Supervision is Mandatory
If the door is moving, your eyes should be on the door’s path until it completely stops. This is non-negotiable. Never assume the sensors will catch everything; always visually confirm the space is clear before you press the button, and watch the door through its entire cycle. This is the most effective thing you can do, and it costs nothing but a moment of your attention.
How to Test and Maintain Your Safety Systems Every Month
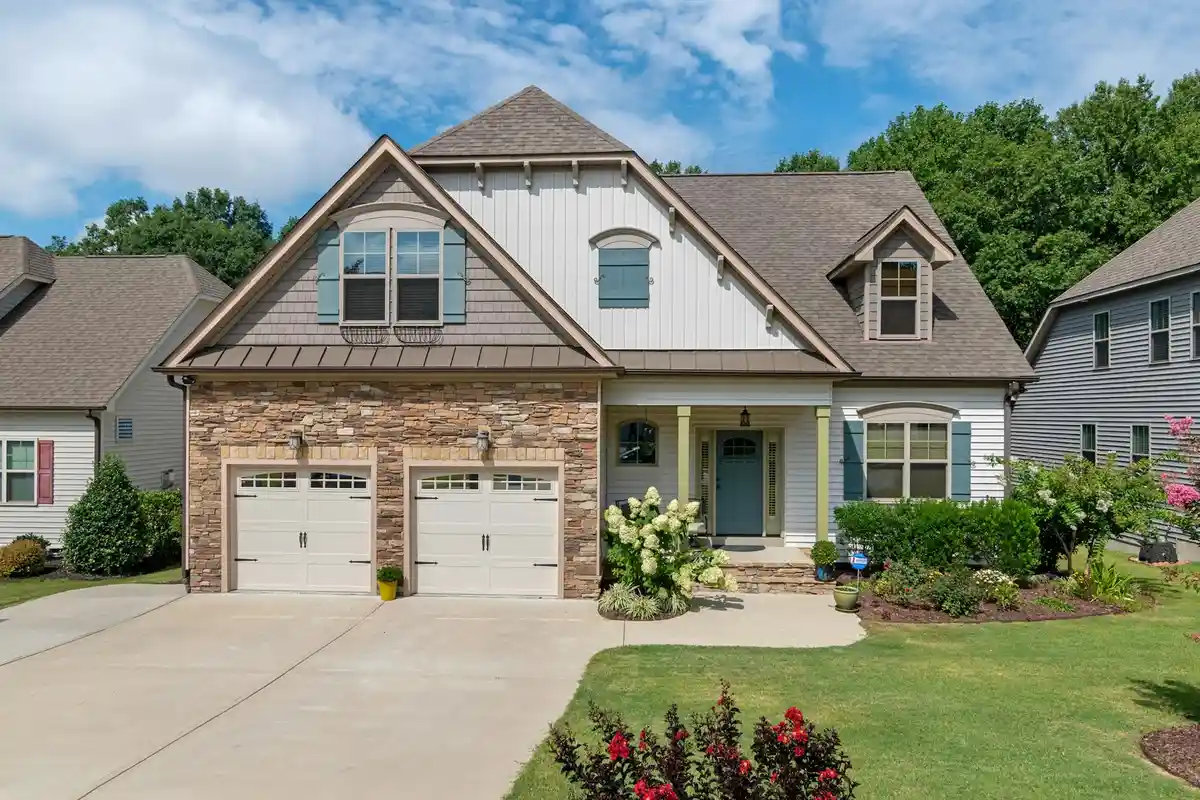
Your garage door’s safety features only protect your family if they actually work. A simple monthly check takes five minutes and gives you real peace of mind. To keep things reliable, establish a regular garage door service schedule so you can catch issues before they become bigger problems. A quick service now can save you from costly repairs later.
Set a reminder for the first Saturday morning of every month and run through this quick checklist.
- Test the Auto-Reverse (Rollback) Feature. Place a solid piece of 2×4 lumber flat on the floor directly under the center of the door. Press your wall button to close the door. The bottom of the door must immediately stop and reverse upward when it touches the wood. If it doesn’t reverse, your opener’s force setting is wrong or the safety system has failed. Do not use the door until it’s fixed.
- Check the Photo-Eye Sensor Alignment. Look at the small LED lights on each sensor, mounted about six inches off the floor on the door tracks. Both should have a solid, steady light (usually green). A blinking light means they are out of alignment. If one light is off completely, you likely have a wiring issue or a dead sensor.
- Clean the Sensor Lenses. Wipe the small plastic lenses on each sensor with a dry, soft cloth. Dust, spider webs, or pollen can block the invisible beam, tricking the door into thinking something is in the way.
- Inspect Cables and Wires. With the door closed, visually check the lift cables that run alongside the door. Look for any strands that are frayed, broken, or look like a worn-out rope. Also, check where the safety sensor wires plug into the opener motor unit to ensure they are secure.
Step-by-Step Fixes for Common Safety Component Issues
When a test fails, you can often fix it yourself with basic tools and a careful eye.
Realigning Misaligned Safety Sensors
A blinking sensor light is the most common issue I see. The two sensor eyes must point directly at each other. Here’s my method.
- Loosen the wing nut or mounting bolt on the back of the sensor that is blinking or has no light.
- The best tool for this is a small laser level. Point the laser from the “good” sensor with the steady light across to the misaligned one. Adjust the loose sensor until the laser dot hits the center of its lens.
- If you don’t have a laser level, sight down the front of the sensor like aiming a rifle. Look for the small “eye” on the opposite sensor and align it as best you can.
- Tighten the mounting bolt and check the lights. They should both be solid. Test the door’s close function.
Understanding Sensor Wiring
If a sensor is completely dead after cleaning and alignment, the wiring might be the culprit. Most systems use a simple two-wire setup.
Trace the thin, low-voltage wires from each sensor back to the opener motor unit. Look for cuts, chew marks from pests, or pinches where the door moves. The wires are usually white and white-with-a-black-stripe, or they use small push-in connectors that are color-coded (one white, one brown). A break in this wire will cause a failure.
Replacing a Faulty Safety Sensor
When a sensor is broken, replacement is straightforward. Buy a universal kit from a brand like Chamberlain or LiftMaster.
- Unplug the garage door opener.
- Disconnect the old sensor wires at the back of the sensor unit and at the opener head. Note which colored wire went where.
- Mount the new sensor bracket in the same spot.
- Run the new wires along the same path and connect them, matching the colors to the terminals on the new opener. The connection is simple: one wire to “white” and one to “white/black” or the equivalent colored terminal.
- Plug the opener back in. The new sensors should power on with solid lights once aligned.
Installing and Inspecting Safety Cables
For doors with torsion springs (the big spring over the door), safety containment cables are a must. They run through the center of the spring and are anchored at both ends.
If your spring breaks, this cable stops it from flying across the garage. To check them, look for severe rust, visible wear, or a cable that seems loose inside the spring. Replacement is a job for a professional, as it requires handling the spring under high tension.
Troubleshooting Sensor Problems
Sometimes the issue is temporary. If your door won’t close and the opener light is blinking, check these things first.
- Sun Glare: Direct afternoon sun can overwhelm the sensor’s receiver. Shade the sensor with your hand to test.
- Physical Obstruction: A kid’s bike handle, a rake, or even a firm bump can knock a sensor out of position. Just re-aim it.
- Dirty Lens: A quick wipe with your shirt can sometimes solve the problem instantly.
Working with Cables and Springs
It’s vital to know the difference between the lifting cable and the safety cable. The lifting cables are what the opener uses to lift the door; they attach to the bottom corners. The safety cable runs *through* the torsion spring to contain it if it snaps.
Never, under any circumstances, attempt to adjust or repair the high-tension springs yourself. The energy stored in a wound garage door spring is incredibly dangerous and can cause severe injury or death. If you hear a loud bang or your door suddenly becomes very heavy to lift, the spring has likely broken. Keep the door closed and call a certified garage door technician immediately for repairing broken garage door springs.
What Tools and Upgrades Make Your Garage Safer?

The right gear isn’t just about convenience, it builds a safer environment. I’ve seen simple upgrades prevent dozens of close calls over the years.
My top recommendation is a wireless exterior keypad. This gets the garage remote out of your car, where a child might find it. I installed a Chamberlain universal keypad for a neighbor last year. It runs on batteries, mounts right outside the door, and they use a personal PIN. It completely stopped their kids from playing with the car visor remote.
Adding motion-activated lighting is one of the most effective safety moves you can make. A well-lit path prevents trips and lets you see clearly before the door moves. I put in a Ring Floodlight Cam on my own garage. It turns on the moment anything moves towards the door, which is great for spotting a pet darting out at dusk. The camera part is a bonus.
Keeping your system in good shape requires a few reliable tools. Don’t overcomplicate it. Here’s my go-to kit for basic safety checks and maintenance:
- A 4-foot level. A door that’s out of plumb can derail. I use a Husky brand level for checking track alignment.
- A cordless drill/driver. Tightening loose bolts on brackets and hinges is constant. My DeWalt 20V gets the job done quickly.
- A set of combination wrenches and a socket set. For adjusting spring tension (on extension springs only, with caution) and securing hardware.
- Safety glasses. Always. Metal shavings or a snapped cable are no joke.
If your opener is from the 1990s or earlier, it might lack modern safety sensors. You don’t need a whole new opener. You can buy an aftermarket safety sensor kit, like the LiftMaster add-on, to give an old unit this critical feature. I’ve added these to several older Genie openers. It’s a straightforward wiring job that brings the door up to current safety standards. That means running the sensor wires and lining up the eye beams for proper sensing. When done correctly, the upgraded sensors provide the same safety you’d expect from a modern opener.
When Should You Absolutely Call a Professional?

Knowing your limits is the mark of a smart homeowner. Some jobs have too much risk for DIY.
Any work on high-tension springs is my hard line. If your door has torsion springs (the big spring mounted on a bar above the door), do not try to adjust or replace them yourself. The stored energy can cause severe injury. I’ve seen the aftermath of a spring letting go, and it’s not something you want in your garage. This is always a pro job.
Call a technician if the safety reversal tests fail after you’ve cleaned the sensor lenses and checked the alignment. If the door still won’t reverse on the basic test, the problem could be in the opener’s internal circuitry or travel limits. A pro has the diagnostic tools to sort it out safely.
Get professional help for any electrical issue beyond connecting a simple wire to a terminal screw. If you’re dealing with the house wiring in the opener receptacle, or if the motor unit seems to have a short, it’s time to stop. I’m comfortable with wiring, but I still call an electrician for anything upstream of the opener’s power cord.
Schedule a pro inspection if the door starts making new grinding, popping, or banging noises, or if it moves in a jerky or uneven way. These sounds are symptoms, and a trained ear can often diagnose the root cause-like a worn gear, failing roller, or damaged track-before it becomes a full failure. It’s cheaper to fix a noisy roller than to replace a door that jumped its track.
What Are the Legal Rules for Garage Door Safety?
Let’s get straight to the rules you must know. If your garage door opener was made after 1993, it has specific safety features required by law. This standard comes from the U.S. Consumer Product Safety Commission. The law mandates that all residential garage door openers must have an automatic reversal system that activates if the door hits something on the way down. It’s not a suggestion; it’s a federal requirement for every new opener sold. These rules are for automatic openers, and they matter whether you use a fully automatic model or a manual-override option. If you’re researching manual and automatic garage door openers, this baseline safety information helps you compare options.
This rule focuses on two main systems: photoelectric eyes and force sensitivity. The photoelectric sensors are those little plastic boxes near the floor on each side of the door. They create an invisible beam. If that beam is broken by a child, a pet, or a toy while the door is closing, the door must automatically stop and reverse. The force setting is the opener’s sense of touch. If the bottom of the door presses against even a small amount of resistance, like a bike tire or a leg, it must stop and go back up. You must test both monthly.
Testing Your Automatic Reversal Systems
Here’s how I test them in my own garage. You should do this too.
- With the door open, place a roll of paper towels or a block of wood on the floor directly under the door’s center.
- Press the wall button to close the door.
- When the door touches the object, it should immediately stop and reverse. If it doesn’t, your force setting needs adjustment.
- For the sensors, close the door halfway. Wave a broomstick through the beam path while the door is moving down. The door should instantly reverse.
If either test fails, stop using the automatic opener immediately and call a pro. Operating a non-compliant opener is a serious liability.
Your Liability and Homeowner’s Insurance
This is where many homeowners get a nasty surprise. If someone is injured by your garage door and your system isn’t up to code, you are personally responsible. Your homeowner’s insurance may deny the claim. I’ve seen this scenario play out. An old opener from the 1980s without sensors fails, a child gets hurt, and the family faces enormous medical bills because their insurer ruled the system was knowingly unsafe. Maintaining a code-compliant garage door system isn’t just about safety; it’s about protecting your family’s financial future. It’s as important as having working smoke alarms.
A Note on Torsion Springs and Safety Cables
While opener laws are federal, rules for the door itself can be local. Many areas now require safety cables on torsion springs. A torsion spring is the heavy coil above your door. If it breaks, it can snap violently. A steel safety cable runs through the center of the spring to contain the pieces if it fails. I won’t install a torsion system without one. Check your local building code. Even if it’s not required where you live, installing one is a smart, inexpensive upgrade. For this job, I use a coated cable kit from a brand like Clopay or Wayne Dalton to prevent rust.
Garage Door Safety Cables & Sensors: A Pro’s Maintenance FAQ
Is there a law requiring garage door safety sensors?
Yes. Federal law (UL 325) mandates automatic reversal systems on all residential openers manufactured after 1993. This includes both photoelectric sensors and force-sensitive reversal. If your older system lacks these features, it is not compliant and poses a significant safety and liability risk.
How do I install or replace a safety cable on my garage door springs?
For extension springs, thread a new, rated steel safety cable through the spring’s center and secure it to solid anchor points at both ends of the track. For torsion springs, this is strictly professional work due to the lethal tension involved. If a cable is rusty or damaged, call a technician.
My safety sensor wires are damaged. What’s the basic wiring diagram?
It’s a simple two-wire, low-voltage system. One wire runs from the “common” terminal on the opener motor to one sensor, and the other wire completes the circuit back to the “sensor” terminal. The key is ensuring the wires are intact, connected to matching terminals, and not pinched. Universal kits include a clear diagram. Some readers may encounter the topic ‘wire disable garage door sensors’ in related discussions; while it can be mentioned, disabling safety features is risky and not recommended. Always follow manufacturer guidelines and local codes.
What’s the fastest way to check safety sensor alignment?
Look at the LED lights on each sensor. Both should show a solid, steady light (often green). A blinking light on either unit means they are misaligned and must be adjusted until both lights are solid. This is your first and fastest diagnostic check every month.
When should I replace my garage door safety sensors entirely?
Replace them if they remain unresponsive after cleaning lenses, confirming wire integrity, and realigning. Physical damage, water intrusion, or a failed internal component are common causes. Use a universal replacement kit matched to your opener brand for a straightforward swap.
How often should I inspect the garage door safety cables and lifting cables?
Conduct a visual inspection monthly with the door closed. Look for fraying, rust, or broken strands on the lift cables (which raise the door) and the safety cable running through torsion springs. Any sign of wear demands immediate professional attention-do not wait for a failure.
Your Blueprint for Garage Door Safety
The most important safety feature is your own commitment to using and maintaining the technology correctly. Treat your garage door system with the same respect as a stove or a power tool. Make these four actions a regular part of your home routine. First, physically test the auto-reverse sensors every single month by placing a roll of paper towels in the door’s path. Second, keep all remote controls and wall consoles up high, out of sight and reach. Third, establish and enforce a simple family rule: never play near or run under a moving garage door or attempt to bypass the garage door sensor. Finally, don’t skip the annual professional tune-up, as a technician can spot worn parts you might miss.
Research and Related Sources
- 8 Important Garage Door Safety Tips – Danley’s Garages
- 523 Non-Reversing Automatic Garage Door Openers Are a …
- Safety Commission Publishes Final Rules For Automatic Garage Door Openers | CPSC.gov
- Garage Doors and Openers – InterNACHI®
- Garage Door Safety Features Guide – Creative Door Services
- Garage Door Opener Safety | The Genie Company