
Is Your Garage Ready to Become a Music Studio?
Turning your garage into a music studio is a fantastic project, but the noise and acoustics can seem overwhelming to get right.
We will cover real soundproofing you can do yourself, affordable acoustic treatment, and a no-fuss equipment setup that works.
I’ve handled the insulation, electrical, and finishing work for several garage conversions and know what holds up to daily use.
First, Assess Your Garage’s Sound Leaks and Weaknesses
Before you buy a single material, you need to know what you’re working with. I start every studio project the same way: with a thorough walk-through on a quiet evening.
The easiest first step is the “clap test.” Go into your garage, close the doors, and give a single, sharp clap. Listen hard. You’ll hear a quick, clean echo if the space is bare and boxy, but more importantly, you’ll hear where the sound escapes. Go outside and have a family member clap from inside. Walk around the perimeter of the garage, near the house walls, and listen. The spots where you can clearly hear the clap are your biggest weak points.
Next, do a physical gap check. I grab a good flashlight, like a Streamlight ProTac, and my trusty Zircon stud finder. I’m not looking for studs yet, I’m using it to identify hollow spots on the walls. Shine the light along all the edges:
- Garage Door: Look for daylight around the entire seal. Push on the panels; if they flex and rattle, they’ll leak sound badly.
- Service Door and Windows: Check the weatherstripping. If it’s brittle or missing, that’s a direct sound highway.
- Walls and Ceiling: Look for cracks, gaps around electrical outlets, and where the drywall meets the bottom plate. Pay special attention to any wall you share with your house.
Here’s a critical step many homeowners forget. You must understand your local noise ordinances before you plan your studio. Call your local building or code enforcement office. Ask about acceptable decibel levels and “quiet hours.” This isn’t just about being a good neighbor; it guides how much soundproofing you really need. If you can only play after 9 AM, you might not need a full radio-grade booth.
How to Soundproof Your Garage Walls, Door, and Ceiling
Soundproofing isn’t about magic foam. It’s a simple physics problem. You need to do three things: add mass to block sound, add damping to stop vibrations, and seal every single air gap. Sound travels through air, so a tiny gap makes all your other work pointless.
The most effective method I use for walls is building a decoupled interior wall. This means building a new stud wall inside your garage, but leaving a one-inch air gap between it and the existing wall. They don’t touch, so sound vibrations can’t easily travel through. Here’s my step-by-step:
- Find your existing studs with a finder and mark them.
- Frame a new wall using 2×4 lumber, but set the bottom plate about 1.5 inches in from the existing wall.
- Fill the cavities of this new wall with dense insulation (I’ll get to materials next).
- On the studio side, hang two layers of 5/8″ drywall. Between the layers, use a damping compound like Green Glue.
Your garage door is the weakest link. For a permanent soundproofing solution, I recommend replacing a single-layer door with an insulated steel model. Brands like Clopay or Amarr make doors with polyurethane foam cores that are great for both temperature and sound. If a new door isn’t in the budget, a heavy DIY blanket is a good temporary fix. I’ve used moving blankets hung from a conduit rod across the inside of the door. It’s not perfect, but it kills a lot of the high-end rattle and is cheap.
The ceiling is often overlooked. If you have living space above, you must treat it like a critical wall. Seal any penetrations for lights or wires with fire-rated acoustic sealant. For a truly quiet studio, consider adding a dropped ceiling with resilient channel and two layers of drywall below the existing joists, filled with insulation.
Sealing gaps is your final, non-negotiable step. After your walls and ceiling are up, go around with a tube of acoustical sealant (like OSI SC-175). Seal the perimeter where the drywall meets the floor and ceiling. Seal around every electrical box, light fixture, and pipe penetration. Install foam gaskets behind every outlet and switch plate cover. This meticulous sealing is what separates a pro job from a noisy DIY attempt.
What Are the Best and Most Cost-Effective Soundproofing Materials?
You don’t always need the most expensive product. You need the right product for a garage environment, which means considering durability, fire resistance, and cost.
For adding mass, you have two main choices. Mass-loaded vinyl (MLV) is a heavy, limp sheet you staple between layers. It’s effective but pricey and a pain to work with. I often find that a second layer of standard 5/8″ fire-code drywall with Green Glue in between gives you 90% of the benefit for less money and is much easier to install neatly. The Green Glue converts sound energy into tiny amounts of heat, damping the vibration between the panels.
Inside your walls, insulation is key for absorbing sound. Standard fiberglass batt insulation (like R-13) works okay and is very cost-effective. My go-to for garage studios is mineral wool insulation, like Rockwool Safe’n’Sound. It’s denser than fiberglass, absorbs more sound, is naturally fire-resistant, and doesn’t sag over time. It’s more expensive, but for a critical wall shared with your house, it’s worth the upgrade.
The cheap heroes of soundproofing are all about sealing. Don’t skip these:
- Weatherstripping: High-density foam tape for door jambs.
- Acoustic Sealant: A permanent, flexible caulk that never fully hardens.
- Outlet Gaskets: Foam gaskets that cost pennies each and block a major sound leak.
These tactics pair well with ways to improve garage door seal insulation for a more complete solution. Upgrading the garage door seal can dramatically reduce sound leaks and improve overall comfort.
In a garage, you must prioritize fire-resistant materials. Use fire-code drywall (Type X), fire-rated sealant, and non-combustible insulation like mineral wool. This protects your studio, your home, and is often required by code for a garage living space, especially for garage fire code safety requirements.
The Gearhead’s Soundproofing Checklist

Think of soundproofing like stopping water leaks. Your goal is to seal every gap and add heavy, dense layers that sound waves can’t easily vibrate through. This is a project where material choice is everything. If you’re turning a garage into a soundproof home gym or workshop, these principles will guide your setup. Here is my shop-tested shopping list.
Acoustic Sealant (like OSI SC-175)
Regular caulk dries hard and can crack, letting sound through. Acoustic sealant stays flexible forever. Use a tube of OSI SC-175 or a similar non-hardening sealant to fill every single gap, especially where the drywall meets the floor, ceiling, and corners. I run a fat bead along the bottom plate before the drywall even goes up. It’s messy, but it’s the best $10 you’ll spend.
Weatherstripping for Door Bottoms and Jambs
Your garage door is the biggest weak spot. A standard door seal keeps out weather, not sound. You need compression-style weatherstripping with a dense rubber bulb. For the bottom, I prefer an adjustable aluminum threshold with a heavy-duty vinyl seal. It takes a little fussing to get the height right, but the seal is complete when the door closes. To finish the seal, consider installing garage door seals and thresholds along the bottom edge. This upgrade helps ensure a tight, draft-free fit when the door is closed.
Mass Loaded Vinyl (MLV) Rolls
This is your secret weapon. MLV is a limp, dense sheet you hang like wallpaper. It adds mass without much thickness. I use 1 lb per square foot MLV, stapling it to the studs before hanging drywall. The key is to hang it loosely, never stretched tight, so it can dampen vibrations instead of transmitting them. Wear gloves, the edges are sharp.
Green Glue Compound and Tubes
Green Glue is a viscoelastic damping compound. In simple terms, it turns sound energy into a tiny amount of heat. You apply it in a serpentine pattern between two layers of drywall. I use their tubes with a standard caulk gun. Don’t skimp. A single tube covers about 48 square feet. It’s not cheap, but in my tests, it made a bigger difference than just adding a second drywall layer alone.
5/8″ Fire-Rated Drywall
Always use 5/8-inch Type X drywall for studio walls. It’s heavier and stiffer than 1/2-inch, which means it vibrates less. The fire rating is a smart safety bonus for a garage. When you screw it off, space screws every 12 inches on the edges and every 16 inches in the field. Sink the screw heads just below the paper without breaking it. A drywall dimpler bit is worth buying for this.
Resilient Sound Isolation Clips
For a serious ceiling or if you’re framing new interior walls, these clips are the pro move. You screw the metal clip to the stud or joist, then snap a metal channel into it. You hang your drywall from the channel. This creates a physical break, so sound vibrations in the structure can’t jump straight into your drywall. They add cost and labor, but for stopping footstep noise from above, they are unmatched.
Acoustic Treatment: Controlling Sound Inside Your Studio
Soundproofing keeps sound from escaping the room. Acoustic treatment manages how sound behaves inside the room. You need both. A perfectly sealed garage will have terrible acoustics-sound will bounce around like a ping-pong ball. You can read more about this in Garage Acoustics vs. Soundproofing.
The two biggest problems in a rectangular garage are flutter echo and bass buildup. Clap your hands sharply. Hear that fast, ringing “zing” sound? That’s flutter echo between parallel walls. Bass frequencies gather and boom in the corners, muddying your mix.
Simple DIY Broadband Absorption Panels
You don’t need to buy expensive foam. Build panels that actually work. Here’s my method.
- Build a simple frame from 1×4 pine. A 2′ x 4′ panel is a great starting size.
- Fill the frame with rigid mineral wool insulation, like Owens Corning 703 or Rockwool Rockboard. Avoid fluffy pink insulation; it doesn’t absorb as well. Wear a mask and gloves when handling it.
- Wrap the frame in a breathable fabric. I use Guilford of Maine FR701 because it’s acoustically transparent and fire-retardant. Burlap from a fabric store works in a pinch. Do not use plastic-backed fabric or thick canvas; it will reflect sound.
- Staple the fabric tightly to the back of the frame. Leave the back open-don’t seal it with wood or cardboard.
Hang these panels with a French cleat or picture wire so they stand off the wall by an inch or two; this improves bass absorption.
Where to Place Your Acoustic Panels
Start with your first reflection points. Sit in your mixing chair and have a friend slide a mirror along the side wall. When you can see your studio monitor in the mirror from your seat, that’s a first reflection point. Hang a panel there. Do this for both side walls and the ceiling above you. Then, place thicker panels or dedicated bass traps in the corners where the walls meet, and where the wall meets the ceiling.
How to Set Up Your Studio Monitors and Listening Position
Great speakers in a bad spot will lie to you. Your goal is a clear, accurate picture of your sound.
Follow the equilateral triangle rule. Position your two studio monitors and your head to form an equal-sided triangle. If you’re 4 feet from each speaker, the speakers should be about 4 feet apart from each other. Your head should be at the third point.
Get the speakers off your desk. Desktop stands or isolation pads like the Auralex MoPADs decouple the speaker from the surface, stopping the desk from becoming a resonating box. This tightens up the bass immediately.
Aim the monitors so the high-frequency tweeters point directly at your ears. Most monitors are designed for this. Finally, avoid placing the back of the speaker flush against a wall. This exaggerates bass. If you must, use the monitor’s built-in boundary EQ correction if it has one.
Setting Up Your Garage Studio Equipment and Power

Once your space is acoustically treated, it’s time to bring in the gear. Your core setup will likely include a computer with an audio interface, studio monitor speakers, one or two microphones, headphones, and of course, all the cables to connect them.
The single best electrical upgrade you can make is installing a dedicated 20-amp circuit just for your studio equipment. I’ve tried to run a full setup on shared garage circuits before, and the constant humming and popping from the fridge or power tools is a nightmare. A clean, dedicated line prevents that noise and protects against overloads.
Cable management is a safety and sanity issue. You cannot have a tangle of wires across a floor where you might walk with a guitar or a mic stand.
- Plan your layout so your computer, interface, and monitors are on one main workstation.
- Run cables along the wall, not the floor. I use plastic J-channels or wire raceways you can find at any hardware store. They snap onto the wall and hide everything neatly.
- For any cable that must cross a walkway, secure it firmly against the floor with flat, rubber cord covers. The last thing you need is to trip and pull your expensive monitors off the desk.
Plug all your sensitive electronics into a quality power conditioner or a surge protector strip with good noise filtration. I think of it like a water filter for electricity. It smooths out dirty power and shields your gear from voltage spikes.
Recommended Studio Gear and Climate Control Products
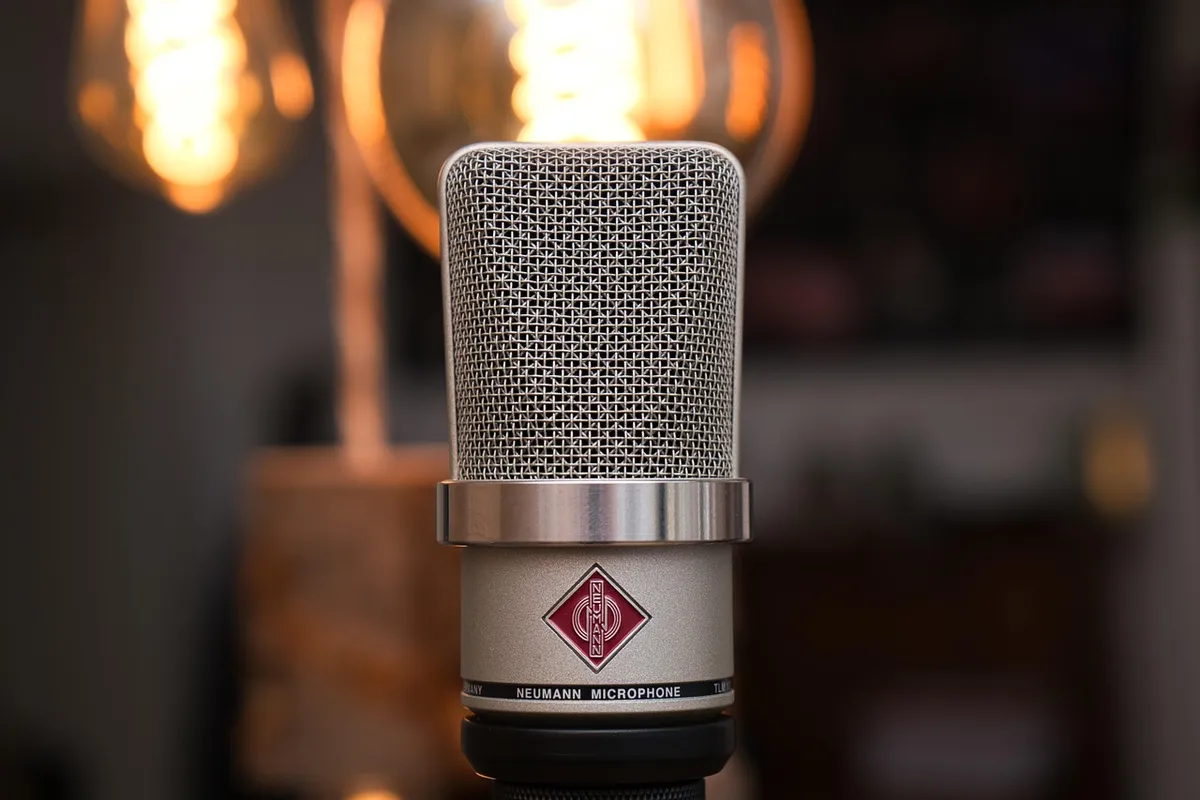
You don’t need the most expensive brands to get great sound, but you do need the right type of gear for the job. For a home studio, I generally recommend starting with a large-diaphragm condenser microphone for vocals and acoustic instruments. They are sensitive and capture a lot of detail.
Your audio interface is the heart of the system. Get one with enough inputs for your microphones and instruments. Look for models with built-in preamps that get good reviews for clean sound.
Do not place your studio monitor speakers directly on your desk or shelf. The vibrations will muddy the sound. Instead, get a pair of studio monitor isolation pads. They are dense foam platforms that decouple the speakers from the surface. This simple $40 investment makes a huge difference in what you hear.
Garages have extreme climates. A concrete floor is cold, and the space can swing from damp to arid.
- For consistent temperature, a mini-split heat pump system is the professional’s choice because it’s quiet and efficient. If that’s out of budget, a heavy-duty portable air conditioner and a separate ceramic heater work, but they are noisier.
- Hang a simple hygrometer on the wall. You want to keep humidity between 40% and 60% to protect your gear and instruments. If it’s too dry, get a small humidifier; too damp, use a dehumidifier.
- Your feet and your sound will thank you for good flooring. Interlocking rubber tiles are my top pick. They’re affordable, soften the hard concrete, and help with sound reflection. A very thick, dense area rug is a good second option if you’re on a tighter budget.
Finally, if you haven’t already, upgrade to insulated garage door panels. They are the biggest weak spot for both temperature and noise. It’s a straightforward project that pays off every single day you use the studio.
How to Control Temperature and Humidity in a Garage Studio
Your garage is probably the worst room in your house for stable climate. I see it all the time. The bare concrete slab acts like a giant sponge for ground moisture, and that big metal door has almost no insulation. This creates a space where temperature and humidity swing wildly between day and night. For musical gear, that’s a slow death sentence.
Seal and Insulate Your Space First
Before you plug in a single piece of gear, you need to build a stable box. Start with the garage door, as it’s your biggest weak point. I’ve had good results with the Foam It Green kit for DIY door insulation; it expands to fill the cavities and cuts down noise and thermal transfer. For walls, I prefer the simplicity of faced fiberglass batt insulation (like Owens Corning R-13) because it has a built-in vapor barrier. Wear a respirator and gloves when handling it.
Don’t forget the floor. A concrete sealer is a must. I use Ghostshield Siloxa-Tek 8500 because it penetrates deep and doesn’t leave a slippery film. For more comfort and moisture blocking, consider floating an interlocking floor mat system on top. I’ve used RaceDeck tiles for years; they keep gear off the cold concrete and make cleaning spills easy.
Choose Your Climate Control Gear Wisely
After insulation, you need active control. For humidity, a simple dehumidifier is non-negotiable in most climates. I run a Frigidaire 50-Pint model in my own shop. Set it to maintain 40-50% relative humidity. For temperature, a portable AC/heat pump unit is your best bet. I steer clients toward dual-hose models, like some from Whynter, because they are more efficient. They exhaust hot air outside without pulling your conditioned studio air out with it. This is especially important when dealing with climate control in garages for temperature and humidity.
Letting condensation form on a microphone diaphragm or inside a guitar’s control cavity is a fast track to costly repairs and ruined recordings. Keep your space consistent, and you’ll protect your investment.
Your Monthly Music Studio Maintenance and Cleaning Routine
Treat your garage studio like a piece of fine equipment. A little regular care prevents big problems and keeps your space sounding its best. Here’s the schedule I follow in my own setup.
Weekly Tasks (15 Minutes)
Dust is the enemy of sound absorption and electronics.
- Use a dry microfiber cloth to wipe down all hard surfaces: desk, stands, monitor tops.
- Gently dust the faces of your acoustic panels and bass traps. Don’t press hard, just skim the surface to keep the material porous.
Monthly Tasks (30 Minutes)
This is your connection and deep-clean check.
- Go to every cable connection-XLR, ¼-inch, speaker cables-and gently push them in to ensure they are snug. Loose connections cause pops and signal loss.
- Vacuum the floor thoroughly. A shop vacuum works, but I prefer a canister vac with a HEPA filter to avoid kicking dust back into the air where it settles on your gear.
Seasonal Tasks (Every 3-4 Months)
Focus on the integrity of your studio’s shell.
- Inspect the seals around your garage door, man door, and any windows. Look for cracks, gaps, or daylight. I use a candle to check for drafts; a flickering flame shows you where to add weatherstripping.
- Press the “TEST” button on your surge protector power strip. If it doesn’t click off, replace it immediately. This simple test has saved my gear more than once.
Yearly Tasks (One Afternoon)
This is the tighten-up and refresh.
- Grab a Phillips head screwdriver and check every screw on your desk, rack, speaker stands, and panel frames. Vibration from speakers and foot traffic can loosen them over time.
- Power down and unplug your studio monitors and computer screens. Wipe them down with a slightly damp microfiber cloth (water only) to remove fingerprints and smudges. This regular maintenance isn’t about being fussy; it’s about preventing the slow creep of dust and loose connections that degrade your sound and your gear’s lifespan.
FAQ: Pro Tips for Your Garage Music Studio
What’s the real difference between soundproofing and acoustic treatment?
Soundproofing blocks sound from escaping or entering by sealing gaps and adding mass, like with drywall and weatherstripping. Garage soundproofing often involves similar techniques. Acoustic treatment manages internal sound reflections using panels and bass traps to clean up your mix. Always soundproof first, then treat acoustics-they solve different problems.
What flooring holds up best in a garage studio?
Interlocking rubber tiles are my top recommendation; they dampen noise, resist moisture from concrete, and are durable for heavy gear. Avoid wall-to-wall carpet-it traps humidity and molds. If budget is tight, use a thick, low-pile area rug with an anti-slip pad underneath.
What’s a cost-effective first step for soundproofing?
Seal all air leaks with acoustic caulk and install foam outlet gaskets-these are cheap and tackle major weak points. Next, hang heavy moving blankets over the garage door to reduce rattle; it’s a temporary but impactful fix that costs under $50.
How should I manage cables to prevent hazards?
Route cables along walls with plastic raceways or J-channels to keep them off the floor and avoid tripping. For power, plug all studio electronics into a quality surge protector on a dedicated circuit, and check connections monthly for looseness or wear.
Final Steps for Your Garage Studio
Getting your garage ready for music means treating it like a construction project first and a creative space second. Remember these three things as you finish your project. Seal every air gap you can find-sound escapes like water through a crack. Treat your room’s acoustics after the soundproofing is done; adding foam to a noisy room is a waste. Finally, run your gear on a dedicated, clean power circuit to protect your investment from surges and hum.