
How Do I Calculate the Right BTU for My Garage Heater?
Picking a garage heater that’s too small leaves you shivering, while one that’s too large wastes energy and money. I’ll help you find the sweet spot with a straightforward calculation.
This article breaks down the process into actionable steps, covering how to measure your garage’s dimensions, assess its insulation, factor in your local climate, and use a simple BTU formula.
As a garage care pro who has installed and serviced countless heaters, I rely on this method to ensure my clients stay warm and efficient.
The Garage Pro’s BTU Formula: It’s More Than Just a Number
Think of a BTU (British Thermal Unit) like a matchstick. Lighting one match gives off a tiny, specific amount of heat. One BTU is that amount. A heater rated for 50,000 BTUs is like lighting 50,000 matches all at once, every hour. Your goal isn’t to buy the biggest “box of matches” you can find. You want one that’s just right for your space. An oversized heater will cycle on and off too quickly, wearing itself out, wasting fuel, and never properly dehumidifying the air. An undersized one will run constantly and never get warm.
The right heater is powerful enough to reach your desired temperature efficiently without being wasteful.
Forget the old “just multiply square feet by 30” rule. It’s too generic. I use a tailored formula that accounts for your actual garage. Here’s the core of it:
(Your Garage’s Square Footage x Your Local Climate Factor) x Your Insulation Quality x Your Ceiling Height Factor = Your Base BTU Need.
We’ll fill in each part together.
Step 1: Measure Your Garage’s True Size
This seems obvious, but I’ve seen too many estimates based on a guess. You need real numbers. Grab a 25-foot tape measure, or better yet, a laser distance measurer like a Bosch GLM 20. I use a laser for everything now because one person can do it quickly and accurately.
Here’s how you calculate the square footage of your garage:
- Clear any big items away from the walls.
- Measure the length of your garage at the floor, from the interior of one side wall to the other.
- Measure the width from the interior of the front wall (where the door is) to the interior of the back wall.
- Multiply the length by the width. That’s your floor area in square feet.
For a quick reference: a common 24-foot by 24-foot two-car garage is 576 square feet. A deeper 24-foot by 30-foot garage is 720 square feet. These figures tie directly into garage space square footage, helping you gauge what will fit. Use this mental image as you explore options and compare layouts. Write your number down.
Don’t Forget the Air Volume: Accounting for Ceiling Height
Heat warms air, and your garage is a box full of it. A garage with 12-foot cathedral ceilings holds nearly 50% more air to heat than one with standard 8-foot ceilings. If you ignore this, your heater will struggle.
A higher ceiling means you’re heating a larger volume of air, which requires a more powerful heater.
Here’s a simple method I use to account for ceiling height in my BTU calculation. First, measure from the floor to the ceiling. If you have a sloped or vaulted ceiling, take an average. The standard baseline is 8 feet.
- For an 8-foot ceiling, your factor is 1.0 (we multiply your BTU need by 1, meaning no change).
- For a 9-foot ceiling, add about 12%. Your factor is 1.12.
- For a 10-foot ceiling, add about 24%. Your factor is 1.24.
- For a 12-foot ceiling, add about 48%. Your factor is 1.48.
You can use this rule: for every foot over 8 feet, multiply your final BTU estimate by an extra 1.12. We’ll apply this factor at the very end of our calculation. Jot down your ceiling height factor now.
Step 2: Apply Your Local Climate and Garage Construction

Now we take your garage’s square footage and adjust it based on how it’s built and where you live. Think of your garage as a bucket. The size of the bucket is your square footage. How fast heat pours out of it depends on your walls and the weather outside.
For a simple start, we can group climates into three types. Your starting BTU per square foot depends entirely on how harsh your winters are.
- Mild Climate: Winters are short, with lows rarely dropping below 20°F. Think of the Pacific Northwest or the Mid-Atlantic. Start with 30 BTUs per square foot.
- Cold Climate: You have real winters with consistent freezing temps. This covers much of the Midwest and Northeast. Start with 45 BTUs per square foot.
- Very Cold Climate: Sub-zero temperatures are a regular part of your winter. Northern states like Minnesota, North Dakota, or high mountain regions. Start with 60 BTUs per square foot.
The Insulation Factor: Your Biggest Energy Saver (or Drain)
This is the single most important adjustment. Insulation is like a winter coat for your garage. Without it, your heater works overtime. I’ve used an infrared thermometer to scan walls in uninsulated garages, and on a 30°F day, the inside wall surface can be just a few degrees warmer than outside. All your heat is rushing right out.
Garages typically fall into one of three conditions. Be honest with your assessment.
- Fully Insulated: Insulation in all walls and the ceiling, with a proper vapor barrier. This is ideal. Use the base BTU number from the climate zone above. No adjustment needed.
- Partially Insulated (Walls Only): This is common in many homes. The walls have batting, but the ceiling (the door to your attic) is wide open, letting massive amounts of heat escape upwards. For this setup, multiply your base BTU requirement by 1.25.
- Uninsulated: Bare studs and drywall or concrete block. Your garage is essentially wearing a t-shirt in a snowstorm. For an uninsulated space, multiply your base BTU requirement by 1.5. This extra power is not a luxury, it’s what you need to overcome constant heat loss.
Attached vs. Detached: The Thermal Neighbor Effect
An attached garage shares a wall with your warm house. This matters. That shared wall acts like a mild, passive heater, often keeping the garage 10-15 degrees warmer than the outside air before you even turn on your unit. A detached garage stands alone in the cold.
If your attached garage is well-sealed from the house (with a solid, weather-stripped door), you can safely reduce your total BTU need by about 10%. I only recommend this reduction if the door between your house and garage is modern and tight. If it’s an old, drafty door, ignore this reduction, you’re not getting much benefit.
For a detached garage, make no reduction. It has no thermal neighbor to borrow from.
Garage Doors and Windows: The Big Leaks
Your garage door is the largest, weakest link in your thermal envelope. An old, uninsulated single-layer door might as well be a screen. Insulating your garage door with a modern, insulated steel door with tight seals changes the game completely.
Large windows also let heat out fast. Here’s my rule of thumb from doing hundreds of estimates.
- If you have a modern, insulated garage door (like a Clopay or Amarr insulated model) with good bottom seals, no adjustment is needed.
- If you have an older, uninsulated door or a door with visible gaps letting in light, add 10% to 15% to your total BTU requirement. You’re heating the great outdoors.
- If you have multiple large, single-pane windows, add another 5% to your total. Consider using shrink film insulation kits on them in winter; I use them in my own shop and they work.
Double-check the perimeter of your garage door with a flashlight at night. Have someone shine it from outside while you stand inside with the lights off. Any streams of light are streams of lost heat.
Step 3: Run the Numbers and Pick Your Heater Type
Now, let’s make this real with some math. I use the same basic formula for every garage I assess.
The formula is: Garage Volume (in cubic feet) x Temperature Rise (in °F) x Insulation Factor = Estimated BTU Requirement.
A Real-World Calculation for a 2-Car Garage
Let’s walk through a standard 24′ x 24′ garage with an 8-foot ceiling. This is the size I work on most often when people ask me “how many BTU for a 2 car garage”.
- Find Your Volume: Multiply Length x Width x Height. 24 ft x 24 ft x 8 ft = 4,608 cubic feet.
- Determine Your Temperature Rise: This is the difference between how cold it gets outside and how warm you want inside. If it’s 30°F outside and you want 65°F in the garage, your rise is 35°F.
- Apply Your Insulation Factor:
- Well-Insulated (finished walls/ceiling, insulated door): Use 0.5
- Moderately Insulated (maybe just insulated walls): Use 1.0
- Poorly Insulated (bare studs, uninsulated metal door): Use 1.5
For our example, let’s say it’s a moderately insulated garage in a 35°F climate. Plug it all in:
4,608 cu ft x 35°F x 1.0 = 161,280 BTU.
That 161,280 BTU is your starting point. I always recommend rounding up to the next common heater size, like a 75,000 BTU or 80,000 BTU unit for gas, or a 5,000-watt (about 17,000 BTU) electric heater. This gives you a buffer for extra cold days and prevents the heater from running non-stop.
Choosing Your Heater: Forced-Air vs. Infrared
Once you have your BTU number, the next choice is heater type. I’ve installed and used them all.
Natural Gas or Propane Forced-Air Heaters (like from Mr. Heater or Modine) are my go-to for a fully heated workspace. They blast warm air quickly, making them great for raising the temperature of the whole garage from cold. You need proper venting for combustion gases, so professional installation is non-negotiable for safety. For propane units, safety tips cover proper ventilation, CO detectors, fuel storage, and maintaining clearances around the heater. They’re best for garages where you spend hours working and want consistent, whole-room heat. These precautions help prevent hazards and ensure dependable operation.
Electric Forced-Air Heaters (such as the Dayton G73) are fantastic for smaller, well-insulated spaces or as a supplemental heat source. I use a 5,000-watt ceiling-mounted unit in my own insulated workshop. The installation is simpler (no venting, just adequate wiring), but operating costs can be high if you’re heating a large, drafty area all winter.
Infrared Tube Heaters (brands like Dettson or Schwank) work differently. They heat objects and people directly, like sunshine, rather than the air. In my experience, this makes them ideal for a “quick warm-up” scenario, like taking the chill off a car or warming you while you’re at a workbench, but the air in the room may still feel cool. They are very efficient for spot heating but less effective for uniformly heating a cluttered space where objects block the rays.
What About Cooling? A Quick Note on Garage AC BTU Needs
Heating and cooling BTU needs are different animals. A unit sized for heat will be massively overpowered for cooling.
For air conditioning, you size for the square footage, not the volume, and the BTU requirements are much lower. The heat from the sun on the roof and walls is the main driver for cooling load.
Here’s the rule of thumb I follow: for a typical garage, you need about 25-30 BTU of cooling capacity per square foot. For that same 24′ x 24′ (576 sq ft) two-car garage, the math is simple: 576 sq ft x 30 = 17,280 BTU.
You would look for an 18,000 BTU portable or mini-split air conditioner for a garage that size, which is less than half the BTU capacity you’d need for heating in a cold climate. This is a key consideration in garage climate control air conditioning, where proper sizing affects comfort and humidity. Always err on the side of slightly undersizing an AC unit rather than oversizing; an oversized unit will cool too quickly without removing enough humidity, leaving the space cold and damp.
The Gearhead’s Checklist: Tools for the Job
You can’t hit the target if you don’t know where you’re aiming. Before you run any numbers, grab these four tools. I keep them in a bucket in my own shop because I use them for almost every project.
Tape Measure or Laser Distance Measurer
Guessing your garage size is a great way to waste money on a heater that’s either too weak or overpowered. You need exact measurements. For years, I used a standard 25-foot Stanley PowerLock tape measure. It works, but crawling around on the floor to measure ceiling height is a pain.
Now, I use a Bosch Blaze GLM 20 laser measurer. I can get length, width, and height in about 30 seconds from one spot in the center of the garage. The laser gives you a perfect, squarer measurement than a tape can, which is critical for an accurate cubic volume calculation. If you’re buying a tool for this job, the laser is worth it.
Notepad and Calculator
Don’t try to do this math in your head. I use a simple grid notepad to write down my measurements and the results of each calculation step. For the math itself, the calculator app on your phone is fine. The key is writing it all down so you can double-check your work.
I once messed up a decimal point and nearly ordered a 75,000 BTU heater for a small one-car garage. My notes saved me from that expensive mistake. Your notepad is your project’s paper trail, and it’s the simplest way to catch errors before they cost you.
Flashlight
This isn’t for seeing in a dark garage. A good, bright flashlight is for inspecting your insulation. Turn off the main lights and use the flashlight at a shallow angle along your walls and ceiling. You’re looking for gaps, tears, or compressed batting.
In my last house, this trick showed me a whole section above the garage door where the insulation had slumped down behind the drywall. Shining a light across the surface reveals problems you’d never see with overhead lighting, telling you if you need to factor in major heat loss. A headlamp leaves your hands free if you need to pull back a corner of insulation to look deeper.
Incense Stick or Lighter
Your garage door and man-door are the biggest sources of drafts. A simple air leak test shows you where your heat will escape. Light an incense stick or a lighter and slowly move it around the seals of all doors and windows on a windy day.
Watch the smoke or flame. If it flickers or gets pulled sideways, you’ve found a leak. I use this method every fall. Finding and sealing these drafts with weatherstripping is cheaper than buying a bigger heater to compensate for the loss. It’s the single most effective efficiency upgrade you can do first.
Installation and Safety: Non-Negotiables
You’ve done the math and picked out the perfect heater. Now, the job is to install it right. I’ve fixed enough botched DIY heater jobs to tell you that this is where you can’t cut corners. Getting the BTU calculation right is pointless if the installation creates a fire or health hazard.
Power and Fuel: Get a Pro on Your Team
For electric heaters, you must verify your circuit can handle the load. A 240-volt heater pulling 30 amps needs a dedicated breaker and the correct gauge wiring. I’ve seen melted outlets from folks trying to plug a 5,000-watt unit into a standard 120V circuit. It’s a mess.
For natural gas or propane units, this is a hard stop. You absolutely need a licensed professional to handle the gas line hook-up and venting. I don’t care how handy you are. A small leak you can’t smell can fill your garage with explosive gas. I have a local plumber I call for every gas job because his work is always to code and he pressure tests every connection. It’s worth the peace of mind.
Clearance is Your Best Friend
Every heater manual has a page listing clearance distances. This tells you how far the unit must be from walls, your ceiling, and anything that can burn. I keep a tape measure in my toolbox just for this.
- Drywall and studs are combustible.
- That stack of cardboard boxes is combustible.
- Your lumber storage is combustible.
Respect these distances. I once helped a neighbor move his new propane heater because he had it 6 inches from a wooden shelf. The manual said 36 inches. That’s a big difference. Treat the clearance zone around the heater as a sacred, empty space for safety.
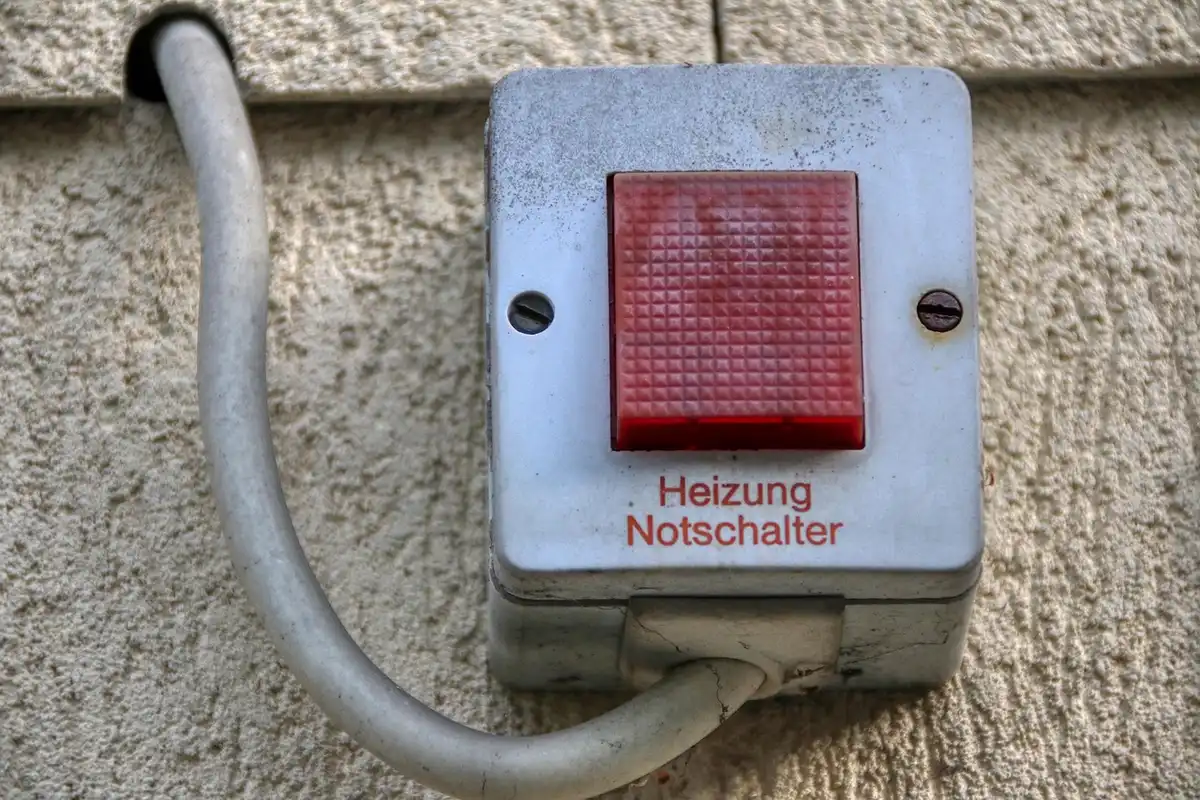
The Carbon Monoxide Detector is Not Optional
If your heater burns fuel (natural gas, propane, kerosene), it produces carbon monoxide. This gas is silent, invisible, and deadly. I mount a battery-powered CO detector right in my garage. I use a Kidde unit because it’s reliable and has a digital readout.
Test it monthly when you test your smoke alarms. Installing a carbon monoxide detector is the simplest, most critical step you can take to protect your family when using a fuel-fired garage heater. It’s a ten-minute job that could save lives.
Maintenance & Cleaning Routine: Keep the Heat Flowing
Buying the right heater is only half the job. To keep it running safely and efficiently for years, you need a simple but consistent maintenance plan. I treat my garage heater like my truck. A little regular attention prevents major, expensive breakdowns when I need it most.
Annual Pre-Season Inspection: Your Fall Tune-Up
I do this every September before the cold hits. It gives me time to order any replacement parts. Turn the heater’s power off completely at the circuit breaker before you start.
- Check for Blockages: Use a bright flashlight to look inside the air intake and exhaust vents on the outside wall of your garage. I’ve pulled out everything from bird nests to leaves packed in there. A simple shop vacuum with a hose attachment cleans most debris.
- Clean Air Filters on Forced-Air Units: This is the single biggest efficiency killer I see. For a common unit like a Mr. Heater Big Maxx, the filter slides out. Tap it gently to dislodge dust, or wash it with mild soap and water if it’s the reusable type. Let it dry completely before reinstalling.
- Inspect Burners and Vents: On natural gas or propane heaters, carefully look at the burner assembly. You’re looking for heavy rust, cracks, or any spider webs (spiders love the smell of gas). Use a soft brush, like a new paintbrush, to gently clean the burner ports. If you see anything that looks damaged or out of place, call a professional. This isn’t a place for guessing.
Monthly Check During Heating Season
This takes two minutes but can save you a headache. Once a month when the heater is running regularly:
- Listen for Unusual Noises: A clean heater should have a steady hum or rumble. New rattling, buzzing, or screeching sounds often mean something is loose, a fan blade is hitting a casing, or a bearing is failing. Catching it early is easier on your wallet.
- Ensure Vents are Unobstructed: Do a quick visual. Make sure snow, trash cans, or stored items haven’t drifted within three feet of the exterior vent. I keep a broom handy to brush snow away from my vent after a big storm.
General Garage Upkeep: The Support System
Your heater can only do so much if the garage itself is leaking heat.
- Maintain Door Seals: Feel for drafts around your garage door. A cheap but effective upgrade is a new bottom seal. I prefer the vinyl bulb-type seals from a brand like M-D Building Products. They’re durable and create a tight seal against the floor. Replacing worn weatherstripping on the sides and top is just as important.
- Keep Area Around Heater Clear: This is a major fire and safety code rule. Maintain at least a 3-foot clearance in front of the heater. I use floor marking tape to create a clear zone on the floor. Never store boxes, paint thinners, or gasoline anywhere near the unit.
Recommended Products
Once you have your heater, the job isn’t done. Running it efficiently and safely is what turns a cold garage into a useful space you can afford to heat. For energy efficient garage heating, it’s essential to pair the heater with smart controls and good insulation. These are the three add-ons I install in every heated garage I work on.
Category: Programmable Thermostats
A basic dial thermostat will turn your heater on and off, but that’s about it. To truly manage run-time and save money, a programmable thermostat is non-negotiable. I learned this the hard way heating my own shop for a season with a cheap one and watching my utility bill climb.
I install and recommend the Mysa Smart Thermostat for garages. It’s designed for high-voltage electric heaters, which most garage units are. Here’s why I prefer it over a basic hardware store model:
- You can set a schedule so the garage is only warm when you need it, like on weekday mornings or Saturday afternoons for projects.
- The phone app lets you turn it on from the house so it’s already comfortable when you walk in.
- It shows you your energy usage, which helps you understand the real cost of heating the space.
The installation is straightforward if you’re comfortable working with electrical wiring. Turn off the power at the breaker, label your wires, and connect them to the Mysa’s labeled terminals. If that sentence makes you nervous, hire an electrician. The upfront cost for a smart thermostat pays for itself in a season or two through smarter heating.
Category: Garage Door Bottom Seal Kits
Your garage door is the biggest hole in your wall. Even a small gap at the bottom lets cold air pour in and warm air leak out, forcing your heater to work constantly. Installing a new bottom seal is the single most effective way to eliminate a major draft source and stop wasting BTUs.
I’ve used several brands, but the M-D Building Products vinyl bulb seal kit is my go-to. It’s durable, flexible in cold weather, and comes with all the hardware. Avoid the foam-only types; they compress too quickly and don’t last.
Replacing it is a simple, 20-minute job:
- Open your garage door halfway and unplug the opener for safety.
- Use a socket wrench to remove the old retainer bracket and seal.
- Clean the channel where the new seal will sit.
- Press the new vinyl seal into the retainer bracket, tap it into place with a rubber mallet, and screw the bracket back onto the door bottom.
When you’re done, close the door and look for light coming under it. You should see none. This simple fix can improve your heater’s efficiency by 15% or more.
Category: Plug-in Carbon Monoxide Detectors
If you are using a natural gas, propane, or kerosene heater, this isn’t a recommendation-it’s a requirement. A plug-in carbon monoxide detector is mandatory for any garage with a fuel-burning appliance. CO is a silent, odorless killer that can seep into your home. To help prevent carbon monoxide poisoning in the garage, ensure proper ventilation and regular maintenance of fuel-burning equipment.
I use the Kidde Plug-In Alarm with a battery backup. I like that it has a digital display that shows the CO level, so you’re not just relying on an alarm. Plug it into an outlet at breathing height, around 5 feet off the floor, and away from the heater’s direct exhaust path.
Test the alarm button monthly. The sensors have a finite life, so replace the entire unit every 5 to 7 years as the manufacturer states. This is one area where you don’t shop for the cheapest option. Buy a known brand like Kidde or First Alert, and make sure it’s listed by a testing laboratory like UL. Your heater’s performance means nothing if it isn’t safe.
Garage Heater BTU FAQ: The Pro’s Quick Checks
What’s the fastest way to assess my garage’s insulation quality?
Forget guessing. On a cold day, feel the interior walls and ceiling with your hand. If they feel cold and damp, you have poor insulation. Next, inspect the attic access door or ceiling; if you see open joists, that’s a major heat sink. For a definitive check, use an infrared thermometer to compare wall surface temperature to the room’s air temperature.
How do I know which climate zone factor (30, 45, or 60 BTU/sq ft) applies to me?
Don’t rely on your “feeling” of winter. Look up your area’s average winter low temperature. If it’s consistently in the teens or single digits (°F), use 45. If you regularly see sub-zero temps, use 60. For a precise number, check your local weather station’s historical data for the design temperature-the coldest it typically gets.
My garage door is insulated. Should I still add extra BTUs for it?
An insulated door is good, but the seal is what matters. Perform the flashlight draft test outlined in the article. If you see no light, no extra BTUs are needed. If you see gaps, add the 10-15% as recommended, but your first action should be to replace the weatherstripping, not just buy a bigger heater.
How does an attached garage really change the BTU math?
The benefit comes from the shared wall with your home, which acts as a thermal buffer. An insulated garage door also helps reduce heat exchange at that boundary, boosting energy savings. To see if you qualify for the 10% reduction, check the interior house door. If it’s a solid, weather-stripped door that feels warm to the touch on a cold day, you get the benefit. If it’s a hollow, drafty door, ignore the reduction-your garage is functionally detached.
Your Blueprint for Garage Heat
Getting the BTU number right is the single most important step to buying a heater that works efficiently and safely for your space. After years of installing these units, I’ve seen too many homeowners guess and end up with a system that’s either useless or dangerously overpowered. Follow the process we discussed, and you’ll buy with confidence. Your key takeaways are straightforward:
- Start with the basic calculation for a well-insulated space, but always adjust for reality.
- If your walls or door are uninsulated, you must add the extra BTUs or the heater will struggle.
- Don’t forget your ceiling height; standard formulas assume 8 feet, and a taller garage needs more power.
- Choose a reputable brand like Modine or Mr. Heater for safety features and reliable performance.