
How Do You Fix Cracks in Your Concrete Garage Floor?
Seeing a new crack snake across your garage floor is unsettling, but you can fix it yourself and prevent it from getting worse. I’ll show you how to tackle this common problem with the right tools and materials.
This guide walks you through the process I use in my own shop, covering how to tell a harmless hairline crack from a serious structural one, which filler or epoxy to pick for the job, and the step-by-step repair to make it last.
I’ve been fixing and maintaining residential garage floors for years, learning which methods hold up under cars, tools, and weather.
What Kind of Crack Do You Have? A Pro’s Diagnosis Guide
Before you grab any product, you need to know what you’re dealing with. Mismatching the fix to the crack is the number one reason repairs fail. Let’s break it down.
Think of this like checking under the hood. I look at three things: width, depth, and if the sides are level. Cracks happen because concrete shrinks as it cures, the ground underneath settles a bit, or from the freeze-thaw cycle if you’re in a cold climate. Heavy point loads, like a car jack on one spot, can cause them too.
To identify your crack type, get down on one knee with a bright work light and a simple ruler that shows 1/8-inch increments. Shine the light across the crack to see shadows that reveal uneven edges.
Hairline Cracks (The Cosmetic Fix)
These are the fine lines, thinner than a dime’s edge-usually less than 1/8-inch wide. Run your finger over it. If it feels like a groove but the concrete on either side is perfectly level, you have a hairline crack.
In my experience, these are almost always just in the sealer or the very top layer of the slab. They don’t affect the floor’s strength, but they let water and dirt in, making them look worse over time.
A hairline crack is a surface-level issue and is the easiest, fastest repair you can make yourself.
Medium to Wide Cracks (The Standard Repair)
Now we’re getting into the common repair zone. These cracks are between 1/8-inch and 1/2-inch wide-about the width of a standard pencil. You can often see debris like pebbles or dirt inside them.
These are active “working” cracks. They flex slightly with temperature changes and ground movement. If you don’t prep them right or use a rigid filler, they’ll just crack again in a year or two.
Fixing a medium crack isn’t just about filling a hole; it’s about creating a flexible, bonded seal that can move with the concrete. This requires thorough cleaning and the right flexible filler.
Large or Structural Cracks (The Red Flag)
Any crack wider than 1/2-inch, or one where the edges are crumbling or one side is visibly higher than the other, is a major warning sign. Place a straightedge, like a 4-foot level, across the crack. If it rocks or you see a clear gap underneath, you have vertical displacement.
This often points to a foundation settlement issue, severe soil erosion, or a broken slab. I’ve been called to garages where a crack this size had weeds growing through it from the soil below.
A large, uneven crack is a structural red flag; your safest move is to call a foundation specialist for an assessment before you try any repair. Trying to patch over this can hide a serious problem and be a waste of money.
The Gearhead’s Checklist for Concrete Crack Repair
Here’s exactly what you’ll need on your workbench. I’ve split it into two kits: one for the dirty prep work, one for the clean application.
Cleaning & Prep Kit
This step is 80% of a lasting repair. Don’t skip it.
- Safety First: NIOSH-rated dust mask, safety glasses, and heavy-duty gloves.
- Debris Removal: A wire brush, a flat-head screwdriver for prying out loose chunks, and a shop vacuum with a crevice tool. I use a Ridgid shop vac because the filter handles concrete dust well.
- Crack Widening (“Keying”): For cracks over 1/8-inch, you need to create an inverted “V” shape so the filler locks in. I gave up on a cold chisel and hammer for this years ago-it’s jarring and creates messy, uneven edges. My go-to tool is a carbide grit rasp, like the one made by QEP; it lets me grind the sides clean and undercut the crack with much more control and far less dust.
- Final Clean: Rags and a dedicated concrete cleaner or degreaser. For oily cracks, I use Simple Green or Krud Kutter. Rinse thoroughly and let it dry completely.
Filler & Application Kit
Match the product to your crack type from the diagnosis above.
- For Hairline Cracks: Use a liquid crack filler. I like the Ghost Shield brand because it’s thin enough to wick deep into the crack. It comes with a built-in applicator tip. Just squeeze it in, wait 30 minutes, and apply a second coat.
- For Medium Cracks (1/8″ to 1/2″): You need a flexible, self-leveling sealant. A high-quality polyurethane or silicone concrete caulk is your best bet here. I prefer polyurethane (like Sikaflex Self-Leveling Sealant) for garage floors as it bonds incredibly well and stays flexible. You’ll need a standard caulk gun.
- For Large, Stable Cracks (after professional clearance): For wider gaps that aren’t structural, a two-part epoxy filler or a vinyl concrete patcher works. Quikrete Vinyl Concrete Patcher is a solid, durable option you can trowel smooth. For this, you’ll need a margin trowel and a mixing bucket.
- Finishing Touch: A putty knife or a stiff plastic spreader to smooth the filler flush with the surface.
Investing ten minutes in choosing the right filler from the start will save you a weekend of redoing the job later. Always check the product’s specifications for minimum and maximum crack widths it can handle.
DIY Difficulty, Time, and Your Limits

Not all cracks are created equal. Let’s be honest about the work involved so you can decide if this is a Saturday project or a job for a professional.
Hairline cracks (less than 1/8 inch) are the easiest to tackle yourself. I’d rate them a 3 out of 10 on the difficulty scale. The challenge isn’t skill, it’s patience during prep. Active work time is about 1-2 hours. Drying time for a liquid filler is quick, often just a few hours before you can walk on it, but wait a full 24 hours before parking a car over it.
Medium cracks (1/8 inch to 1/2 inch) jump to a 6/10. You’re moving from a simple sealant to a patching compound, which often requires mixing. Active work time extends to 2-3 hours. The curing time is longer too; most vinyl concrete patchers need 24 hours to set and a full 7 days to reach full strength before driving on them. This is where a helper is useful for mixing large, consistent batches if you have several cracks to fix.
Large cracks (over 1/2 inch) or multiple web-like cracks are a 9/10. This is serious repair work that often involves chiseling, undercutting the crack, and may indicate a foundational issue. Active work can take 4+ hours, with curing taking a week. You will absolutely need help moving bags of mix and operating heavier tools like a demo hammer. For most homeowners, this is the line where calling a pro becomes the smarter choice.
When NOT to Try This Yourself
Your safety and your home’s structure are more important than DIY pride. I tell my clients to stop and call a structural engineer or foundation specialist if they see any of these red flags.
- You see water actively seeping through the crack, especially after rain. This points to a drainage issue that a surface patch won’t fix.
- The crack is visibly moving. Tape a piece of clear packing tape over the crack and mark the edges with a permanent marker. If the tape tears or the marks no longer line up after a month, the slab is still settling or shifting.
- The crack is wider at one end than the other, or it runs directly up to a load-bearing wall or column. This can signal uneven settlement that needs professional assessment.
- The edges of the crack are crumbled or sunken, forming a noticeable dip. This indicates subgrade failure underneath the concrete.
In these cases, patching the crack is just painting over the problem. A professional needs to diagnose and address the root cause first.
Step-by-Step: Fixing Hairline Cracks in Your Garage Floor
For those stable, skinny cracks, a proper fix is totally within your reach. The secret isn’t in the product you use, it’s in the preparation. A clean, dry, and dust-free crack is the only way to get a lasting bond.
How do you prepare the crack before applying any filler or sealant? The process is the same whether you’re fixing a hairline or a wider crack, and it’s 90% of the job. You’ll need a stiff brush, a shop vacuum, a chisel or flat-head screwdriver, and safety glasses. For power, I always grab my DeWalt cordless angle grinder with a masonry wheel to widen cracks, but for hairline jobs, you can often skip it.
- Clear the crack. Use your brush or a flat-head screwdriver to dig out any loose concrete, dirt, or old sealant. Get as deep into the gap as you can.
- Open it up slightly. For the best bond, you need a “key.” Take your chisel or grinder and undercut the edges of the crack. This means making the bottom of the crack slightly wider than the top, creating a dovetail shape that locks the filler in place. For a hairline crack, just scoring the sides deeply is often enough.
- Blow it out and vacuum. Use a can of compressed air or the blower function on your shop vac to remove all the fine dust and debris you just created. Follow up immediately with the vacuum’s hose to suck out every last particle. Any dust left behind will prevent the filler from adhering.
- Degrease it. This step is easy to forget. Soak a rag in a concrete degreaser or simple dish soap and hot water, and wipe the crack and the surrounding inch of concrete. Oil stains are common in garages and will ruin your repair. Let it dry completely.
Now you’re ready for the filler. For hairline cracks, I prefer a low-viscosity, penetrating sealer like Sikacryl Concrete Caulk or a simple concrete crack filler from DAP that comes in a caulk tube. These flow deep into the crack.
- Apply the filler. Cut a small tip on the tube and run a steady bead directly into the crack, slightly overfilling it. You can also use a putty knife to force trowel-grade patchers into very thin cracks.
- Smooth the surface. Immediately take a flexible putty knife or a margin trowel and drag it flat across the crack, scraping off the excess. The goal is to fill the void perfectly level with the surrounding floor, not to leave a bump on top.
- Let it cure. Follow the product’s instructions. Keep the area dry and avoid any traffic for the time specified, usually at least a few hours. Don’t rush this part.
Step-by-Step: Repairing Medium to Wide Cracks
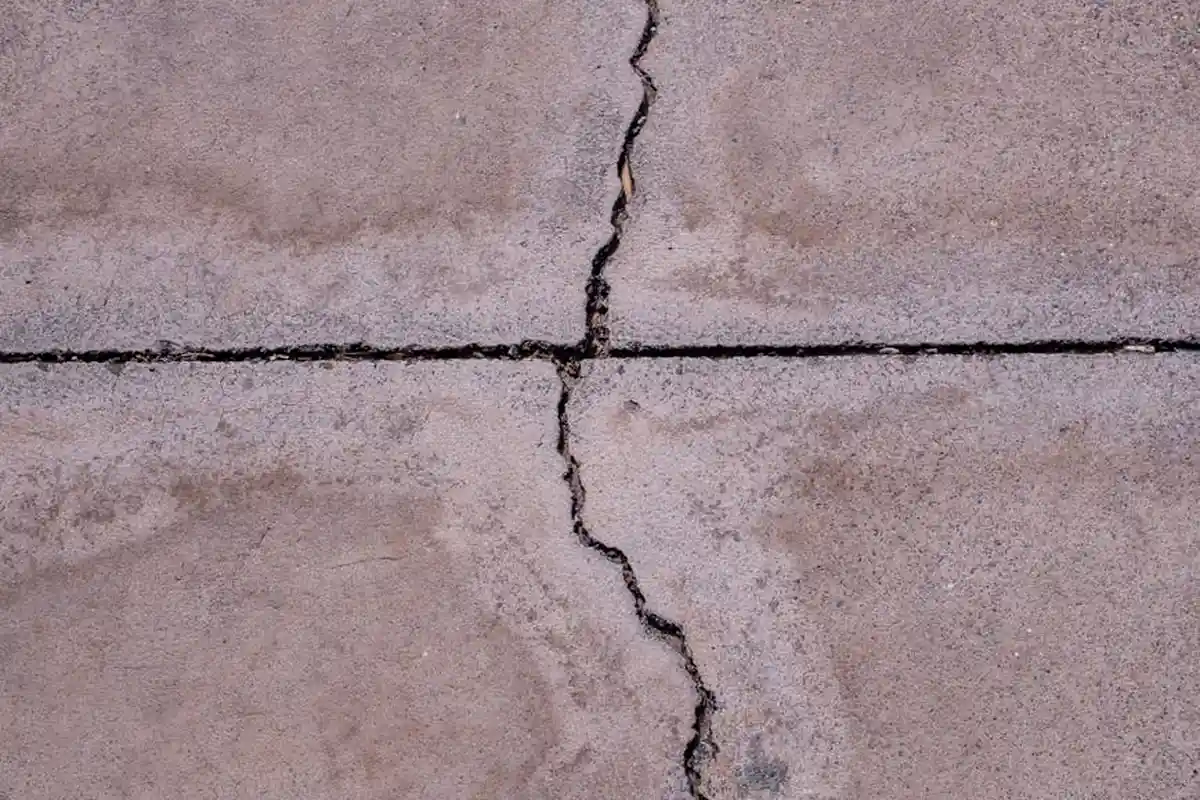
You’re looking at a crack that’s wider than a dime, maybe even an inch. This isn’t for a simple hairline. For this, you need a flexible, waterproof seal that can handle the floor’s movement. Think of it like filling a deep pothole in an asphalt road you need a material that can flex with the seasons.
1. Prepare the Crack: The Undercut Method
First, clean it out completely. I use a shop vac and a wire brush to get every bit of dust and loose material. The secret step is undercutting. Take a cold chisel and a hammer and widen the bottom of the crack more than the top. You’re making an inverted “V” shape. This creates a mechanical lock so the filler can’t just pop back out when pressure is applied from above.
2. Install a Backer Rod for Deep Cracks
If the crack is deeper than half an inch, you’ll waste a lot of expensive sealant filling a deep hole. Instead, I buy a foam backer rod from the hardware store. It looks like a long, skinny pool noodle. You press it down into the crack until it’s about a quarter-inch from the surface. This gives the sealant a solid base to bond to and saves you material.
3. Apply the Sealant with a Caulk Gun
You have two main choices here: silicone or polyurethane concrete sealant. I’ve used both for years. The silicone is easier to work with and tool, but I find polyurethane bonds stronger and lasts longer under a car tire. My go-to is Sikaflex Self-Leveling Sealant for horizontal cracks it flows right in. Proper surface preparation is key regardless of which sealant you choose.
Load the cartridge into a standard caulk gun. Cut the tip at a 45-degree angle to match your crack width. Apply a steady, consistent bead, slightly overfilling the crack. If you’re not using a self-leveling product, you’ll need to tool it. I wet my finger with soapy water and drag it along the bead to smooth and press it into the crack. Clean up any excess immediately with mineral spirits.
Step-by-Step: Patching Large Cracks and Chipped Concrete
When you have a gaping crack or a chunk of concrete missing, you’re not sealing you’re rebuilding. This is a patch job. The goal is a permanent, structural repair that can bear weight. You’re making a new piece of floor that bonds to the old. Garage floor repairs often rely on rebar or welded mesh to carry load and prevent future cracks. Knowing the garage floor rebar requirements helps ensure the patch becomes part of a continuous, strong slab.
1. Prep and Clean Aggressively
This is the most important step. All loose material must go. I use a hammer and chisel or even a small angle grinder with a masonry wheel to square up the edges of the damaged area. You want solid, clean concrete on all sides. Vacuum thoroughly. Then, I do a crucial extra step: I apply a liquid bonding agent. I mix an acrylic fortifier, like Quikrete’s Acrylic Fortifier, with water and paint it onto the old concrete. This creates a sticky glue layer for the new patch.
2. Mix and Apply the Patching Material
For most garage floor patches, I use a vinyl concrete patcher, such as Quikrete Vinyl Concrete Patcher. It sets hard and fast. Mix it with water (and sometimes that acrylic fortifier instead of plain water) to a stiff, peanut butter-like consistency. If the damage is severe or needs ultra-high strength, a two-part epoxy mortar is the professional choice, but it’s more expensive and trickier to mix. If you’re exploring epoxy paint garage floor DIY, this patched base helps ensure the coating adheres well. A DIY epoxy system can deliver a durable, easy-to-clean finish after proper prep.
Pack the mix into the hole with a mason’s trowel. Press it in firmly to eliminate air pockets, which are the enemy of a strong patch. Overfill the area slightly.
3. Finish and Blend the Surface
Here’s where you make it look decent. Drag a short piece of 2×4 lumber (a screed) across the patch to level it with the surrounding floor. Then, use a steel finishing trowel to smooth the surface. To blend the edges and create a less obvious repair, I take a wet paintbrush and lightly feather the new material into the old. Let it set according to the package instructions.
How Long Until You Can Park on It? The Curing Truth
This is the question I get every time, and it’s the step everyone wants to rush. Here’s the honest timeline from my shop experience.
You can usually walk on a patch or sealed crack after 24 hours. It will feel hard. But “hard” is not the same as “cured.” Full strength takes much longer.
Do not drive on it or park a car on it for at least 3 to 7 full days. I lean toward a full week for peace of mind, especially for patched areas. Why? The repair needs time for a chemical process called hydration to complete. Putting thousands of pounds of vehicle weight on it too early will cause it to crumble or crack at the edges. I learned this the hard way on a client’s floor years ago we had to redo the entire patch because they parked a pickup on it after two days. Patience here saves you from doing the job twice.
Keeping Your Garage Floor Crack-Free for Good
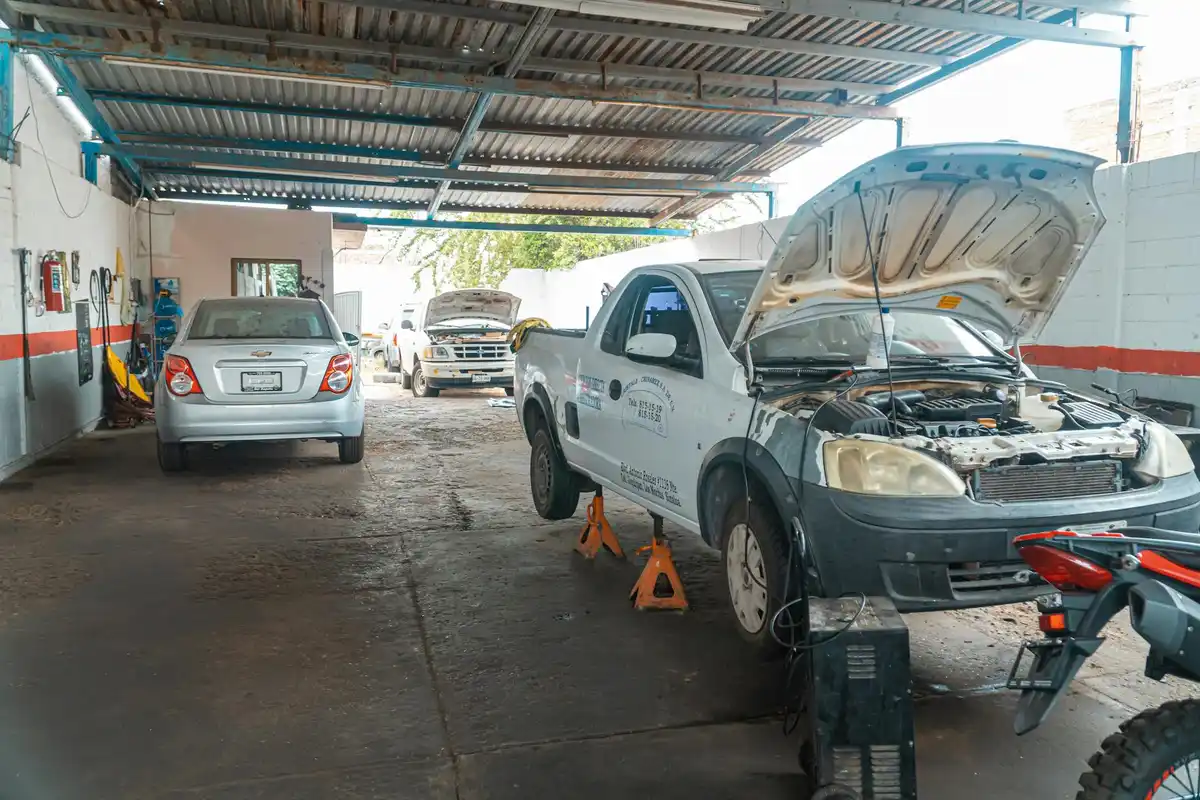
Once you’ve filled those cracks, your next thought is usually, “How do I keep this from happening again?” It’s a smart question. A good repair is just the first step; smart, daily habits are what protect your floor long-term. A garage floor maintenance guide can walk you through ongoing care. Following its routines helps prevent future cracks and stains.
Control Water, Control Cracks
Water is concrete’s worst enemy when it’s trapped. You want it flowing away from your garage, not toward it. Every spring and fall, take five minutes to walk around your house. Clear leaves and dirt from your gutters and make sure your downspouts extend at least five feet away from your foundation and garage slab. I use simple, affordable extensions from a brand like Flex-Drain because they’re easy to move when I’m mowing. Ensuring proper water flow can help prevent flooding and water damage in your garage.
If water pools near your garage door after a rainstorm, you’re asking for trouble beneath the slab.
Seal It Up
Think of a concrete sealer like a wax for your car’s paint. It doesn’t make it bulletproof, but it creates a barrier against oil, water, and road salt. I apply a high-quality penetrating sealer, like Ghostshield Siloxa-Tek 8500, every two to three years. It soaks right in, doesn’t change the look of the concrete, and makes cleanup spills a breeze. Don’t use a cheap, glossy film-forming sealer from a big box store; they peel and wear off in high-traffic areas in under a year.
Be Kind to the Surface
Your daily habits make a big difference. In winter, avoid de-icing chemicals like rock salt or calcium chloride. They melt ice but force water into tiny pores in the concrete, then it freezes and expands, causing “spalling” or surface chips. Use sand or kitty litter for traction instead, especially when trying to winterize your garage.
When you’re working on a car, your tools matter. I always use thick rubber wheel chocks, not metal ones. Metal can chip the concrete edge if you kick it. And I never, ever set a jack stand directly on the floor. Always place a 12-inch square of 3/4-inch plywood under each leg to spread the immense weight and prevent point-load cracks. I learned this the hard way after putting a small dent in a client’s new floor with a transmission jack.
Shop Talk: Mistakes I’ve Seen (So You Don’t Make Them)
Over the years, I’ve been called to fix repairs that failed. The problem was rarely the product itself; it was how it was used. Here are the big four mistakes I see all the time.
Mistake #1: Filling Over the Dirt
I got a call from a homeowner who used a tube of crack filler, only to have it crack again in a week. When I dug into it, the crack was packed with fine dirt and gravel. No cleaner can get that out. Filler just sits on top of it, creating a weak plug. You must physically remove all loose material before any repair product can bond properly. Now, I keep a dedicated shop vacuum with a narrow crevice tool just for this job. Blowing out the crack with compressed air first, then vacuuming, gets it 95% clean.
Mistake #2: Ignoring a Wet Crack
One customer had a crack that constantly seeped a little water after heavy rain. They filled it with a standard epoxy, which seemed to hold until the next big storm. The water pressure from underneath pushed the entire repair right out. If a crack is actively damp or you see efflorescence (that white, powdery residue), you have an underlying moisture issue. For these, you need a specialized hydrophilic (water-activated) urethane or a two-part epoxy designed for wet conditions, like Sikafire Self-Leveling Sealant. It cures in the presence of moisture, sealing it from within.
Mistake #3: Grabbing the Wrong Tube
A neighbor once asked me why the “caulk” he used on his driveway crack turned yellow and squishy. He’d used ordinary silicone kitchen and bath caulk. Concrete moves, gets hot, and takes weight. Household caulk isn’t made for that. Always use a product labeled specifically for concrete or masonry repair. For hairline cracks, I prefer a flexible polyurethane sealant. For bigger jobs, I use a two-part epoxy or a vinyl concrete patcher. They cost more than a tube of caulk, but they last.
Mistake #4: Rushing the Cure Time
This is the most common error. A client repaired a crack on a Saturday and parked his heavy SUV over it on Monday. The surface was dry to the touch, so he thought it was done. But the product deep down was still curing. The weight caused it to compress and fail. Product labels list “foot traffic” times and “full cure” times-the full cure time is what matters for vehicle weight. That can be 24 hours for some products or up to 72 hours for others, especially in cooler weather. I plan my repairs when I know the car can stay out for at least two full days, no exceptions.
Frequently Asked Questions: Concrete Floor Crack Repair
How do I quickly identify the type of crack I’m dealing with?
Get on your knees with a bright light and a ruler. Check the width and run your finger across it. If it’s less than 1/8″ and level, it’s a hairline crack. If it’s 1/8″ to 1/2″ wide, it’s a standard repair. Anything wider, uneven, or crumbling needs a pro assessment before you touch it.
What is the single most important material choice for a durable repair?
It’s not a specific brand, but the product type. Match the filler to the crack’s behavior. For hairline cracks, use a liquid, penetrating sealer. For moving medium cracks, you must use a flexible polyurethane or silicone concrete sealant. Using a rigid filler in a working crack guarantees a failed repair.
For a wide, stable crack, what’s the best method to ensure it holds weight?
You must undercut the crack to create a mechanical lock and use a structural patching compound. Clean aggressively, apply a bonding agent to the old concrete, and pack in a vinyl concrete patcher or epoxy mortar. The key is forcing the material in to eliminate all air pockets.
How long do I *really* need to wait before parking my car on the repair?
Ignore the surface dry time. For any repair meant to hold weight, a full 7-day cure is non-negotiable for maximum strength. Parking on it sooner risks crumbling the patch or breaking the sealant bond, forcing you to redo the entire job.
Right after repairing a crack, what’s the best first step to prevent more?
Inspect your water management. Ensure downspouts drain away from the garage and the ground slopes properly. Water under the concrete slab is the prime cause of future cracking. Then, plan to apply a quality penetrating sealer to the entire floor within the next year.
Final Thoughts on Fixing Concrete Cracks
In my experience, the best repair starts by figuring out why the crack happened—fixing the root issue saves you from doing the job twice. If you’re dealing with cracks in a garage ceiling or floor, the same root-cause approach helps prevent recurring damage. Addressing the underlying issue now can save you headaches later. Keep these takeaways in mind for a solid, long lasting floor:
- Always prep the crack thoroughly with a stiff wire brush and a shop vacuum; I prefer a Ridgid model for its power, as debris left behind will ruin the bond.
- Match the filler to the crack size-for structural gaps over 1/4 inch, I rely on a two part epoxy like SikaFix, not cheaper caulks that will fail under pressure.
- Seal the entire floor after repairs with a quality penetrating sealer; it blocks moisture and protects your work, much like a coat of paint on wood.
- Wear safety gear every time-nitrile gloves and ANSI rated goggles are non negotiable when handling chemicals to avoid skin and eye irritation.
Evan Gunther
Evan is a general contractor operating in Columbus, Ohio servicing, maintaining and building residential and commercial garages for over two decades. He has personally redeveloped over 100+ garages and installed and reinstalled over 230+ garage doors in his long tenure. When it comes to giving your garage a face lift or fixing common issues, Evan's the pro. Feel free to reach out to him and follow his Garage Log blog for expert, fact based advice.