
How Do You Choose the Right Paint Colors for Your Garage?
Choosing paint for your garage goes beyond a simple color swatch; it affects durability, lighting, and even your home’s value. I’ll help you cut through the confusion with practical, shop-tested advice.
We’ll walk through evaluating your garage’s light conditions, picking paint sheens that withstand grease and impact, coordinating colors with your house exterior, and my specific experiences with brands like Sherwin-Williams ProMar 200 or Behr Ultra Scuff Defense.
As a residential garage pro who’s prepped and painted hundreds of spaces, I know which choices hold up over time and which to avoid.
First, Ask Yourself These Garage-Specific Questions
Your garage isn’t just a room; it’s a tool. The right color makes it work better. Before you pick a single swatch, figure out what you’re really doing in there. Is it a pristine showroom for a classic car, a dusty woodshop, or a home gym? The best paint color for your garage starts with matching its job. For a workshop, you need colors that hide dust and make finding small parts easier. For a gym, you might want something more energizing. As you plan the workshop, map out where benches, tools, and storage will live so color choices support the workflow. In the next steps, we’ll explore organizing the garage workshop layout to keep everything within reach.
Next, take a good, hard look at your walls. Run your hand over them. What you’re painting on dictates everything.
- Concrete Block or Poured Walls: These are thirsty. They need a specialty masonry primer or a paint labeled for concrete, like Drylok or a quality acrylic latex. I skipped the primer once on a basement wall and the paint peeled within a year.
- Drywall: Standard, but check for cracks or oily spots. Use a stain-blocking primer like Kilz on any stains, then a good wall paint. Unprimed drywall soaks up paint.
- OSB (Oriented Strand Board): This is tricky. The rough surface drinks paint. I use a thick-nap roller and an oil-based or shellac primer first, like Zinsser B-I-N, to seal the wood strands and prevent “photocopying” where the texture bleeds through.
For the exterior, your house gets the final say. Pull a piece of your siding or trim to the paint store for a color match. You don’t want the garage to clash. Typically, I match the garage door to the trim color and the siding to the main house color. Your roof color matters too; a dark brown roof won’t look right with cool gray siding.
Here’s your first real step: check your HOA documents and local building code. Some neighborhoods regulate exterior color palettes. It’s a non-negotiable. I’ve seen projects get stopped because a homeowner picked a modern charcoal gray in a tan-stucco-only community.
Getting the Light Right in Your Workspace
Light changes everything. A color you love under the store’s fluorescent lights can look dead or totally different in your garage. If you have windows, paint a large sample (a 2×2 foot square) on different walls and look at it morning, noon, and night.
Most of us rely on artificial light. The type of LED bulb you choose is a game-changer for how you see color and detail.
- Cool White LEDs (4000K-5000K): This is my default shop light. It gives a bright, slightly blue-white light that’s fantastic for detail work like engine repair or soldering. Under cool white light, grays and blues look crisp and true, but tans can look a bit washed out.
- Daylight LEDs (5000K-6500K): These mimic noon sun and are extremely bright and stark. They’re great for photography or detailing cars. Be warned: they can make some colors look overly harsh and cast sharp shadows. I find them fatiguing for long woodworking sessions.
To make any light work harder, choose paint with a high Light Reflectance Value (LRV). This number is on the paint swatch or can. An LRV above 70 means the color bounces a lot of light back into the room, brightening dark corners and reducing eye strain. Pure white has an LRV of about 100. A dark navy might be 5. For a garage, I rarely go below 50.
Choosing Paint for Your Garage Interior Walls
After painting dozens of garages, I have a go-to. For most garages, a light gray in an eggshell or satin sheen is the best overall performer. It reflects light well, doesn’t show every single scuff like bright white, and hides dust better than a tan or beige. It’s a neutral, professional backdrop that makes your tools and projects pop. Unlike more vibrant garage door colors, this gray won’t clash with your home’s exterior.
Let’s compare the common contenders:
- Bright White: Maximizes light reflection and looks clean. The downside? It shows every speck of dirt, grease fingerprint, and imperfection in the wall. It can feel clinical.
- Light Gray (My Pick): Offers excellent light reflection while gracefully hiding the inevitable dust and smudges of a working space. It’s easier to keep looking good.
- Light Tan/Beige: Feels warmer and can hide dirt fairly well. The trade-off is it reflects less light than white or gray, which can make a windowless garage feel darker.
The sheen is just as critical as the color. Never use flat paint in a garage; it stains if you look at it wrong and can’t be cleaned. Eggshell or satin is the sweet spot. It has a slight gloss that you can wipe down with a damp cloth to clean up splatters or handprints. I used a satin finish from Behr Marquee in my own shop, and after three years of projects, it still wipes clean.
Special Considerations for Workshops and Heavy Use
If your garage is a true workshop, the area around your bench needs armor. For these zones, a standard wall paint isn’t tough enough. Upgrade to a dedicated enamel or specialty paint designed for cabinets, trim, or doors. Products like Benjamin Moore Scuff-X or Sherwin-Williams Emerald Urethane Trim Enamel dry to a hard, scrubbable finish that resists chemical splashes and dings from tools. I painted the lower 4 feet of my shop walls with an enamel; it wipes clean from oil, stain, and adhesive without a mark. Extend that protection to the entire garage—walls, ceilings, and floors. Durable coatings on all surfaces keep the workspace clean and ready for projects.
Use color strategically for safety and order. Paint one accent wall a different color to mark your primary work zone, improving focus. More importantly, use bright, high-visibility floor marking paint to define safety areas. I use Rust-Oleum Professional Floor coating in yellow to mark walkways and red for “no storage” zones around the electrical panel and water heater. It prevents trips and organizes the space at a glance.
Selecting Colors for the Garage Exterior and Door
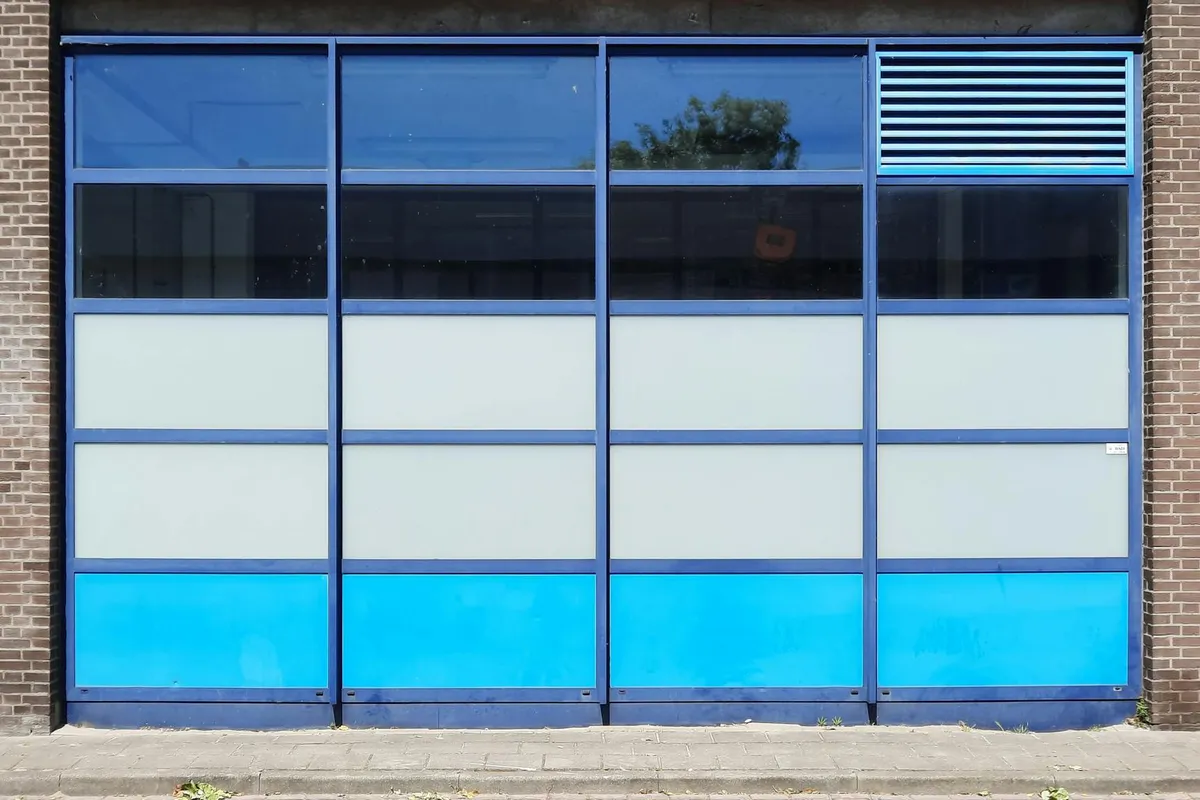
Think of your garage exterior as a three-part system. Getting this right ties the whole look of your home together.
The field color is the main siding color, the accent color is usually your garage door, and the trim color frames windows and doors. Your house likely already has this system in place, so your job is to decide how the garage door fits in.
For the garage door color, you have three reliable paths. First, you can paint the door the same color as your trim. This is a classic, safe choice that makes the garage recede visually. Second, choose a color that complements your siding. If your siding is a warm tan, a soft gray or sage green door can look excellent. Third, make a bold statement. A bright white, deep charcoal, or even a tasteful navy on the door creates a focal point. I used a deep charcoal on my own home’s garage door to contrast with light gray siding, and it added serious curb appeal without being flashy.
Your home’s exterior material changes the paint you need and the prep work. For vinyl siding, you must use 100% acrylic latex paint formulated for vinyl to allow flexibility and prevent warping. Wood siding needs a thorough scraping and sanding before a quality exterior acrylic. With stucco, use a thick-nap roller to get into all the texture, and always check for moisture issues first. No matter the material, proper cleaning and priming are non-negotiable for a finish that lasts more than one season.
Recommended Products: Paint, Primer, and Finish
Buying the right paint for each surface saves you money and frustration. You’ll need different types for different jobs.
For interior garage walls, a good scrubbable latex paint like Behr Marquee or Sherwin-Williams Duration is my go-to. It handles dust and the occasional scuff. For exterior siding, look for the words “100% Acrylic” on the can-this is the gold standard for weather resistance. Trim paint should be a tougher, higher-sheen formula. For concrete floors, you must use an epoxy or a dedicated concrete floor paint; regular wall paint will fail immediately. For the best paint garage walls, prioritize durable, washable finishes and proper surface prep. This approach helps keep the garage looking clean and lasting longer.
Primer is not optional. For fresh drywall, use a PVA drywall primer-it’s cheap and seals the surface. Stained concrete or blocking old grease spots requires an oil-based or shellac-based primer like Zinsser B-I-N. If you’re unsure if the old paint is oil-based, sand a spot and rub it with a rag soaked in rubbing alcohol. If the color comes off on the rag, it’s latex; if not, it’s oil-based and needs an appropriate primer.
Sheen affects durability and clean-up. Use flat or eggshell on ceilings to hide imperfections. I use satin on interior walls-it has a slight shine and is very wipeable. For all trim, doors, and anywhere that gets touched or needs frequent cleaning, use semi-gloss. Semi-gloss is the most durable and easiest to clean, making it ideal for garage doors, window trim, and baseboards.
Tools You’ll Need to Do the Job Right
Good tools make a good job. Using the wrong brush or roller leaves streaks and adds hours of work.
- Brushes: Get high-quality angled sash brushes (2.5-inch is perfect) for cutting in lines. I prefer Purdy or Wooster brands-they hold more paint and give cleaner edges than cheap ones.
- Rollers: Use a sturdy metal roller frame with a threaded end for an extension pole. For smooth walls, use a 3/8″ nap roller cover. For textured surfaces or stucco, move up to a 3/4″ nap.
- The 5-in-1 Tool: This is your multi-tool for scraping paint, opening cans, cleaning roller grooves, and prying off outlet covers. Don’t start without one.
Your safety gear is just as critical. Heavy-duty painter’s tape (FrogTape brand has never let me down) protects edges. Canvas drop cloths are better than plastic-they don’t tear or get slippery. A sturdy, tall enough ladder is non-negotiable for exterior work. Never stand on the top two rungs, and always have someone spot you when you’re high up.
Cost & Budget: Planning Your Garage Paint Project
Before you buy a single can, you need a realistic budget. I’ve seen too many projects stall halfway because of hidden costs. Let’s break it down so you can plan for success.
Good, Better, Best: Paint, Primer, and Tools
Think of this as building a toolkit. You can get the job done at any level, but the quality and longevity of the finish will differ.
For paint, I stick with 100% acrylic latex. It’s durable, cleans up with water, and breathes well to resist blistering. Here’s my shop-tested tier system:
- Good (Economy Tier): Big-box store brand flat or satin paint. It covers fine for a low-traffic storage area but marks easily and may need recoating sooner. Expect $25-$35 per gallon.
- Better (Prosumer Tier): Paint from a dedicated supplier like Sherwin-Williams or Benjamin Moore. I use Sherwin-Williams Duration for exteriors and SuperPaint for interiors. These have better resins for a harder finish that resists scuffs and washing. Plan for $45-$70 per gallon.
- Best (Premium/Pro Tier): Specialized coatings. For garage floors, I use epoxy. For interior walls that will see lots of abuse, a high-gloss or semi-gloss industrial enamel. These are tough as nails but can cost $80+ per gallon and require more skill to apply.
The same logic applies to primers. A basic PVA primer is your “Good” option for new drywall. For sealing stains or covering bold colors, a stain-blocking oil-based or shellac primer like BIN is your “Best” and worth every penny. Tools follow suit: a cheap roller sleeve will shed fibers, while a quality Purdy or Wooster roller ($8-$12) gives a smoother finish and holds more paint.
The Hidden Costs Nobody Talks About
The paint is just part of the bill. If you don’t budget for these, you’ll be making extra trips to the store.
- Surface Repair: You will find cracks, holes, and gaps. A bucket of spackle, a roll of fiberglass mesh tape, and a few tubes of paintable silicone caulk add $40-$60.
- Application Gear: Renting a paint sprayer for a day runs $75-$125. It’s fast for large, blank walls but requires masking everything you don’t want painted. For most DIYers, quality rollers and brushes are more cost-effective.
- Safety & Cleanup: Respirator masks for sanding, drop cloths, painter’s tape, and mineral spirits for cleaning oil-based products are not optional. Budget $50.
- Proper Disposal: You can’t just toss old paint in the trash. Let latex paint dry out completely in the can (mix in cat litter to speed it up) before disposal. Oil-based paint is household hazardous waste. Check with your local waste authority for drop-off days, which may have a small fee.
How Much Paint Do You Actually Need?
Running out of paint mid-wall is a nightmare. Use this simple formula to get it right.
- Measure: For walls, multiply (Width + Length) x 2 to get the total perimeter. Multiply the perimeter by the wall height for total square feet. Don’t subtract for the garage door, but do subtract for windows.
- Estimate Door & Trim: A standard double garage door is about 18′ x 7′, or 126 sq ft. Trim is usually about 10% of your wall area.
- Do the Math: Add your wall, door, and trim square footage together. Check your paint can-most cover 350-400 sq ft per gallon. Divide your total area by the coverage rate. Always round up and buy an extra quart for touch-ups. For my 2-car garage, I typically need 2 gallons for walls, 1 for the door, and a quart for trim.
Maintenance & Cleaning Routine for Painted Garages
A good paint job lasts years if you care for it. This isn’t about deep cleaning every week, it’s about small, consistent habits.
The single best thing you can do is a simple weekly wipe-down of your garage door and any interior trim. Use a soft-bristle broom or a microfiber mop head to dust off cobwebs and loose dirt from the door panels. For the trim around the man door and windows, a quick pass with a dry microfiber cloth prevents grime from bonding to the paint. This five-minute task makes a huge difference over time, especially compared to more involved cleaning methods for steel, wood, or aluminum doors.
Cleaning Scuffs and Spills from Walls
You will get a scuff from a bike handle or an oil splatter from the lawnmower. Don’t panic and don’t use harsh chemicals.
My method is to start gentle and increase strength only if needed. For dirt and scuffs, a microfiber cloth dampened with warm water and a drop of dish soap usually works. Wipe in a circular motion. For grease or oil, I use a dedicated cleaner like Simple Green. Spray a small amount on the cloth, not the wall, and dab at the spot. Always test your cleaner in an inconspicuous area first to ensure it doesn’t dull the sheen. Rinse the area with a water-dampened cloth and dry it.
Your Seasonal Exterior Inspection
Twice a year-once in spring and once in fall-walk around your garage exterior with a critical eye. You’re looking for three main issues:
- Cracking or Peeling: This often starts at trim joints or where wood meets masonry. Press on it lightly. If it feels soft or brittle, moisture is getting behind the paint.
- Mildew: Look for black, gray, or green speckled patches, especially on north-facing walls that get little sun.
- Chalking: Rub the wall with your hand. If you get a powdery residue, the paint pigments are breaking down from UV exposure.
Catching these early means a simple spot repair. Waiting turns it into a full repaint project.
When and How to Touch Up the Paint
Even the best paint gets nicked. Touching up correctly keeps it looking fresh for a decade.
Always keep your leftover paint. I transfer it to a clean, airtight plastic or glass container, like a mason jar. Label it clearly with the room, brand, color name, and number. Store it in a cool, dark place-not in a freezing garage or hot attic. This is especially important if you store paint in your garage.
To fix a chip or deep scratch:
- Use fine-grit sandpaper (220-grit) to lightly feather the edges of the damaged spot. This prevents a visible “ridge.”
- Wipe away all dust with a tack cloth.
- Stir your saved paint thoroughly-don’t shake it, as that creates bubbles.
- Use a small, high-quality artist’s brush for precision. Dab the paint into the center of the chip and gently brush outward to the feathered edges.
- The key to a seamless touch-up is to avoid over-brushing. Apply the paint and let it dry. It may take two or three thin coats to build up to the surrounding color and sheen. Trying to do it in one thick coat will look gloppy and obvious.
Garage Paint Color FAQ: Straight Answers from a Pro
How does my home’s architectural style influence my garage exterior color choice?
Your home’s style dictates appropriate palettes. Traditional styles like Colonial suit classic whites or neutrals that match trim, while modern designs allow for bold, monochromatic statements. Always pull a siding sample to ensure cohesion and avoid visual discord with your main house.
I have a preference for a specific color family. What should I consider for garage use?
Neutrals like light grays are top picks for hiding dust and maximizing light reflection. Bright colors can fade or show scuffs quickly, and dark hues reduce brightness and increase heat absorption. Check the paint’s Light Reflectance Value (LRV)-aim for above 50 for optimal garage functionality.
How crucial is ease of cleaning and maintenance when selecting paint?
Non-negotiable. Always choose satin or semi-gloss sheens for wipeable surfaces; flat paint is a liability. For zones with heavy abuse, upgrade to a tough enamel like Sherwin-Williams Emerald Urethane. This proactive choice minimizes future repairs and keeps your garage looking sharp.
How does my garage’s primary purpose affect color selection from a maintenance standpoint?
High-activity spaces like workshops demand durable, stain-hiding colors (e.g., medium grays) and enamel finishes on lower walls. For basic storage, lighter colors aid visibility but require regular dusting. Align your color and sheen with expected wear to reduce long-term upkeep.
Final Thoughts on Garage Color Choices
The best garage color is the one you’ve tested for your specific space and that stands up to your garage’s unique demands. Don’t just pick a swatch from a card. Your garage is a workshop, a storage area, and part of your home’s curb appeal all at once. The right paint makes it safer, more durable, and a place you enjoy. Keep these points in mind as you finalize your plan.
- Treat your garage floor first with an epoxy or moisture-resistant paint like Rust-Oleum EpoxyShield; wall color comes second.
- Always test large paint samples on different walls and view them at multiple times of day before buying gallons.
- Choose a semi-gloss or satin sheen for walls and ceilings to make cleaning up dust and splatters much easier.
- Proper prep-cleaning, repairing, and priming-matters more than the paint brand for a lasting finish.
Also consider epoxy paint garage floor diy; it’s a popular choice for tough, easy-to-clean surfaces. The same prep principles—thorough cleaning, repairs, and priming—apply whether you’re painting walls or a garage floor.