
What Type of Drywall is Best for Garage Walls and How Do You Install It Properly?
Choosing the wrong drywall for your garage can leave you with damp, damaged walls or safety concerns. I will help you pick the right material and show you a straightforward way to install it.
This guide will walk you through picking between standard, moisture-resistant, and fire-rated drywall, preparing your wall studs, hanging and securing the panels, and finishing with tape and joint compound.
I have installed and repaired garage drywall in hundreds of homes, learning through trial and error what holds up to real world use.
Why Your Garage Walls Need More Than Just Studs
Open studs might look like a handy place to hang tools, but you’re leaving your home exposed. Drywall does three important jobs in a garage. First, it acts as a fire barrier to slow flames from your garage from spreading into your living space. Second, it gives you a finished, paintable surface that keeps out drafts and dust. Third, the paper face helps manage minor moisture vapor, preventing your insulation from getting soggy.
You might ask, “Do I really need to install drywall?” I install it in almost every garage I finish. The biggest pro is safety; a proper fire-rated wall is a non-negotiable layer of protection for your family. The finished look also makes the space more usable and increases your home’s value. The main con is the time and skill required to do it cleanly. It’s a dusty, multi-day project.
Some folks use plywood or oriented strand board (OSB) instead for a more rugged, fastener-friendly wall. I’ve done this in workshop areas. It’s quicker to install and you can screw into it anywhere, but it doesn’t meet fire code for a separating wall and it’s more expensive. We’ll look at that choice more closely later.
Choosing Your Garage Drywall: Type, Thickness, and Fire Ratings
Walking down the drywall aisle can be confusing. You have three main types for garage use. Regular white-board drywall is for interior rooms. Moisture-resistant drywall, often called green board for its paper color, handles damp air better but isn’t for direct water. Fire-rated drywall, labeled Type X, has glass fibers mixed into the gypsum core to resist fire longer. Also, think about how wall materials pair with the door type you’ll install in your garage. The best combination supports insulation, moisture control, and long-term durability.
For garage walls, my go-to is standard 1/2-inch thick, fire-rated Type X drywall. I buy the USG Sheetrock brand from my local supplier because it’s consistently flat and cuts cleanly. The green board isn’t necessary unless your garage is very damp, and even then, fixing the moisture source is a better first step.
So, what thickness of drywall should be used? This is where code and common sense meet. For walls, 1/2-inch is standard and much easier to handle. For ceilings, I always use 5/8-inch thick drywall. The extra weight helps prevent sagging over time, and it has a better fire rating. If your garage shares a wall with your house, your local building code will almost certainly require 5/8-inch Type X drywall on that shared wall and often on the ceiling. Always check with your permit office first.
To answer the common questions directly: What type is best? 1/2-inch Type X for walls, 5/8-inch Type X for the ceiling. What about fire resistance? It’s not just a good idea; it’s very often the law for the wall attached to your home. Don’t skip it.
The Garage Log’s DIY Difficulty & Time Estimate
I rate this project a 6 out of 10 for difficulty. It’s less about advanced skill and more about patience and attention to detail. If you can measure accurately and are willing to sand dust, you can do this.
For a typical two-car garage, plan for 2 to 3 full days of active work. Day one is hanging all the panels with a helper. Days two and three are for taping, applying joint compound (mud), and sanding. The critical factor everyone forgets is drying time; you must wait a full 24 to 48 hours between coats of mud for it to dry properly, not just harden on the surface. If you’re in an HOA community, be sure to review HOA garage construction rules and permit requirements before you begin. That way your project stays compliant and avoids delays.
You will absolutely want a second person. A 4×8 sheet of 1/2-inch drywall is awkward and heavy. Trying to lift, position, and screw it alone onto a ceiling joist is a great way to damage the panel and your back. A helper cuts the job time in half.
Gearhead’s Checklist: Tools and Materials You Actually Need
Getting the right gear before you start is not just about efficiency, it’s about getting a clean, durable finish. Here’s the exact kit I put together for every garage drywall job.
Your Core Tool Lineup
You don’t need a truck full of specialty tools, but these are non-negotiable. A cordless drill is your workhorse. I’ve been using a Milwaukee M18 Fuel drill/driver for years; its clutch is precise, which is critical for setting screws without tearing the paper. You’ll also need a sharp utility knife with plenty of spare blades-I snap them off as soon as the edge dulls. A 4-foot level is for checking stud alignment, not for hanging the boards. For cutting, a basic keyhole saw handles outlets and a T-square gives you straight scores. The drywall rasp is the most underrated tool here; it quickly shaves down edges for a perfect fit without creating a dust storm.
Setting Screws the Right Way
This is where most DIYers go wrong. Driving screws too deep, or “breaking the paper,” creates a weak spot that will crack. A dedicated drywall screw gun has a collar that stops at the perfect depth. If you’re using a standard drill, you must use the clutch. Start with a low setting and test on a scrap piece. You want the screw head to sit just below the surface without ripping the brown paper. It should look like a dimple, not a crater.
Materials That Hold Up
Buying the right materials prevents callbacks. For screws, use 1-5/8″ coarse-thread drywall screws for 1/2″ drywall on wood studs. They grab better than fine-thread. For joint compound, I’ve settled on USG All-Purpose Powder. It mixes to a consistent, smooth texture and has more glue in it than pre-mixed, resulting in a harder, more crack-resistant finish. You’ll need paper tape, not mesh, for your butt joints and inside corners in a garage-it’s stronger. For the panels themselves, stick with 1/2″ regular or moisture-resistant drywall from a major brand like USG or National Gypsum; there’s no need for expensive lightweight board here.
FAQ: What Tools Are Needed for a Garage Drywall Project?
You need a drill with a clutch, a 4-foot level, a utility knife, a T-square, a drywall rasp, and a keyhole saw. The goal is to measure, cut, and fasten accurately. A drywall lift is a great rental for ceilings, but for walls, a helper and some patience work just fine. Investing in a quality drill and learning its clutch settings will make a bigger difference in your final result than any other tool.
Step 1: How to Prep Your Garage Walls for Drywall
Before you pick up a single sheet of drywall, the work you do here determines how good your final project looks and how long it lasts. Rushing this step is the most common mistake I see. Treat it like prepping a canvas for a painting.
Check Plumbing, Electrical, and Insulation
Once the drywall is up, fixing anything behind it is a massive, messy headache. I walk the entire wall and do a three-point check.
- Plumbing: Look for all drain, supply, and vent pipes. Give them a gentle shake to ensure they’re securely strapped. A loose pipe will rattle and eventually leak.
- Electrical: Verify every electrical box is firmly nailed to a stud. Tug lightly on the Romex cable where it enters the box; it shouldn’t pull out. This is a basic code check for safety.
- Insulation: For garages I plan to heat or cool, I use unfaced fiberglass batts or rigid foam board like Owens Corning FOAMULAR. Make sure it’s snug between studs with no gaps or compression. If your garage is unfinished and drafty, insulating now is the single best upgrade for comfort.
My rule is simple: if you wouldn’t trust it buried in a wall for 20 years, fix it now.
Find and Mark Your Stud Centers
Your drywall screws must hit solid wood. Missing the stud means a weak spot that will crack or pop. I use a combination of tools for reliability.
- Start with a stud finder. I’ve had the best luck with the Zircon Metal Scanner models because they also find wires and pipes, which prevents a dangerous drill through a live cable.
- Confirm by knocking on the wall. The hollow sound becomes solid over the stud.
- Use a small finishing nail or a 1/16-inch drill bit to poke a test hole and confirm you’ve hit wood.
Once located, don’t just mark the edge. Use a 4-foot level or a long straightedge to draw a vertical line down the exact center of each stud. Marking the centerline is the pro trick that makes screwing off drywall fast and accurate. I use a bright blue lumber crayon; it’s easier to see through dust than pencil.
Address Moisture and Leaks Immediately
Drywall and moisture are enemies. Hanging board on a damp wall guarantees mold and crumbling seams later. Inspect the foundation and the wall framing, especially near the floor and ceiling.
- Look for dark streaks, soft wood, or white, powdery mineral deposits (efflorescence) on the concrete. These are sure signs of water intrusion.
- Check the exterior grading. The ground should slope away from your garage foundation. If water pools near the wall, you must fix the drainage first. I’ve seen too many homeowners drywall over this, only to rip it all out a year later.
For minor seepage in poured concrete walls, I’ve used waterproofing masonry paint like DRYLOK with good results. For serious leaks, consult a foundation specialist before proceeding.
Add Blocking for Future Storage
This is the planning-ahead step most people skip and later regret. Think about where you’ll want shelves, cabinets, or a workbench. A typical stud wall only gives you wood every 16 inches, which isn’t enough support for heavy items.
I install horizontal 2×4 or 2×6 “blocking” between the vertical studs. Cut the wood to fit snugly, nail it in place with 16d nails, and make sure the face is flush with the front of the studs. Adding blocking now gives you a solid, continuous backing to screw into anywhere along the wall, turning your entire garage into a potential tool wall. It’s a bit of extra work and lumber cost, but it pays off for decades.
So, how do you prepare the walls? It’s this systematic process: verify everything inside is complete and secure, accurately map your studs, eliminate any moisture, and build in strength for the future. Do this, and hanging the drywall becomes the easy part.
Step 2: Measure, Mark, and Cut Drywall Panels
This is where the project shifts from planning to action. I’ve seen more frustration and wasted material from sloppy cutting than almost any other step. Getting your cuts right the first time saves money, time, and prevents gaps that are a nightmare to tape and finish later.
Measure Twice, Cut Once Is Your New Mantra
I can’t say it enough. For drywall, you’re measuring the open space between framing, not the entire wall length. Use a sturdy 25-foot tape measure. I keep a Stanley PowerLock in my bag. Hold the panel in place against the studs and mark its width directly on the face of the drywall with a pencil. Always subtract a quarter-inch from your measurement to ensure the panel doesn’t fit too tightly, which can cause cracks down the road. Mark a second time to confirm your number before you ever touch a knife.
Mastering the Score-and-Snap for Straight Cuts
For straight cuts, the score-and-snap method is all you need. You don’t require expensive power tools. Here’s my shop-tested process:
- Place your panel on a flat surface, face up. I use two sturdy sawhorses.
- Lay a 4-foot drywall T-square (I prefer the aluminum ones from Stanley) along your pencil line. This guarantees a perfect 90-degree cut.
- With a sharp utility knife-I buy Husky blades in bulk-score deeply along the square’s edge. You need to cut through the paper face and into the gypsum core, not just scratch the surface.
- Slide the panel so the scored line is just over the edge of your sawhorses, then snap the panel downward towards the floor.
- Fold the piece back, and run your knife along the crease on the backside to cut the remaining paper and release the piece.
Cutting Holes for Outlets, Switches, and Pipes
Cutting around obstacles seems tricky, but it’s straightforward with the right tool. Never use your utility knife for this. A keyhole saw, sometimes called a drywall saw, is your best friend for these precise cuts. The pointed tip lets you punch a starting hole easily.
For electrical boxes, measure carefully from the edge of your last panel to the center of the box. Transfer those measurements to your new panel. I’ll often hold the panel up, get it roughly positioned, and then lightly tap the panel over the box. The box will leave indentations in the back of the drywall, giving you a perfect outline to cut. Cut just inside your marks so the panel slips over the box without force.
Always shut off power to the circuit you’re working near before cutting around an electrical box. Safety is non-negotiable.
Fine-Tuning with a Drywall Rasp
Not every cut will be perfect. Maybe a stud is slightly warmed or your measurement was a hair off. This is where a drywall rasp saves the day. It looks like a big, flat cheese grater. Use a rasp to shave down edges a little at a time until the panel fits snugly without buckling. I keep a Hyde Tools rasp in my kit. It’s faster and creates less dust than sanding a bad edge. Run it in one direction for a smooth finish.
FAQ: How Do I Measure and Cut the Panels?
The most common mistake is measuring the wall instead of the opening between the studs. Hold the panel in its final position and mark directly on it. For cuts, trust the score-and-snap method with a T-square for straight lines and a keyhole saw for any holes. That rasp is your secret weapon for the final fit. Go slow here. Rushing leads to gaps you’ll see forever.
Step 3: Hanging Drywall Panels the Right Way
This is where the garage starts to look finished. Doing this step correctly means fewer cracks and a smoother surface for taping later. The two most common questions I get are about the proper technique and how to secure the panels.
The right order is non-negotiable: you always hang the ceiling before the walls. This lets the wall panels support the edges of the ceiling drywall, locking everything together. Trying to do walls first creates an unsupported seam that’s a nightmare to finish.
Lifting, Bracing, and Getting it in Place
A 4×12-foot sheet of 5/8″ drywall is heavy. For the ceiling, you need a helper or a tool called a “deadman.” I built mine from two 2x4s in a T-shape, cut to hold the panel snug against the joists. It’s a lifesaver. Lift one end of the panel onto the deadman, then walk the other end up and into position. For walls, you can often “walk” the panel up by yourself, tilting the bottom out and sliding it up the studs.
Securing it to Studs: Screw Pattern is Key
You’ll need a drywall screw gun or a drill with a clutch. I use a Senco screw gun because it consistently sinks screws to the perfect depth. Drive screws every 12 inches along ceiling joists and every 16 inches along wall studs.
The goal is to drive the screw so the head sits just below the paper surface without breaking it-this is called “dimpling.” If you tear the paper, the screw has little holding power and must be replaced. Start screws in the center of the panel and work your way out to the edges to press out any air bubbles.
Staggering Seams and Managing Corners
Never line up the vertical ends of your sheets in consecutive rows. Stagger them like bricks. If your first full sheet on the ceiling starts at a corner, start the next row with a half-sheet. This distributes stress and prevents long, weak seam lines.
For inside corners, cut one panel to fit snugly into the corner. The panel for the adjoining wall should be cut and butted against the first. Don’t force it. Outside corners are fragile. I prefer to use metal corner bead, which you install after all the drywall is hung, rather than trying to make perfect drywall-to-drywall meets.
The “Log Entry” Pro-Tip
When cutting around outlets, shut off the power at the breaker and cut the hole 1/4-inch larger than the box. It gives you wiggle room for a perfect fit, and the outlet cover plate will completely hide the gap. I learned this the hard way after fighting with a too-tight fit for an hour on a job years ago.
Step 4: Taping, Mudding, and Sanding for a Smooth Finish

This is where the real craft begins. Hanging the drywall gets you the shape, but taping and mudding give you the surface. Doing this right is what separates a pro-looking garage from a patchy mess. Let’s get your walls ready for paint.
Choosing Your Joint Compound
You have two main choices: pre-mixed mud in a bucket or powder you mix yourself. For a garage, and especially for a DIYer, I always grab the pre-mixed. The USG All-Purpose stuff in the green-top bucket is my go-to. It’s consistent, easy to work with, and forgiving if you need to fix a mistake. Powder compound, like Durabond, sets harder and faster, which is great for pros on a schedule or for filling deep gaps, but it’s less forgiving. It can start to set before you’re done, and once it’s hard, sanding it is a chore. Stick with a pre-mixed, all-purpose joint compound for your garage; it gives you the working time you need to get a smooth finish.
The Three-Coat Process: A Layer-by-Layer Guide
You’ll apply three separate coats of mud. Rushing this is the biggest mistake I see. Each coat has a specific job and needs to dry completely before you move on.
First Coat: Embedding the Tape
Your goal here is to securely bury the paper drywall tape in a layer of mud. I use a 6-inch taping knife for this.
- Apply a continuous bed of mud, about 1/8-inch thick, over the length of the joint.
- Press the paper tape into the wet mud, centering it over the seam.
- Using your 6-inch knife, scrape firmly over the tape to squeeze out excess mud and lock it in place. You should see a thin layer of mud come through the tape’s mesh.
- Feather the edges of this coat out a few inches on either side of the tape. Don’t worry about perfection, just get the tape embedded flat with no bubbles.
Second Coat: Building Width
Once the first coat is bone dry (touch it, it should feel cool and hard), it’s time for the 12-inch knife. This coat builds out the seam to hide the tape’s edges.
- Load your mud onto a hawk or directly onto your 12-inch knife.
- Apply a generous coat over the taped joint, focusing on covering the feathered edges from the first coat.
- Hold the knife at a shallow angle and pull it down the joint in one smooth motion. This second coat should be about 10 to 12 inches wide, creating a gentle, flat slope from the center of the seam to the wall.
- Let this coat dry completely. This often takes overnight.
Third Coat: The Final Skim
This is your finish coat. The goal is to hide the previous coat’s ridges and blend the seam invisibly into the wall.
- Use your 12-inch knife again. Your mud should be a bit thinner for this coat; I often add a spoonful of water to the bucket and mix it well.
- Apply a final, thin layer over the entire area of the second coat.
- Make your final passes with the knife, using light pressure. Wipe the knife clean after each pass. This coat should feather out to almost nothing at the edges, making the seam disappear.
Controlling the Dust: Sanding the Right Way
Sanding creates a huge amount of fine dust. Doing it without control will coat every tool and surface in your garage. I use a pole sander with a vacuum attachment. The Festool Planex is the pro’s dream for this, but for a homeowner, a standard pole sander with a shop vac hooked up works wonders. It’s essential to pair this with good dust control practices to maintain air quality in your garage.
- Attach 120-grit sandpaper to your pole sander.
- Connect your shop vacuum hose to the sander’s dust port if it has one. If not, have a helper hold the vacuum hose near where you are sanding.
- Use broad, even strokes with moderate pressure. You’re not trying to remove mud, just knock down ridges and high spots. The trick is to sand just until the wall feels smooth to your hand; over-sanding will cut through the paper facing of the drywall.
- After sanding, wipe the entire wall down with a damp cloth or a dry microfiber mop to remove all dust before priming.
Step 5: Priming and Painting Garage Drywall
This is where your project turns from construction into a finished space. Skipping proper priming is a mistake I see too often, and it always leads to problems down the road.
You must seal fresh drywall with primer; it creates a uniform surface so your paint adheres correctly and looks even. Without it, the drywall paper sucks moisture out of the paint, causing patchy color and poor durability. I exclusively use a PVA (Polyvinyl Acetate) primer for new drywall. It’s affordable and seals the surface perfectly. Brands like Zinsser Bullseye 1-2-3 or Kilz PVA are my shop standards.
Choosing and Applying Your Primer
Pour your PVA primer into a roller tray. I use a 3/8-inch nap roller cover for this job too-it holds a lot of primer and helps fill the tiny texture of the taped joints. Work in manageable sections, about 4×4 feet. Roll the primer onto the wall in a “W” or “M” pattern, then go back over it with vertical strokes to even it out. One full, even coat of PVA primer is sufficient; you’re sealing the wall, not building up layers. Let it dry completely according to the can’s instructions, usually a few hours.
Selecting the Right Garage Paint
Your garage walls need tough paint. Glossy finishes show every imperfection, and flat paint is impossible to clean. I always recommend an eggshell or satin sheen. They have a slight gloss that resists stains and can be wiped down without damaging the finish. If you’re aiming for the best paint for garage walls, look for a durable, washable finish designed for high-traffic spaces. I can help you compare the top options for the best paint garage walls to keep yours easy to maintain.
For the paint itself, use a high-quality interior wall paint designed for durability. Look for a paint labeled “scrubbable” or “washable.” I’ve had great results with Behr Marquee or Sherwin-Williams Duration Home lines. They cost more than bargain paint, but the film is stronger and lasts years longer in a high-traffic area like a garage. If you’re also painting a garage door, consider an exterior enamel with UV resistance. Details on choosing paint for the garage door will follow.
Painting for a Professional Finish
Stir your paint thoroughly. Start by “cutting in” the edges with a 2-inch angled brush-paint a 2-3 inch strip along the ceiling, corners, and trim. Then, use your roller. A 3/8-inch nap roller is perfect again. It’s like a thick bathroom towel; it holds plenty of paint to give the wall a slight, attractive texture that hides minor flaws. Apply two thin coats of paint, letting the first dry completely before starting the second. Two thin coats are always more durable and even-looking than one thick, drippy coat.
What type of primer and paint is recommended?
For primer, a basic PVA drywall primer is all you need. It’s a sealer. For paint, invest in a quality interior paint with an eggshell or satin finish. The sheen provides just enough scrubbability for garage life. Buy the best paint you can for this step; it’s the protective shell for all your hard work. It’s especially important when painting garage walls, ceilings, and floors.
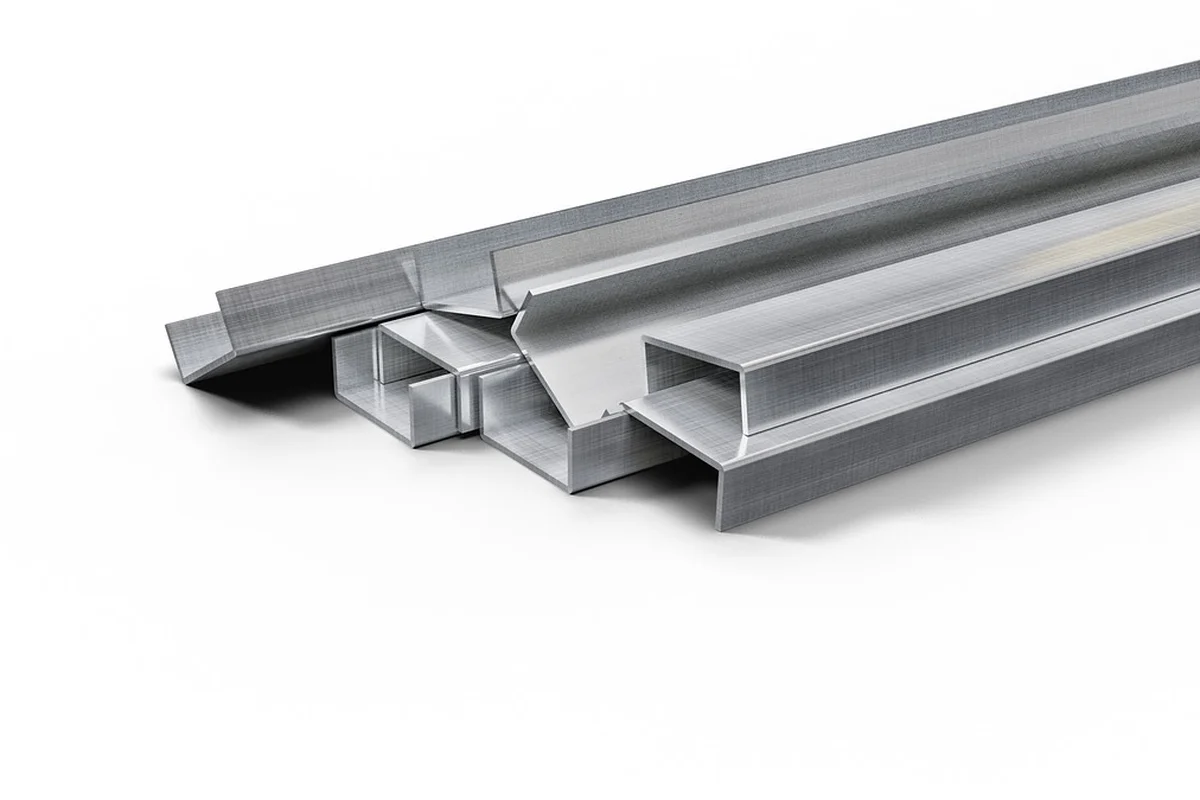
Garage Wall Alternatives: When Plywood or OSB Makes Sense
Yes, you can absolutely use plywood or OSB (oriented strand board) instead of drywall in your garage. It’s a question I get a lot. The real question is whether you should, and that comes down to what you plan to do in that space.
Plywood vs. OSB for a Working Garage
For a pure utility wall, workshop, or heavy storage area, I often lean towards paneling. Think of it like this: drywall is a finished wall covering, while plywood or OSB is a structural sheathing material you’re using as a finish.
- OSB is the budget-friendly, workhorse choice. It’s made from compressed wood strands. I’ve used 7/16-inch thick AdvanTech flooring panels as wall sheathing in a workshop because it’s incredibly stiff and handles moisture from spills better than standard OSB. For most garage walls where you just need a tough surface, standard 7/16-inch or 1/2-inch OSB does the job perfectly well at a lower cost.
- Plywood is generally stronger and has a smoother face, which is nice if you might paint it. For a wall where I knew I’d be mounting a heavy French cleat system for tool storage, I used 1/2-inch ACX plywood. The “A” side was sanded smooth for a cleaner look, and the “C” side didn’t matter because it faces the studs. It’s more expensive than OSB, but the edge won’t crumble as easily if you bump it with a ladder.
Choosing the Right Thickness
How thick of OSB for garage walls? Don’t overthink it. For walls, you’re not walking on it, so you don’t need the super-thick stuff. Just make sure it matches your garage wall framing.
- 7/16-inch is the common minimum. It’s what you’ll find at most home centers. It’s plenty for hanging shelves, pegboard, or basic cabinets. I’ve hung 4×8 sheets of this by myself with a panel lift.
- 1/2-inch gives you a bit more rigidity and screw-holding power, which is valuable if your studs are spaced 24 inches on center instead of 16 inches. If your garage is unfinished and you see 24-inch stud spacing, go with 1/2-inch material to prevent sagging between the frames.
I keep a box of 2-inch coarse-thread deck screws for this job. They grab into the studs and the panel material far better than drywall screws, which can snap under the weight of a heavy panel.
The Real Trade-Offs You Need to Consider
Paneling is not a direct, better-than-drywall swap. You gain some things and lose others.
The Big Win: Mounting Anything, Anywhere. This is the main reason people choose it. You can screw a hook, bracket, or shelf directly into the wall without hunting for a stud. The entire surface is load-bearing. For a shop wall covered in tools, this is a game-changer.
The Notable Losses:
- Fire Rating: This is critical for safety. Drywall, specifically Type X, is a fire barrier. Plywood and OSB are fuel. If your garage is attached to your house, check your local building code. Many require a fire-rated separation (like drywall) on shared walls.
- Finished Look: Paneling looks like a workshop. Even painted, you’ll see seams and texture. Drywall gives you a smooth, paintable, “house-like” finish. If your garage is more of a rec room or you care about resale, drywall is the expected choice.
- Cost & Labor: While OSB can be cheaper per sheet, the sheets are heavier and harder to handle alone than drywall. You also give up the option for a seamless look without a lot of extra filling and sanding work on the seams.
In my own garage, I split the difference. The front wall where my workbench is has 1/2-inch sanded plywood for mounting flexibility. The walls adjoining the house are finished with 5/8-inch Type X drywall for fire safety. Matching your wall material to the specific function of each wall is a professional approach that gives you both utility and safety.
Safety First: Your Garage Drywall Installation Precautions
Installing drywall is physical work. I’ve seen too many weekend projects get sidelined by preventable injuries or sloppy oversights. Good results start with a safe, methodical approach to protect yourself and your home. Don’t rush this part.
Gear Up for the Mess
Drywall work creates a fine, irritating dust that gets everywhere. Cutting it produces sharp edges. I always suit up with three specific items before I even open the first panel.
- Safety Glasses: Not sunglasses. Clear, ANSI-rated glasses. A sliver of drywall or a staple popping from a stud can easily fly toward your eye.
- A Good Dust Mask: A basic fabric mask isn’t enough. Use a respirator with a P100 filter, like the 3M 7500 Series. Your lungs will thank you later, especially during sanding.
- Work Gloves: I prefer the Firm Grip All-Purpose gloves from Harbor Freight for this. They’re cheap, offer decent grip, and protect your hands from the abrasive board edges and metal corner bead.
Work From a Stable Platform
Never use a chair, bucket, or wobbly stack of wood. A fall from even a few feet can cause a serious injury and ruin your project. For garage walls, I use one of two setups.
For the lower half of the wall, a sturdy, wide-based step ladder is sufficient. For ceilings or the top half of tall walls, you need proper scaffolding or baker staging. I rent a 5-foot section of rolling scaffold from my local tool rental for about $40 a day. It’s stable, gives you a large platform to hold tools and a panel, and is worth every penny.
Locate and Respect Electrical Lines
This is non-negotiable. Before you make any cut for an outlet, switch, or light, you must confirm the power is off.
- Turn off the circuit at your main breaker panel.
- Use a non-contact voltage tester. I keep a Klein Tools NCVT-3 in my pouch. Test at the outlet or switch box and test the wires inside it to double-check they’re not live.
- Only then do you mark and cut your drywall. Assume every wire is hot until you prove it isn’t.
Handle Panels with Care
A standard 4×8 sheet of 1/2-inch drywall weighs about 55 pounds. The 5/8-inch fire-rated type is over 70 pounds. Lifting these incorrectly is a fast track to a strained back.
I never try to muscle a full sheet into place alone. For a DIYer, here’s the smarter method: use a panel lift. You can rent one, or a decent helper is the next best thing. When carrying, keep the panel vertical and close to your body, using your legs to lift. If you feel a twinge, stop and reassess.
What Safety Precautions Should I Take?
Think of safety in three layers: what you wear, how you work, and what you check.
First, wear the right personal protective equipment (PPE) every time. My glasses, mask, and gloves stay on from the first cut to the final sanding swipe.
Second, control your workspace. Secure your ladder, keep the floor clear of off-cuts and tools to avoid tripping, and ensure you have bright, shadow-free light so you can see what you’re doing.
Finally, verify your home’s systems. That means confirming electrical wires are dead and knowing where plumbing pipes might be behind the studs. A few minutes of caution prevents days of repair work.
Garage Drywall Installation: Your Quick-Hit Q&A
What’s the proper technique for hanging the first panel?
Always start with the ceiling, positioning the long edge perpendicular to the joists. Use a deadman brace or a helper to hold it tight against the framing before driving your first screws. This ensures the ceiling is fully supported before the walls go up.
How do I secure the drywall to the studs without causing damage?
Use a drill with a clutch or a drywall screw gun. Drive 1-5/8″ coarse-thread screws every 12 inches on ceilings and 16 inches on walls, sinking the head just below the surface to create a “dimple” without tearing the paper face. Start in the center of the panel and work outwards.
How do I handle outside corners?
Don’t try to mate two drywall edges. Install a metal or vinyl corner bead after all panels are hung. Secure it with joint compound or specialized fasteners, then apply mud over it. This creates a durable, straight corner that can withstand bumps.
What type of joint compound is best for a DIYer?
Use a pre-mixed, all-purpose joint compound from a quality brand like USG. It offers plenty of working time for beginners, is easy to sand, and provides a durable enough finish for garage walls. Save the fast-setting powders for the pros.
What’s the one non-negotiable rule for taping seams?
Your first coat must fully embed the tape. Apply a bed of mud, press the tape in firmly, and scrape it smooth with your knife until a thin layer of mud squeezes through the mesh. Skipping this step guarantees bubbles and cracks later.
How do I sand joints without creating a dust disaster?
Use a pole sander and attach your shop vacuum if possible. Sand with 120-grit paper using broad, even strokes just until the wall feels smooth to your palm-over-sanding will expose the tape or drywall paper. Immediately wipe walls down with a damp cloth afterward.
Are there special considerations for electrical boxes?
Yes. Always shut off the power at the breaker before cutting. Measure from the edge of your last panel to the box center, transfer to your new panel, and cut the hole with a keyhole saw. Cut it about 1/4-inch larger than the box; the cover plate will hide the gap.
My Go-To Advice for Garage Drywall
Getting your garage walls right boils down to using moisture-resistant drywall and taking your time during installation. A vapor barrier is a key part of moisture control in garage spaces. It helps slow moisture migration and reduces mold risk. Keep these core lessons from my own projects in mind:
- Skip standard drywall; I always use 5/8-inch Type X or paper-faced moisture-resistant board for its fire rating and ability to handle garage humidity.
- Secure sheets with a screw gun-I use a Dewalt model for consistency-driving screws into studs every 12 inches to prevent sagging and cracks.
- Focus on the finish: apply joint compound in thin coats with a 6-inch taping knife and sand thoroughly between layers for seamless walls.
- Protect your work with a primer and a dedicated garage paint; I’ve found Behr’s specialty garage paint holds up well against stains and scrapes.
Evan Gunther
Evan is a general contractor operating in Columbus, Ohio servicing, maintaining and building residential and commercial garages for over two decades. He has personally redeveloped over 100+ garages and installed and reinstalled over 230+ garage doors in his long tenure. When it comes to giving your garage a face lift or fixing common issues, Evan's the pro. Feel free to reach out to him and follow his Garage Log blog for expert, fact based advice.