
How Do You Paint Your Garage Floor with Epoxy for a DIY Finish That Lasts?
Thinking about painting your garage floor but worried it’ll peel up in a year? I’ve made those mistakes so you don’t have to.
This guide will walk you through the real work, from the concrete prep most people skip to the final coat. We will cover the critical preparation steps, how to choose the right epoxy kit, the tools you actually need for application, and how to manage drying time for a tough finish.
My advice comes from applying these products in my own shop and helping neighbors get it right the first time.
Project Overview: What You’re Getting Into
I give this project an “Ease of Installation” rating of a 5 out of 10. It’s not complicated, but it’s physically demanding and unforgiving of mistakes or shortcuts. A rating of 10 is a full commercial spray-on polyaspartic job.
You need to block out three full days, but only one of them is hard labor. The first day is all prep and cleaning (6-8 hours of active work). The second day is mixing and applying the epoxy (4-5 hours of active work). The third day is a mandatory waiting period for the coating to cure enough for light foot traffic. Plan for at least 72 hours before you can park a car on it, and a full week before subjecting it to heavy use.
You can do this solo, but I strongly recommend a helper for the application day. Epoxy has a limited “pot life” once mixed. Having one person pour and spread while the other rolls it out saves critical minutes and leads to a more consistent finish. For mixing the two-part epoxy, a second set of hands is just safer and easier.
Your DIY finish will look fantastic and be very durable if you follow the steps. A professional job using 100% solids epoxy and a polyurea topcoat will be thicker, slightly more chemically resistant, and might last 5-10 years longer. As you weigh epoxy vs polyurea garage floors, you’ll see how durability, cure time, and maintenance differ. For 90% of homeowners, a meticulous DIY epoxy job provides incredible value and a garage that’s easy to clean and looks professional.
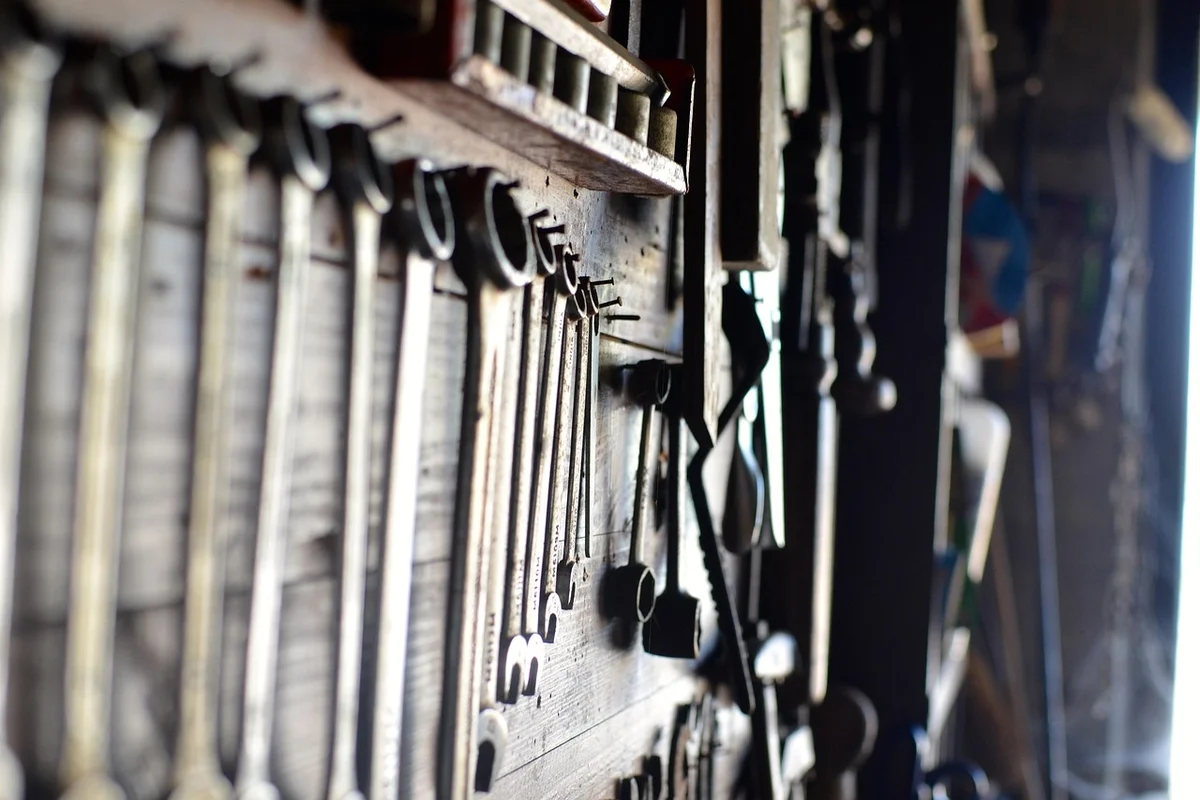
Gearhead’s Checklist: Tools and Materials You Absolutely Need
Do not skip items on this list. Epoxy fails because of poor prep or using the wrong tools. I’ve learned this the hard way on my own floor and early client jobs.
Prep-Specific Gear
This is where the battle is won or lost. Your concrete must be surgically clean and textured.
- Must-Have: A heavy-duty pressure washer (at least 3000 PSI). A garden sprayer won’t cut it. I use a Simpson Megashot. You need it to blast out dirt from pores and later to neutralize acid.
- Must-Have: Concrete etcher. I prefer phosphoric acid over muriatic acid. It’s less fuming and volatile. Brands like Rust-Oleum EPOXYShield sell it in easy gallon jugs. You need this to open the concrete’s pores for the epoxy to bond.
- Must-Have: Stiff bristle push brooms (two is ideal), a shop vacuum rated for wet pickup, and plastic sheeting for masking walls.
- Must-Have: Concrete crack filler and a caulk gun. I use Quikrete Polyurethane Concrete Crack Sealant. It remains flexible.
- Nice-to-Have: A diamond grinder rental. If your floor has old paint, sealers, or is very smooth, acid etching might not be enough. Grinding is the gold standard for prep. It’s dusty and loud, but guarantees adhesion.
- Nice-to-Have: Spiked shoe attachments (like “Dollies”). These let you walk on the wet epoxy to back-roll edges without leaving footprint marks. A game-changer for solo workers.
Application-Specific Gear
Using the right spreader and roller is non-negotiable for a smooth, even coat.
- Must-Have: High-quality epoxy kit. I’ve had good results with Rust-Oleum Rocksolid kits for a balance of cost and durability. Get a 100% solids kit if your budget allows.
- Must-Have: Multiple 5-gallon buckets (get 3 or 4). You’ll use one for mixing, one for clean water, and spares. Don’t try to mix epoxy in the tray it comes in.
- Must-Have: A heavy-duty drill (½-inch) and a Jiffy mixing paddle. Epoxy is thick. A weak drill will stall and leave unmixed portions that won’t cure properly.
- Must-Have: A notched squeegee for spreading. This gets the material out of the bucket and evenly distributed fast. A paint roller alone will take too long.
- Must-Have: Epoxy-rated roller frames with extension poles and 3/8″ nap roller covers. I buy Purdy or Wooster frames and use the roller covers specified by the epoxy kit manufacturer. Cheap paint rollers will shed fibers into your finish and can melt from the chemicals.
- Must-Have: Safety gear: heavy-duty rubber gloves, safety goggles, and a NIOSH-approved respirator with organic vapor cartridges. The fumes are strong.
- Nice-to-Have: An airless sprayer. For very large garages (3+ cars), I’ll use a Wagner Control Pro 130. It’s faster than rolling, but requires more skill to control overspray and masking. For most DIYers, the squeegee and roller method is perfect.
Floor Prep: The Non-Negotiable First Step
You asked, “How do I prepare my garage floor for epoxy paint?” I’ll give it to you straight. Do every single one of these steps, in order, and don’t skip anything. The single biggest reason DIY epoxy jobs fail is because someone rushed or cheated on the prep work. Think of it like painting a wall: if you paint over dirt or grease, the paint will bubble and peel right off. Epoxy is unforgiving; it needs a surgically clean, slightly rough, and perfectly dry surface to bond to for life. For clean concrete epoxy tile garage floors, the prep still has to be meticulous—no shortcuts. And for best results, treat the surface like a clean slate before you mix and apply.
Most folks think cleaning is just sweeping. For epoxy, cleaning means degreasing. Concrete is porous like a sponge, and it soaks up oil, brake fluid, and antifreeze. If you don’t pull that out, the epoxy will bubble over those spots within months. 90% of epoxy failures I see in my shop start with a grease stain that wasn’t properly treated. We’re going to fix that, so you don’t fall for one of the common epoxy garage floor myths.
You have to “etch” the concrete to open its pores and give the epoxy something to grip. You’ve got two main choices: acid washing or mechanical grinding.
- Acid Etching: This is the classic DIY method. You dilute muriatic acid with water, mop it on, let it fizz, and rinse. I’ve used the products from HDX and Behr. It works, but it’s messy, the fumes are dangerous, and if you have a lot of old sealer on your floor, the acid might not cut through it. You’re also left with a ton of acidic wastewater to neutralize and dispose of responsibly.
- Mechanical Grinding: This is the pro method, and it’s what I use on every job now. You rent a concrete floor grinder from a local tool rental. I’ve had good luck with the Bosch and EDCO units. It’s a beast of a machine that uses diamond-impregnated stones to literally scrape off the top layer of concrete. Grinding is faster, creates zero chemical runoff, and gives you a perfectly consistent, aggressively textured surface that epoxy loves. The rental cost is higher, but the result is in a different league.
After you etch or grind, the floor must be bone dry. Concrete can feel dry on top but be holding moisture deep down. My foolproof test is the plastic sheet method. Tape a 2-foot square of clear plastic sheeting tightly to the floor in a few spots and leave it for 24 hours. If you see condensation or a dark damp spot under the plastic when you peel it up, the slab is still too wet. Wait longer or use a dehumidifier.
Step-by-Step Cleaning and Etching
Follow this sequence exactly. Set aside a full weekend for prep alone.
- Clear the Floor Completely. Get everything out. I mean everything. This gives you room to work and prevents tripping over cords or hoses.
- Degrease Aggressively. Use a dedicated concrete degreaser. I keep a gallon of Oil Eater Cleaner/Degreaser in my truck for this. It’s bio-based and cuts through grease better than simple dish soap. Pour it on full strength on any stain, scrub it with a stiff-bristle push broom, and let it sit for 10-15 minutes. Then, pressure wash it off. For the whole floor, dilute it as the label says and mop it on, then pressure wash.
- Etch or Grind.
- For Acid: Wear goggles, gloves, and a respirator. In a plastic watering can, always add acid to water, never water to acid. Flood the floor section by section, watch it fizz for 10-20 minutes, then neutralize it with a baking soda/water solution before rinsing. You must collect this runoff.
- For Grinding: Wear a full-face respirator and hearing protection. The dust is intense. Connect the grinder to a heavy-duty shop vacuum. Make slow, overlapping passes. You’ll see the concrete change from a smooth grey to a uniform, sandy texture.
- Rinse and Vacuum. Whether you used acid or a grinder, you must remove all residue. Pressure wash the entire floor, pushing the dirty water out of the garage. Let it dry, then go over every inch with a shop vacuum. Get all the dust and grit up.
- Dry Completely. Give it at least 24-48 hours of dry weather with fans or a dehumidifier running, and do the plastic sheet test I mentioned above.
Fixing Cracks and Spalls
Any crack or chip bigger than a hairline needs to be filled before epoxy goes down. If you don’t, it will telegraph right through your new finish. You need a 100% solids epoxy patching compound, not a latex-based filler. I use Sikadur 31 or similar products from Legacy Industrial.
The key is to “feather” the edges so the patch blends seamlessly with the surrounding floor. Here’s how I do it:
- Use a wire brush and the shop vac to clean out all loose material from the crack.
- Mix the patching compound according to the label. It usually has a short working time.
- Overfill the crack slightly with a putty knife.
- Immediately, use a trowel held at a very low angle to scrape off the excess. You’re not pushing down; you’re dragging the trowel across the surface to smooth the patch level with the floor. This creates the feathered edge.
- Let it cure fully (usually 4-8 hours) before moving to the next step. Sand any slight high spots smooth with 80-grit sandpaper.
Mixing and Applying the Epoxy: Shop-Tested Techniques
Here’s where your prep work pays off. A successful epoxy job isn’t just about slapping on paint, it’s a timed procedure. Let’s get into the rhythm I use on every job.
The key to a strong, uniform finish is treating the epoxy mix with respect, following its chemical timetable to the letter. I always start by bringing both the resin and the hardener to room temperature, ideally between 60°F and 90°F. Cold components mix poorly and won’t flow correctly.
My mixing routine is straightforward. I pour the entire can of Part A (resin) into a clean, 5-gallon bucket. Then, I slowly add the entire can of Part B (hardener). Never deviate from the 1:1 or prescribed mix ratio, not even a little. I use a heavy-duty paint mixing paddle chucked into my corded drill, like a DeWalt DW130V. I mix at a medium speed for a full three to four minutes, scraping the sides and bottom of the bucket twice to ensure zero unmixed material.
Then comes the most common mistake I see: rushing. After mixing, the epoxy needs an “induction” or rest period. This is when the chemical reaction truly starts. For a product like Rust-Oleum EpoxyShield, this is often 30 minutes. Set a timer and walk away, this waiting period is non-negotiable for proper curing. Before you pour, put on your safety gear: a VOC-rated respirator (I use a 3M half-mask), nitrile gloves, and safety glasses. Open your garage door fully for cross-ventilation.
Mixing for Success
Think of epoxy as a two-part glue you’re spreading on the floor. Precision is everything.
- Use a timer for both the mixing and the induction period. Your phone’s timer works perfectly.
- Mix only one kit at a time unless the instructions explicitly say you can combine them. This prevents a massive, fast-hardening mess.
- Once the hardener is added, you are on the clock. Most epoxy kits give you a 1-2 hour “pot life” to get it all down.
Ignoring the manufacturer’s specific mix and rest times is the fastest way to end up with a soft, sticky, or discolored floor. I learned this the hard way on a hot day years ago, trying to beat the clock and ending up with a gummy section that never fully cured.
The Rolling and Cutting-In Process
With your mixed epoxy ready, work in manageable sections, about a 10×10 foot area. This keeps a “wet edge” so each new roller stroke blends seamlessly into the previous one.
First, “cut in” all the edges using a 3-inch angled sash brush. I prefer a Purdy brush for this. Cut in about a 3-inch band along the walls, around posts, and along the garage door threshold. Always cut in your section just before you roll it, so the brushed edge is still wet when you bring the roller to it. This eliminates visible lines.
For the main field, pour a generous “S”-shaped ribbon of epoxy onto the floor. Spread it thinly with a notched squeegee. This step, often skipped by DIYers, ensures an even coat without puddles. Then, immediately go over the area with a 1/2-inch nap epoxy roller cover on an extension pole. I’ve had good results with Whizz rollers designed for epoxy.
Finish each section by lightly “back-rolling” over it in one direction with an almost-dry roller to pop bubbles and smooth the finish. Move to your next section, always maintaining that wet edge with the previous one. Have a helper manage the mixing and pouring if you can, so you can focus solely on spreading and rolling. The floor should look uniform and glossy as you go.
Drying, Curing, and Adding the Final Touches
This is where patience truly pays off. I see more projects ruined here than anywhere else. Let’s clear up the biggest timing questions first.
You can usually walk on your new epoxy floor in 12 to 24 hours, but you must wait a full 7 days before you can drive a car on it. Those are general rules, and your specific product’s instructions are the law. A 70-degree Fahrenheit day is the sweet spot. If your garage is cooler, add more time. Never guess.
Understanding the stages helps you plan. “Dry to touch” means the surface isn’t sticky, maybe in 8-12 hours. “Walkable” means you can move across it in socks without leaving an imprint. “Full cure” is when the chemical reaction is 100% complete and the floor can handle a car’s weight and hot tires. Rushing this is the most common DIY mistake. I once helped a neighbor who pushed his SUV in after 4 days; we spent the next weekend grinding off the permanent tire tread marks.
Broadcasting Decorative Flakes
If you want that classic, speckled professional look, you add flakes right after your final coat of epoxy is down. Timing is tight. You have about a 20-30 minute “open window” before the epoxy sets too much for the flakes to stick properly.
For an even look, use a handheld broadcast hopper-it’s a game-changer over throwing flakes by hand. I use a model from Garage Floor Supply. Start in a back corner. Crank the hopper’s dial to a medium setting and walk backwards in overlapping sweeps, like you’re mowing a lawn. You want about 30-40% coverage, so plenty of the base color still shows through. It looks sparse on the wet floor, but trust the process.
Let the flakes settle into the wet epoxy for the time your product specifies (often an hour or two). Then, you must sweep up all the loose flakes that didn’t stick. A soft-bristle shop broom works, but I prefer a commercial-grade dust mop. This cleanup is critical for the next step.
For maximum durability and a deep gloss, apply a clear urethane topcoat the same day, after the loose flakes are removed. This topcoat is your armor. It adds incredible chemical resistance against gas, oil, and cleaners, and it prevents the epoxy from yellowing in sunlight. I always use a 100% solids polyaspartic or aliphatic urethane for this. It’s more expensive than some box-store kits, but it’s what the pros use. Roll it on smoothly with a premium microfiber roller cover. This topcoat also fully encapsulates your decorative flakes, locking them in place forever.
Long-Term Care and Durability
So, do epoxy garage floors last? A properly installed DIY floor should give you 5 to 10 years of great service. A professional, multi-coat system with a urethane top can last 15-20 years. The longevity of your epoxy floor depends almost entirely on your prep work and your maintenance habits. There is a lot of discussion around epoxy floor coating myths versus reality. The reality is that results hinge on thorough prep, proper finishing, and ongoing maintenance.
Your daily and weekly routine is simple. Sweep regularly with a soft broom to keep abrasive grit off the surface. For mopping, use only a pH-neutral cleaner. I buy a concentrate like Simple Green Pro HD and dilute it in a bucket. Avoid harsh acids, ammonia, or abrasive cleaners-they will dull the gloss over time.
Two things cause the most premature wear: hot tire pickup and chemical spills. Use rubber tire mats under your car’s parking spots, especially for summer-hot tires. They cost about $40 each and are cheap insurance. For spills, wipe up gas, oil, or antifreeze immediately. The topcoat buys you time, but don’t let it sit.
Even with great care, you might see minor wear in high-traffic areas after several years. Look for dulling, small chips, or (if you skipped the topcoat) yellowing or peeling at the edges. For small damaged spots, you can lightly sand the area, clean it with a degreaser, and apply a touch-up epoxy kit. If the peeling is widespread, it usually means the initial floor prep failed, and a full redo is needed. Good news is, you’re now an expert at the process.
Long-Term Care and Durability
A common question I get is, do epoxy garage floors last, and how long can you expect them to? In my shop and from customer feedback, a properly installed DIY epoxy floor with good maintenance should give you 5 to 10 years of solid service. I’ve seen some last even longer. The key phrase is “properly installed.” The prep work we did earlier is what buys you those years—especially when compared to cheaper options like painted floors that don’t hold up as well.
Your Simple Maintenance & Cleaning Routine
Think of your new floor like a quality kitchen countertop. It’s tough, but it appreciates regular, gentle cleaning. A complicated routine will just make you ignore it, so keep it simple.
- Daily/Weekly: Sweep or dry mop. I keep a push broom in the corner. This removes grit and sand that act like sandpaper underfoot or tires.
- Monthly or as needed: Mop with a pH-neutral cleaner. I use a standard string mop and bucket. For general cleaning, I’ve had great results with Zep Neutral pH Floor Cleaner or a dilute solution of Simple Green. Avoid anything with acids, ammonia, or bleach, as they can degrade the epoxy’s shine and cause yellowing over time.
- Immediately: Wipe up oil, coolant, or chemical spills. Don’t let them sit. Isopropyl alcohol or a dedicated epoxy floor cleaner works well for this. Wear gloves.
What Really Impacts Longevity
Beyond cleaning, a couple of specific habits protect your investment. The biggest threat isn’t your car’s weight; it’s your car’s tires.
Use tire mats under your parked vehicles, especially in summer or if you have a high-performance car. I learned this the hard way on a test patch. Hot tires can actually soften the epoxy slightly. When you drive away, the epoxy can “pick up,” leaving permanent, tacky marks or pulling the coating right off the concrete. A simple rubber-backed carpet mat prevents this entirely.
Also, avoid dragging heavy, sharp objects across the floor, whether it’s epoxy or interlocking tile. While epoxy is hard, a sharp steel bench leg under load can still scratch it. If you’re moving a heavy toolbox, lift it or use furniture sliders.
Spotting Early Signs of Wear or Failure
Even with great care, look for these signs so you can address them early.
- Peeling or Flaking: This usually starts at edges or cracks and means the epoxy didn’t bond. It’s often a prep issue. For a small spot, you can sand the area feather-smooth, clean it with denatured alcohol, and apply a fresh, thin coat of epoxy. For widespread peeling, the floor likely needs a full redo.
- Yellowing: This is typically from UV exposure (if you have windows) or using the wrong cleaners. It’s often just a cosmetic issue on the clear topcoat. Prevention is best, but once it yellows, it’s difficult to reverse.
- Worn Spots to Bare Concrete: In high-traffic areas like in front of a workbench, the topcoat may wear through. If the colored epoxy base coat is still intact, you can lightly sand and recoat just that area with a fresh layer of clear polyurethane topcoat. This is a quick fix that adds years.
Don’t panic over every tiny chip. It’s a garage floor, not a showroom. A little character is normal. Focus on stopping problems before they spread. That’s the real secret to making your DIY job last.
Garage Care Pro FAQ: Your Epoxy Floor, Straight Talk
How do I know if my concrete needs grinding instead of just acid etching?
Check for existing sealers, paints, or a very smooth, hard finish. Acid often can’t penetrate these. If water beads on the surface, grinding is mandatory. It’s the only way to guarantee the “tooth” epoxy needs for a permanent bond.
What’s the biggest mistake people make during the mixing process?
They ignore the induction (rest) time after blending Parts A and B. Pouring and rolling immediately doesn’t allow the chemical reaction to initiate properly, leading to a weak cure. Set a timer for the duration specified on your kit-no exceptions.
Can I apply epoxy if my garage floor has minor moisture issues?
No. Moisture vapor escaping through the slab will blister and delaminate your coating. Always perform the plastic sheet test. If it fails, resolve the moisture issue with proper drainage or a vapor barrier system before proceeding.
How do I ensure an even coat without missing spots during application?
Work in manageable sections (e.g., 10×10 ft) and maintain a wet edge. Always cut-in the perimeter of a section with a brush immediately before you roll it. This technique prevents visible lap marks and ensures uniform coverage.
When is the exact right time to add decorative flakes?
Broadcast flakes immediately after your final epoxy coat is down, typically within a 20-30 minute window. The epoxy should be wet enough for flakes to embed but not so fresh that they sink completely. Test a small area first.
Is a clear topcoat really necessary, or is it just an upsell?
It’s necessary for durability. The topcoat is your floor’s armor against UV yellowing, chemical stains, and abrasion. For a finish that lasts, always apply a 100% solids polyurethane or polyaspartic topcoat over your cured epoxy.
Final Thoughts on Your DIY Epoxy Garage Floor
Based on my years of professional floor coating, your project’s success hinges entirely on meticulous concrete preparation—skimp here, and you’ll see peeling and lifting within months. Keep these core lessons from the shop front of mind, especially when it comes to installing concrete floors in your garage:
- Clean and etch the floor until water soaks in, not beads; I use a Bosch concrete grinder or a Klean-Strip etching acid for reliable results.
- Mix the epoxy resin and hardener slowly with a DeWalt drill and paddle mixer for a full three minutes to prevent sticky, uncured spots.
- Apply with a Wooster Pro roller frame and a 3/8-inch nap sleeve for thin, even coats that avoid runs and bubbles.
- Allow at least 72 hours of dry, warm cure time before light use; rushing this is the most common DIY mistake I see.
Evan Gunther
Evan is a general contractor operating in Columbus, Ohio servicing, maintaining and building residential and commercial garages for over two decades. He has personally redeveloped over 100+ garages and installed and reinstalled over 230+ garage doors in his long tenure. When it comes to giving your garage a face lift or fixing common issues, Evan's the pro. Feel free to reach out to him and follow his Garage Log blog for expert, fact based advice.