
How Do I Repair Holes and Trim My Garage Door to Ensure Proper Fit and Prevent Damage?
Are you worried about drafts, pests, or further damage from those gaps and holes in your garage door? I’ll show you my shop-tested methods to fix them for good.
This article gives you my step-by-step process, from tool selection to final seal, covering assessing the damage, choosing between materials like Bondo or epoxy filler, cutting trim with a Milwaukee oscillating tool, sanding for a flush fit, realigning the door track, and applying new weatherstripping.
I’ve handled hundreds of these repairs in residential garages, relying on my experience with brands like 3M and Irwin to provide dependable solutions.
The Garage Log’s DIY Assessment: Repair or Replace?
Before you grab any tools, you need to play detective. A good inspection tells you if you’re dealing with a simple patch job or something more serious. Get a flashlight and take a close look at your door in the daylight.
First, figure out if the problem is a hole, a dent, or an alignment issue. Look at where the door meets the frame when it’s closed. If there’s a consistent gap or it’s rubbing, the door might be out of square and need adjustment, not patching. For actual holes, identification is key. How do you identify the type and size of holes in your garage door? You look and measure. And if you’re dealing with dents, make sure to address those separately.
Here’s my simple rule from the shop: if the hole is smaller than a quarter, you can repair it. If the entire panel is bent, cracked, or the wood is soft and rotting, you should seriously consider replacement. When should you consider replacing a garage door panel instead of repairing it? When the damage affects the door’s structure or its ability to seal. A bent steel panel won’t seal properly, and rotten wood is a sponge for moisture that will just get worse.
Spotting Trouble Before It Gets Worse
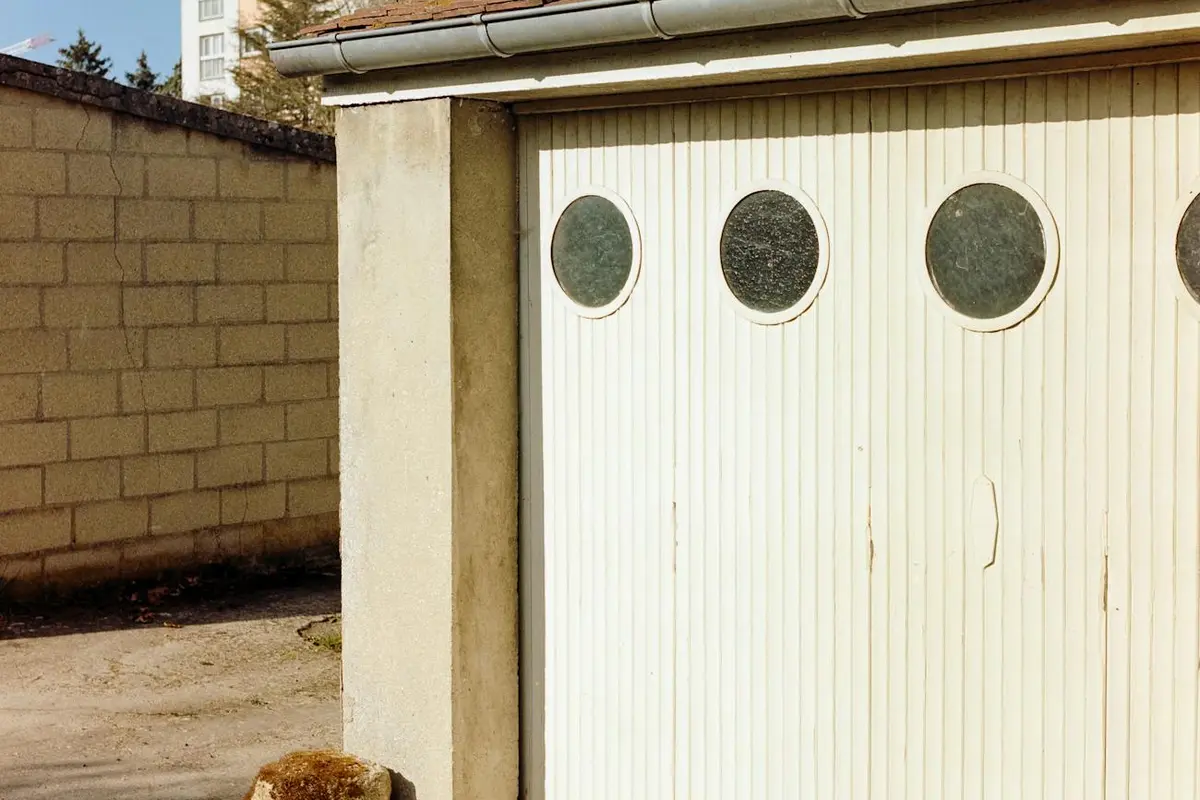
Not all holes are created equal. On steel doors, you’ll often find rust pinholes, especially along the bottom edge where water collects. You might also see dents from a misplaced bike handlebar or a stray basketball. On wooden doors, the enemy is rot or insect damage, usually at the bottom where it’s damp.
Grab a tape measure and a bright work light to see the full extent of the damage. What looks like a small spot of rust from a distance can be a network of pits up close. Measure the hole’s width and depth. For dents, feel if the metal is creased; a sharp crease is harder to fix than a smooth dent.
Your Gearhead’s Checklist for the Job
What tools and materials do you need to repair holes in a garage door? Having the right gear makes all the difference. I keep a specific kit for these jobs, which includes some of the essential garage repair tools.
- For Cleaning & Prep: A corded drill with a knotted wire wheel (I use DeWalt for reliability), 80-grit and 120-grit sandpaper (3M Pro Grade Precision sheets grip better), mineral spirits, and rags.
- For Filling Holes: For steel, a flexible auto-body filler like Bondo Glass Reinforced Filler. For wood, a two-part wood epoxy filler like Abatron WoodEpox. A plastic putty knife set.
- For Finishing: Rust-inhibiting spray primer (Rust-Oleum Automotive Primer is my go-to), matching exterior paint, and foam rollers for a smooth finish.
- For Trimming (if needed): A circular saw (Makita’s cordless is lightweight and powerful) with a fine-tooth blade, a straight-edge guide, and a file for smoothing edges.
- Safety Gear: This is non-negotiable. ANSI-rated safety glasses, heavy-duty gloves like Mechanix Wear, and a respirator with P100 filters for sanding dust and fumes.
DIY Difficulty & Time Estimate
I rate this project a 6 out of 10. The steps are straightforward, but the finish depends on your patience with prep work.
Your active work time will be about 2 to 4 hours. The real clock is in the drying. Filler needs 30 minutes to set, primer needs an hour, and paint needs several hours between coats. Plan for the whole process to span a day, maybe two if humidity is high. Remember, trimming a door to fit is absolutely a two-person job for safety and to keep the panel steady.
Patching Holes: A Pro’s Guide to a Seamless Fix
This is the hands-on part. Think of it like surgery for your garage door; 90% of a lasting fix is in the preparation. How do you prepare the garage door surface before making repairs? You clean it until it’s perfectly bare and sound.
Fixing Small Holes in a Steel Garage Door
What is the step-by-step process for patching small holes in a steel garage door? Here’s how I do it, learned from fixing countless dings.
- Clean the area. Use mineral spirits to wipe away all grease and dirt.
- Remove all rust. Attach a wire wheel to your drill and grind away every speck of rust until you see shiny, bare metal. This stops the corrosion from coming back.
- Sand the edges. Use 80-grit sandpaper to feather the edges of the hole so the filler has something to grip. Wipe clean with a damp rag.
- Apply filler. Mix a small amount of Bondo filler on a disposable surface. I prefer this flexible auto-body filler over hardware store spackle because a metal door flexes slightly when it operates, and rigid filler will crack. Press it firmly into the hole with a putty knife, slightly overfilling it.
- Shape and sand. Once the filler is hard to the touch (about 30 minutes), use 120-grit sandpaper to sand it flush with the door surface. Aim for a smooth, seamless transition.
- Prime and paint. Spray a light coat of rust-inhibiting primer over the entire repair area. Let it dry completely, then apply your color-matched exterior paint with a foam roller for a texture that blends with the factory finish.
Repairing Damage in a Wooden Garage Door
Wood repair is a different beast. How do you repair larger holes or damage in a wooden garage door? You rebuild the rotten structure, not just fill a void.
- Remove all soft wood. Use a chisel or a rotary tool to dig out every bit of soft, rotten wood until you hit solid, dry material. This is the most critical step.
- Soak with wood hardener. Pour a liquid wood hardener like Minwax High Performance into the cavity. It soaks into the remaining wood fibers and turns them rock hard, creating a solid base for the filler.
- Build with epoxy filler. Mix a two-part wood epoxy filler. Abatron’s product is excellent because it’s structural-you can mold it, it doesn’t shrink, and it sands like wood. Pack it into the hole, overfilling slightly.
- Carve the shape. After the epoxy sets but before it fully cures (check the product instructions, usually a 1-2 hour window), you can shape it. I use a small router or just a sharp carving tool to imprint a fake wood grain pattern that matches the surrounding area.
- Sand and finish. Once fully cured, sand it smooth. Prime the bare epoxy and wood, then paint to match. For a stained door, you’ll need to use a stainable wood filler and carefully blend the stain color.
The “Log Entry” Pro-Tip
I learned this the hard way on a client’s door years ago. I was behind schedule and painted over a filler patch that was dry to the touch but not fully cured. It looked perfect for a week. A month later, temperature changes made the filler shrink, and a hairline crack appeared right through the new paint. Now I always wait the full cure time listed on the product can, even if it means leaving the garage door open overnight with a space heater running for security. Rushing the cure guarantees a comeback job.
Trimming a Garage Door for Perfect Clearance
Can you cut a garage door panel? Absolutely, you can. I’ve trimmed dozens to fix a tight fit against new siding or a slightly out-of-square opening. The key is a methodical approach. Rushing this job can lead to a jagged edge or, worse, a weakened panel. Think of it like tailoring a suit-you take off a little material for a perfect fit, but you don’t start cutting the lapels.
Measuring Twice: The Rule for a Reason
How do you measure and mark a garage door for trimming? You check it in multiple spots because doors and openings are rarely perfectly uniform. To get a true fit, measure the garage opening door itself—width, height, and squareness—at several points. This ensures you trim to the actual opening. Here’s my shop method:
- With the door closed, measure the gap between the door edge and the frame at the top, middle, and bottom on both sides.
- Note the smallest measurement-this determines your maximum trim. If one side has a 1/4″ gap and the other has 1/2″, you’ll trim to match the 1/4″ side.
- Mark your cut line using a metal straightedge and a strip of blue painter’s tape. The tape gives you a clear, protected guide line and helps prevent the tool’s base from scratching the door’s finish.
- Double-check that this line is parallel to the door’s original edge by measuring back from a consistent point, like the panel’s rivet line.
Choosing and Using the Right Cutting Tool
What’s the best tool to use for trimming a garage door? It depends entirely on the material.
For steel doors, I always reach for a 4.5-inch angle grinder with a thin cut-off wheel. I use a DeWalt model because the paddle switch is safer. A jigsaw with a metal blade seems like a good idea, but in practice, the blade can deflect on the thin steel, creating a wavy cut you’ll have to fix later.
For wooden doors, a circular saw with a fine-tooth carbide blade is my go-to. A jigsaw works here too, but for a long, straight cut, the circular saw is faster and leaves a cleaner edge. For removing just a sliver (less than 1/8″), a sharp hand plane or a belt sander might be better than a power saw.
The Safe Cut: Step-by-Step for Metal and Wood
How do you safely trim a metal garage door? Safety glasses and gloves are non-negotiable. Wear a long-sleeve cotton shirt-synthetic fabrics can melt from sparks.
- Clamp a piece of angle iron or a straight board along your tape line to act as a guide for the grinder.
- Make your cut using multiple light passes. Don’t try to cut through in one go; you’ll overheat the metal and warp the thin panel.
- Let the tool do the work, and keep a steady pace. You’ll see a clean line of sparks showing you’re on track.
How do you safely trim a wooden garage door? The main risk is kickback.
- Set your circular saw depth so the blade extends just 1/4-inch past the thickness of the wood panel.
- Support the piece you’re cutting off so it doesn’t splinter or drop suddenly at the end of the cut. A second set of hands or a roller stand works perfectly.
- Cut with the finished face of the door panel down if using a circular saw, as the blade cuts upward and can chip the top surface.
How Much Can You Actually Cut Off?
How much material can you safely remove when trimming a garage door? There is a strict limit. Never, ever trim the top panel or the bottom rail that holds the weather seal. These are critical structural and sealing components. The safe zone is the vertical side edge of the intermediate panels.
As a firm rule, I rarely recommend removing more than 1/2 inch total from the door’s width, or 1/4 inch from a single side. Taking off more can compromise the panel’s rigidity and bring the hinge too close to the edge, which may cause binding.
Finishing and Sealing: Protecting Your Work
Leaving a raw, cut edge is the fastest way to ruin your door. On steel, it will rust from the inside out. On wood, moisture will wick into the end grain and cause rot. The repair isn’t done until it’s sealed.
Sealing Cut Edges on Any Door
How do you seal and finish the edges after trimming a garage door? The process differs by material.
For a metal door:
- Use a metal file to smooth any burrs or sharp spots from the cut edge.
- Immediately apply a rust-inhibiting primer, like Rust-Oleum Automotive Primer, directly to the bare metal. Once dry, brush on matching touch-up paint.
- The final, critical step: run a thin, continuous bead of clear exterior-grade silicone caulk (I use GE Silicone II) along the inside of the cut edge. This seals the sandwich of steel where moisture can hide.
For a wood door:
- Sand the fresh cut smooth with 120-grit sandpaper.
- Brush a coat of oil-based primer directly onto the end grain. This soaks in more than face grain, so be generous.
- Apply at least two full coats of a high-quality exterior paint, allowing proper dry time between coats.
Blending Repairs for an Invisible Finish
If you’re patching a hole or touching up paint, blending is key. For small spots, I use a spray can of automotive primer for a smooth base. Lightly sand the area around the repair with 220-grit paper to feather the edges. When painting, use a small brush to stipple the paint into the repair, then lightly roll over the area with a mini foam roller to match the original door’s texture. Keeping a labeled can of the original door paint for touch-ups is the single best trick for a perfect, invisible match years down the road.
The Post-Project Safety and Operation Check
Never, ever skip this step. After you’ve repaired holes or trimmed panels, you must check the door’s operation as if you’re using it for the first time. This final verification is what separates a proper repair from a future disaster.
Re-Balancing and Testing the Door
The most critical test is the balance check, and it must be done with the opener completely disconnected. I pull the red emergency release cord on my LiftMaster opener every single time. This lets you operate the door manually.
Lift the door halfway up by hand and let go. A properly balanced door will stay in place, not drift up or slam down. If it moves on its own, the spring tension is wrong. That’s a job for a pro, as adjusting springs yourself is extremely dangerous.
If the door is balanced, run it through its full cycle by hand, listening and watching closely.
- Watch each roller in its track. None should jump, bind, or come out of the track. I use a DeWalt flashlight to get a clear look down the track.
- Check the tightness of every hinge bolt you worked near. A simple Craftsman socket wrench is perfect for this.
- Feel for smooth travel. The door should glide up and down with consistent, light pressure, free from jerks or loud grinding.
This process directly answers a common question: How do I ensure the garage door is balanced and operates smoothly after repairs or trimming? You ensure it by manually testing balance and travel before re-engaging the automatic opener.
Essential Safety Precautions You Can’t Skip
Garage doors are heavy, under high tension, and unforgiving. I treat them with more respect than a table saw. Here is my non-negotiable safety list.
- Always disconnect power to the opener at the unit itself. Unplugging the unit from the wall outlet is my go-to method.
- Before any work, clamp a pair of locking pliers (I trust Vise-Grip) onto the track just below the bottom of the door. This acts as a mechanical stop in case the door moves.
- Never place your fingers between door sections, near hinges, or anywhere near the torsion springs. The springs store immense energy.
- Use eye protection when drilling, sanding, or cutting. Metal and wood chips are no joke.
To answer the vital FAQ: What safety precautions should I take when repairing or trimming a garage door? Disconnect all power, mechanically secure the door in the track, and keep your body clear of all pinch points and springs.
Keeping Your Garage Door Damage-Free
Your repair is done. Now, let’s make it last. A little regular attention prevents small issues from becoming big, expensive problems.
Routine Checks and Simple Maintenance
I do a quick walk-around of my own garage door every season. It takes five minutes.
- Look for new paint chips or scratches on the repaired area. Touch them up immediately with a small brush. Rust starts fast.
- Check the rubber bottom seal. Make sure it’s pliable and creating a complete seal against the floor. A hardened or torn seal lets in drafts and pests.
- Listen. When you operate the door, any new squeak, grind, or pop is a clue. A rhythmic grinding often means a dry roller.
For lubrication, use a dedicated silicone spray or garage door lubricant, not general-purpose WD-40. WD-40 is a penetrant and water displacer; it dries out and attracts dust. A product like Blaster Garage Door Lubricant or even WD-40 Specialist Silicone is far better. Give a short burst to each roller’s stem and the hinges. Regular lubrication of garage door components helps prevent wear and reduces noise. Keeping these parts well-lubricated ensures smooth operation and extends the door’s life.
Preventing Future Dings and Gaps
Most garage door damage is avoidable. It comes from inside the garage.
- Park with discipline. Use a tennis ball hanging from the ceiling or a laser guide to know exactly where to stop. I’ve seen too many doors dented by a bike handlebar or an open car door.
- Install a wall-mounted bumper. A simple rubber bumper pad on the wall where your car door might swing open is cheap insurance.
- Check your opener’s travel limits. If the door closes with too much force, it can strain the new repair and warp panels. Your opener’s manual will show you how to adjust the “down limit” so it closes gently but firmly.
So, how can you prevent future damage to your garage door after completing repairs? Protect it from impacts inside the garage and ensure your automatic opener isn’t forcing it closed too hard. Also, be aware that worn or broken springs can lead to dangerous failures, so understanding common causes helps you spot risks early.
Frequently Asked Questions from the Garage Care Pro
How do I identify the type and size of holes in my garage door?
Get a bright light and a tape measure. For steel doors, look for rust pinholes or impact dents; measure their width and check depth by feeling for sharp creases. For wood, probe for soft, rotten spots or insect channels. Accurate sizing is critical-anything larger than a quarter often needs more than a simple filler.
What tools do I absolutely need for trimming, and does the material change the choice?
Yes, material dictates the tool. For a clean trim on steel doors, a 4.5-inch angle grinder with a cut-off wheel is unmatched. For wooden doors, a circular saw with a fine-tooth blade is the pro’s choice for straight lines. Never use a jigsaw on thin steel, as the blade will deflect and ruin your cut.
How do I seal the edges after trimming to prevent future problems?
For metal, file burrs, apply rust-inhibiting primer directly to the bare edge, then paint. The pro step is running a bead of clear exterior silicone along the *inside* of the cut to seal the metal sandwich. For wood, heavily prime the exposed end grain before applying two full coats of exterior paint.
What’s the one safety precaution I cannot afford to skip?
Disconnect the opener and mechanically secure the door. Unplug the opener unit, then clamp locking pliers onto the track below the door to act as a fail-safe stop. This prevents any accidental movement while you’re working with tools near the panels and tracks.
How can I tell if my door is balanced after I’ve worked on it?
With the opener disconnected, manually lift the door halfway and release it. A balanced door will stay in place. If it rises or falls on its own, the spring tension is incorrect-this is a job for a professional technician, as adjusting springs yourself is extremely dangerous.
What’s a quick maintenance habit to prevent damage to my repairs?
Conduct a seasonal five-minute check. Look for new chips in painted repairs and touch them up immediately to block rust. Listen for new operational noises, and lubricate rollers and hinges only with a dedicated garage door silicone spray, not WD-40, which attracts dust and dries out.
Final Steps for a Safe, Properly Fitted Door
The single most important piece of advice is to prioritize a perfect seal and alignment over simply filling holes. A quick patch might stop a draft, but a precise fit stops damage before it starts. If you’re looking to install or replace garage door weather seals, these principles help you achieve a tight seal. Correct fit and alignment matter when you install or replace weather seals. Your key takeaways are straightforward:
- Always measure the gap at multiple points before you cut or trim.
- Use a high-quality urethane-based sealant for lasting, flexible weatherproofing.
- Keep your tools sharp-a dull utility blade or saw will tear material, not cut it cleanly.
- Wear safety glasses when cutting or sanding; those tiny fragments are no joke.
Get these steps right, and your door will operate smoothly and protect your garage for years.