
Struggling to Park and Store Vehicles in Your Garage Safely?
Are you tired of door dings, blocked storage, and the uneasy feeling that your garage is a cluttered accident waiting to happen? I’m here to help you solve that with a clear, safe system.
This guide will walk you through the practical steps I use in my own shop, covering smart floor layouts for different vehicle types, maintaining safe clearance, proper trailer tie-downs, and wall storage for gear.
My advice comes from years of hands-on work helping homeowners transform chaotic garages into organized, functional spaces.
Measure Your Garage Before You Pull In
Pulling a vehicle into a garage that’s too small is how you get expensive dents and scrapes. I learned this the hard way years ago with a client’s new truck. Avoid the headache by knowing your space first.
You need three specific numbers: width, height, and depth. For width, measure the distance between the interior walls at the narrowest point, which is usually at the garage door opening. For height, measure from the floor up to the garage door header, and then separately to the bottom of any garage door opener or low-hanging light fixture. Your vehicle must clear the lowest point. For depth, measure from the closed garage door to the back wall.
I use two tools for this: a reliable 25-foot Stanley PowerLock tape measure for the width and depth, and a Bosch Blaze laser measure for the height. The laser lets you get a pinpoint-accurate reading on that opener without climbing a ladder. Write these numbers down in a notepad you keep in the garage, especially if you plan to modify the garage door width or height later.
Now, compare your garage numbers to the vehicle’s specs. Don’t guess. Go to the manufacturer’s website and use their “build and price” or specs tool. A Ford Transit 250 high-roof is about 9’2″ tall, so if your header is 9 feet, it won’t fit. A Chevy Tahoe is over 210 inches long; if your depth is 20 feet (240 inches), you’ll have about 30 inches of space in front of it, which is tight. Width is the real challenge. A 15-passenger van or a Tesla Cybertruck can be over 86 inches wide mirror-to-mirror. If your door opening is 96 inches, you have less than 5 inches of clearance on each side-that’s like parking a pallet.
Once you know it fits, make parking repeatable. Use blue painter’s tape to mark the floor. Outline where your driver’s side front tire should stop and put a small strip on the wall as a guide for your side mirror. This simple trick saves you from crooked parking and door dings every single time.
Tools You’ll Need: The Gearhead’s Checklist
Having the right tools makes this job foolproof. Here’s what I keep in my own garage for this task:
- Tape Measure: A 25-foot Stanley PowerLock. The blade is stiff enough to measure long distances alone, and the lock holds firm.
- Laser Measure: A Bosch Blaze GLM 20. It’s perfect for getting the height to the garage door opener quickly and accurately.
- Marker Tape: A roll of 3M blue painter’s tape. It leaves no residue and is easy to see on concrete.
- Notepad and Pen: For scribbling down measurements so you don’t forget them.
For vehicle specs, your best resource is the automaker’s official website. The “build and price” configurator often lists exterior dimensions more accurately than third-party sites.
Park Smart: Positioning for Daily Use and Storage
A centered vehicle is a safe vehicle. It gives you room to open doors and walk around. Here’s my method: after you’ve pulled in, get out and measure from the wall to the center of each front tire. Adjust until the distances are equal. This ensures you’re perfectly centered between any shelves or workbenches on the sides.
Always leave space between your vehicle and the side wall. I recommend a minimum 18-inch gap on the driver’s side for comfortable door clearance. Think of it like opening a refrigerator door in a tight kitchen-you need that swing space. If your garage is narrow, this might mean parking closer to the passenger-side wall. That scenario is common when you park a car in a narrow garage. In such spaces, small adjustments in angle and distance can make all the difference in door clearance and maneuvering.
There’s a debate on backing in versus pulling in forward. For a daily driver, pulling in forward is often faster. But for storage, or if you’re parking a trailer, backing in is usually better. It’s easier to maneuver a trailer into a tight spot by backing it, and when it’s time to go, you simply pull out. For a daily driver, if you back in, you have better visibility when leaving, but it takes more time to park precisely.
To nail your stopping point every time, use a parking aid. The classic is a tennis ball hanging from the ceiling on a string so it touches your windshield when you’re in the perfect spot. For a more modern solution, a laser guide system like the Garmin BC 40 Wireless Backup Camera, mounted on the back wall, projects a line on your vehicle’s backup camera screen telling you exactly when to stop. I’ve used both, and the laser is fantastic for consistency, especially with different drivers.
Hidden Gem: The Above-Door Storage Log Entry
Garage floor space is gold. Don’t waste it with bulky, seasonal items. The space above your garage door is almost always dead air. That space is perfect for household items you want tucked away, expanding your garage storage space. It’s a simple, practical shift that clears living areas without sacrificing access to what you need. Here’s my pro-tip from countless garage overhauls: install heavy-duty wire shelving up there.
I use Gladiator gear. Their 24-inch deep wire shelves are perfect. You need to find the ceiling joists first—don’t just screw into drywall. Use a stud finder. Mark the joists, then secure the shelving brackets directly into them using 3-inch lag bolts for a rock-solid mount. This creates secure storage for bulky but light items like camping chairs, sleeping bags, or holiday decor, keeping them off your valuable floor space when storing lightweight items over your head. Just remember, this is for lightweight storage only. Don’t try to store engine blocks or cases of motor oil up there.
Gear Up for Long-Term Storage: The Pro Prep List

Parking a car or trailer for more than a month is a different job than parking it overnight. In my own shop, I treat seasonal storage as a shutdown procedure. You’re not just parking it; you’re putting the machine to bed so it wakes up ready to go.
Your Step-by-Step Vehicle Shutdown
Do these tasks in order. I keep a checklist on my phone so I don’t skip a step.
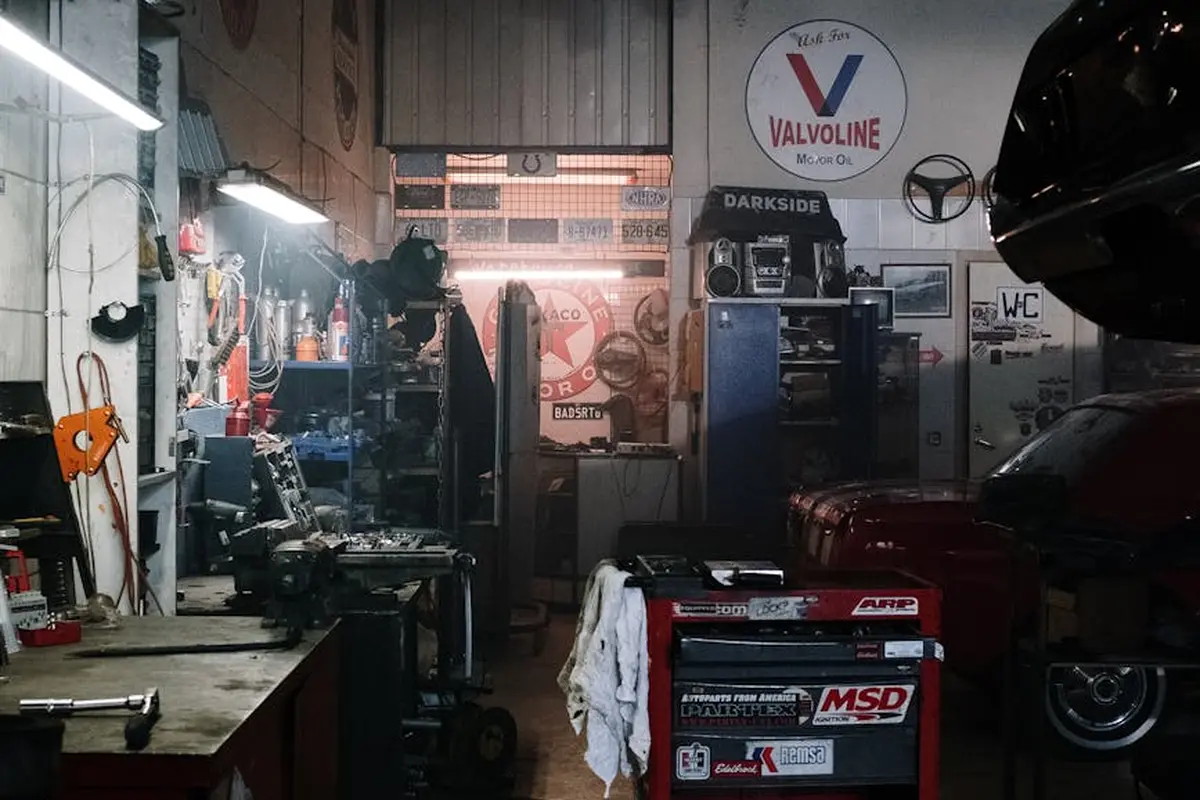
- Change the oil and filter. Used oil holds acids and contaminants that can slowly damage engine internals over a quiet winter. Fresh oil is neutral and protective. I use a conventional oil like Valvoline for storage, as it’s perfectly adequate when the engine won’t be running.
- Fill the fuel tank and add stabilizer. A full tank leaves less room for air, which means less room for condensation that turns into water in your gas. Pour in a fuel stabilizer like STA-BIL, then drive the vehicle for at least 10 minutes to circulate the treated gas through the entire fuel system. This prevents the gasoline from breaking down into varnish that clogs injectors and carburetors.
- Inflate tires to the sidewall’s maximum pressure. This is critical. Tires naturally lose air over time. Inflating them to the max PSI found on the tire’s sidewall (not the door jamb sticker) helps prevent flat spots from forming where the heavy vehicle sits on one section of rubber for months. Check them again halfway through storage.
A proper shutdown now prevents expensive fixes when you’re ready to drive again.
The Great Cover Debate: Breathable vs. Plastic
A cover is for dust, not a magic shield. I’ve seen more harm done by the wrong cover than by leaving a clean car uncovered.
I recommend a soft, breathable fabric cover, like those from California Car Cover. They are custom-fit, have a soft inner lining, and let moisture vapor escape. A breathable cover protects the finish from dust and scratches while preventing the humid, still air underneath from causing mildew or condensation on metal parts.
Do not use a cheap, non-breathable plastic tarp. It will trap every bit of moisture that evaporates from the vehicle and the floor, creating a perfect environment for rust and mold. The plastic can also stick to or mar the paint in temperature swings.
Controlling Moisture Inside and Out
Moisture is your stored vehicle’s worst enemy. You need to attack it in two places.
First, place a disposable moisture absorber like DampRid inside the vehicle’s cabin. Put it on the floorboard in a plastic tray. It will pull humidity from the air inside the car, protecting your upholstery and preventing a musty smell.
Second, manage the garage’s overall humidity. A small, renewable plug-in dehumidifier like an Eva-Dry E-333 works perfectly for a single-car garage space. I run one in my own shop during humid months. It pulls gallons of water from the air, protecting everything in the room, not just the car.
Never Let the Battery Go Flat
A modern vehicle’s computer constantly draws a tiny bit of power. Over weeks, this “parasitic drain” will kill the battery. A dead battery deep discharges, which permanently damages its capacity.
The solution is a battery maintainer, often called a trickle charger. You must connect a quality maintainer, like a Battery Tender brand unit, directly to the battery terminals-not through the cigarette lighter port. That direct connection provides a smart, low-voltage charge that keeps the battery at 100% without overcharging it. I leave mine connected all winter; it’s as routine as plugging in the garage fridge.
Trailer Storage: From Hitch to Hibernate
Putting your trailer away for the season isn’t just about rolling it into a corner. Doing it right prevents rust, protects your gear, and keeps your garage floor safe. I treat every trailer storage job like I’m prepping my own gear for a long winter.
Clean It Like You Mean It
Never park a dirty trailer. Road salt, mud, and brake dust are your trailer’s worst enemies. A thorough clean now stops corrosion later.
I start with a standard wash using car soap and a soft brush. The real work happens underneath and in the wheel wells, where grime and salt love to hide. For this, I use an electric pressure washer, like a Greenworks model. Its adjustable tip lets me blast away mud without damaging wiring or seals.
Once it’s completely dry, I apply a paste wax to the entire painted metal surface. I’ve had good results with Meguiar’s Ultimate Paste Wax. It creates a durable barrier. This extra half-hour of work pays off tenfold by spring.
Lock It Down: Basic Security
A parked trailer can still move. The first line of defense is simple and effective.
Always engage the trailer’s own parking brake if it has one. Then, place wheel chocks. I only use heavy-duty rubber chocks, like those from Rhino or MAXSA. The cheap plastic ones can crack and slip. For real stability, place a chock tightly against the front and back of the same tire. This “boxing in” method prevents any rolling in either direction.
- Engage the trailer’s parking brake.
- Place a robust rubber wheel chock tightly against the front of a tire.
- Place a second chock tightly against the rear of the same tire.
- Repeat on a second tire if the trailer is long or on a slope.
For Total Peace of Mind: Permanent Anchoring
If you live where high winds are a concern, or if you just want absolute certainty your trailer won’t budge, anchoring it to the floor is the answer. This is a permanent modification to your concrete slab.
I use a 3/8-inch concrete anchor kit that includes a D-ring and a sleeve anchor. You’ll need a hammer drill, a masonry bit, a wrench, and safety glasses.
- Position the trailer where you want it stored. Mark a spot on the concrete directly under a solid point on the trailer’s frame, not the axle.
- Drill a hole into the concrete using the hammer drill and the correct size masonry bit. Wear hearing and eye protection-this is loud and dusty.
- Blow out the concrete dust from the hole. Insert the sleeve anchor and place the D-ring over it.
- Tighten the nut with a wrench until it’s very snug. The anchor expands inside the concrete, creating a powerful hold.
- Use a heavy-duty ratchet strap, like a Rhino USA 2-inch strap, to connect the D-ring to the trailer frame. Crank it down until the strap is taut.
This anchor point is now a permanent part of your garage floor and can be used for securing other heavy items year-round.
Smart Positioning to Save Space
Garage space is prime real estate. For boat trailers or lightweight utility trailers, you can reclaim a lot of floor space by changing their angle. This is especially useful when maximizing storage in smaller garages.
If your garage ceiling is high enough, consider storing the trailer with the tongue pointing up. You’ll need a sturdy, wall-mounted trailer tongue stand. I’ve installed the Radcaster brand before-it bolts into wall studs and has a solid jaw to cradle the coupler.
Lifting the tongue pivots the entire trailer back, tucking the long body closer to the wall and freeing up the center of your bay. Before you do this, make sure your trailer is perfectly secure on its wheels and chocked. The lifting process should be slow and controlled, never exceeding what you can handle safely.
Sharing Space: Parking Motorcycles and Small Vehicles
When you share your garage floor, you need a smart system. A crowded space risks damage to your vehicles and makes every project a hassle. Proper storage under your vehicle is critical to maintaining organization and safety.
Stabilize Motorcycles with a Stand
Never just park a motorcycle on its kickstand for months. The tires can develop flat spots, and a slight bump can knock it over. I always use a rear wheel stand to lift the back tire off the ground, which saves the tire and makes the bike rock-solid. For my Harley, I use a Pit Bull rear stand because it’s steel and has never wobbled. A cheaper stand from Harbor Freight might work for a lightweight bike, but for long-term storage on a heavier cruiser, invest in the stability.
Create a Durable Spot for ATVs and Dirt Bikes
Parking a dirty, dripping ATV next to your car is a recipe for stains and frustration. I solved this by creating a dedicated parking pad. I lay down interlocking plastic tiles, like RaceDeck FreeFlow, right where the ATV sits. The tiles protect the concrete from oil drips, and the open design lets dirt and water drain through. More importantly, the smooth surface lets me easily roll the 600-pound machine in and out by myself, which you can’t do on bare concrete or carpet.
Get Bicycles and Kayaks Off the Floor
The fastest way to free up floor space is to look up. Installing simple wall hooks for bicycles or an overhead pulley system for kayaks instantly clears a parking bay. I’ve installed the Racor bike hooks from Home Depot in dozens of garages. For canoes and kayaks, the simple pulley systems from Garage Living work great. You lift the boat, secure the rope, and your entire floor is open for your primary vehicle.
Plan Your Aisle Space
This is the step everyone forgets until they scratch their door. Before you park everything, physically walk between the vehicles with your arms out. You need a clear aisle, at least 24 inches wide, to walk through without turning sideways. I keep a yardstick in my toolbox just for this check. That buffer zone is what prevents you from zipping a jacket button down the side of your car.
Keep It Rolling: Maintenance Routines for Stored Vehicles
Think of a stored vehicle like a hibernating bear. It’s not dead, just dormant, and it still needs care to wake up healthy. A simple monthly ritual prevents a world of expensive headaches later.
The most important thing you can do is start the engine and let it run every 30 days. Don’t just fire it up for two minutes. You need to get the entire engine up to full operating temperature, which usually takes a solid 15 to 20 minutes. This burns off corrosive condensation from the oil and exhaust system and circulates fresh fluid through the transmission and power steering. I set a timer on my phone so I don’t forget and wander off.
When seasons change, do a more thorough walk-around. In spring and fall, grab a flashlight and check under the hood and in the wheel wells for signs of mice or rodents-look for shredded insulation or nesting material. Next, check every tire with a good gauge, like a simple pencil-style one from Accu-Gage, and fill them to the door jamb’s recommended PSI. Finally, look at the floor beneath the engine and transmission. Any fresh drips or spots? A clean piece of cardboard slid underneath overnight can help you spot a slow leak you’d otherwise miss.
Keeping it clean is about preservation, not vanity. Every two months, I run a California Car Duster over the painted surfaces. It’s a soft paraffin wax-impregnated cloth that grabs dust without scratching. Follow that with a quick five-minute vacuum of the interior carpets and seats. This simple step prevents a damp, musty smell from taking root inside your car.
Your Storage Maintenance & Cleaning Routine
Here’s the straightforward schedule I follow for my own vehicles. Tape it to your garage wall.
- Monthly: Start the engine and let it run for 15-20 minutes. Verify your Battery Tender brand maintainer is still plugged in and has a green light. Do a quick visual scan under the hood for pests.
- Seasonally (Spring & Fall): Perform a full tire pressure check and adjustment. If the car is on the ground (not on jack stands), roll it forward a few feet to change the tire’s contact patch and prevent flat spots. Inspect brake discs; if you see light surface rust, a quick pass with 120-grit sandpaper cleans it right off.
- Annually: If you’re storing something for over a year with fuel stabilizer in the tank, drain and replace it with a fresh batch for maximum protection. For a true classic car going into multi-year storage, I use an engine fogging oil sprayed into the intake to coat the cylinder walls and prevent internal rust.
Avoid the Pitfalls: Risks and How to Sidestep Them
Storing a vehicle for weeks or months creates unique problems you don’t see with daily driving. I’ve pulled many cars out of storage where simple, preventable issues turned into expensive headaches. Let’s tackle the most common ones head-on.
Flat-Spotted Tires and Seized Brakes
The weight of your car pressing on the same spot on the tires for months can cause a permanent flat spot. You’ll feel a terrible thumping vibration when you finally drive it. I’ve also seen brake rotors develop a thick layer of rust from humidity, causing the pads to essentially weld themselves to the rotor.
The fix for both is to get the weight off the tires and control moisture. For my personal project car, I use four jack stands. I lift the car at the proper frame points, let the suspension hang freely, and place the stands securely. For a simpler solution, tire cradles like the ones from Ctek work well. They’re made of a soft foam that cradles the tire and distributes the weight. Pair this with the dehumidifier we discussed earlier to fight the rust that seizes brakes.
Dried-Out Rubber and Sticky Interiors
Door seals, window trim, and wiper blades will dry out, crack, and lose flexibility if left untreated. Inside, vinyl and plastic can get a chalky film, and leather can stiffen.
A quick application of a protectant keeps rubber supple and interiors fresh. I use a spray-on silicone protectant, like Rubber Queen Silicone Spray, on all exterior seals and wiper blades. For the interior dash and trim, I prefer a water-based UV protectant to avoid a greasy shine. A small, battery-powered moisture absorber placed inside the cabin prevents that stale, moldy smell.
The Critical Safety Checklist
Your garage is an extension of your home, so fire safety is non-negotiable. I start every seasonal prep the same way.
- Remove all trash, especially anything flammable. I once found oily rags balled up in a trunk that had begun to heat up.
- Empty the ashtray completely. Even a single butt can be a risk over time.
- Check your garage smoke detector. I replace the batteries in mine every time I change the clocks for daylight savings. It’s a foolproof reminder.
Leaving a window cracked a quarter-inch is my final step for air circulation, but only after the cabin is spotless and fire-safe.
How It All Works Together
These steps aren’t separate chores. They’re a system. The battery tender keeps the computer alive so your security system and memory seats work. The dehumidifier protects the brakes and metal surfaces from corrosion. Taking weight off the tires preserves them, and protecting the rubber ensures your car stays sealed and quiet. Do them all, and your vehicle will roll out of storage like you just parked it yesterday.
Garage Care Pro FAQ: Storing Vehicles & Trailers
How can I secure a trailer to prevent it from moving while stored?
Beyond wheel chocks, your first step should always be to lock the trailer’s coupler with a high-quality hitch lock. For absolute security on a concrete floor, install a permanent D-ring anchor into a slab, not just epoxy. Use a heavy-duty ratchet strap to connect the anchor directly to the trailer’s frame, not the axle, and check the strap tension monthly.
What are the risks of improper vehicle storage, and how can I avoid them?
The biggest hidden risks are fuel system varnish and a dead battery killing the vehicle’s computer. Always use a fuel stabilizer and run the engine to circulate it. Connect a smart battery maintainer directly to the terminals; a dead battery can lead to a costly ECU reset or replacement.
Should I use a cover for a vehicle stored long-term in a garage?
Yes, but only a soft, breathable, custom-fit fabric cover. Even in a clean garage, settled dust can microscopically scratch the paint. A breathable cover allows moisture to escape, preventing the “greenhouse effect” that causes mildew and corrosion under plastic tarps.
How do I manage moisture and ventilation when storing a vehicle in a garage?
Control humidity at two levels: use a renewable dehumidifier for the entire garage space and place a disposable moisture absorber inside the vehicle’s cabin. For ventilation, crack a window slightly, but only after ensuring the interior is spotless and fire-safe to prevent pests. This is especially important when protecting classic cars from garage humidity.
Are there specific considerations for parking motorcycles or smaller vehicles alongside a car?
Absolutely. Use a rear wheel stand for motorcycles to prevent tire flat spots and tip-overs. For ATVs or dirt bikes, create a dedicated pad with interlocking floor tiles to contain drips and allow easy rolling. Always maintain a clear, 24-inch walking aisle between all vehicles to prevent door dings.
Smart Habits for Long-Term Garage Safety
In my experience, the most reliable method is to establish and stick to a precise parking routine, always ensuring you have clear, unobstructed access around every vehicle and trailer.
- Permanently mark your parking space with a durable material like epoxy paint, which I prefer over tape because it withstands tire heat and garage chemicals without fading.
- Always use wheel chocks for trailers; I rely on the simple, rubber ones from a brand like Hopkins for their grip and affordability.
- Keep floor space clear by mounting items on walls; I install slatwall panels from brands like NewAge or Gladiator to hold tools and bins securely.
- Conduct a quick visual check each time you park, scanning for leaks, debris, or anything out of place to prevent accidents.