
How Do You Organize a Garage for More Space and Better Access?
If your garage feels like a cluttered maze where tools go missing, I can help. I will walk you through a straightforward plan to sort it out and make every inch usable.
We will cover a methodical cleanup, selecting robust storage like slatwall or steel shelving, and arranging items into clear, labeled zones.
As a garage care pro who has installed hundreds of storage systems, I give advice based on what actually works in a busy home garage.
The Garage Pro’s First Step: Assessment and a Plan
Forget trying to organize around the mess. The only way to start fresh is to see your empty garage. I call this the “full empty” method. From there, you can tackle the clutter and begin organizing a messy garage. A decluttered, well-organized garage keeps projects moving smoothly.
Pick a decent weekend, pull your cars out, and take everything-and I mean everything-out onto the driveway. Sweep and maybe even mop the empty floor. This clean slate is your foundation, and you only bring back inside what you actively use and need.
As you pull items out, sort them into piles right on the driveway. I use these six categories every time:
- Automotive: Oil, fluids, detailing supplies, car wash buckets.
- Garden & Lawn: Hoses, sprinklers, fertilizers, lawn mower, trimmers.
- Tools: Power tools, hand tools, fasteners, your workbench area.
- Sports & Recreation: Bikes, camping gear, coolers, balls.
- Seasonal: Holiday decorations, patio cushions, snow shovels.
- Hazardous: Paints, gasoline, pesticides (these need special, safe storage).
While the floor is empty, grab a notepad and sketch your garage. Draw the walls, mark the door, the garage door, windows, and electrical outlets. Most importantly, use a stud finder to locate and mark the studs on your sketch—this map is gold for planning where heavy things will go. I rely on a Franklin Sensors stud finder; its deep-scan mode helps avoid pipes and wires.
The Gearhead’s Checklist
Before you start the pull-out, have these ready:
- Stud finder (like the Franklin Sensors ProSensor)
- 25-foot tape measure
- Notepad and pencil for sketching
- Heavy-duty contractor bags for real trash
- Assorted bins or cardboard boxes for sorting categories
How do I take an honest inventory of my garage stuff?
You don’t need a fancy spreadsheet. As you create your piles, take out your phone and snap a quick photo of each category. These photos become your visual inventory, a fast way to remember what you own before you decide where it goes.
Now, be ruthless. Pick up each item. If you haven’t used it in two years, ask yourself honestly if you ever will. That old broken drill, the partial can of stain from a decade ago, the mystery key-this is the time to let them go. Toss, recycle, or donate. I find that this step alone clears out 30% of the clutter for most homeowners.
Claim Your Vertical and Overhead Real Estate
Your floor space is for cars and movement. Your walls and ceiling are for storage. Choosing the right wall system depends on what you’re hanging.
- Slatwall (PVC Panels): My top choice for versatility. I used NewAge slatwall in my last shop. The panels mount to the studs, and you can move hooks and baskets anywhere. It holds a lot of weight and looks clean.
- Pegboard: Classic and cheap, best for lightweight hand tools. The thin hooks can pop out if overloaded. Use washer-head screws to secure it tightly to the studs.
- French Cleats: The shop-built solution for heavy, odd-shaped tools. You screw a beveled cleat to the wall studs and a matching one to the back of a custom shelf or tool holder. It’s incredibly strong and modular.
For long items like lumber and pipes, get them off the floor. A simple wall-mounted lumber rack is the answer for how to store 2×4 in garage neatly. I’ve installed the Rubbermaid FastTrack lumber racks for clients. They bolt into studs and keep materials accessible but out of the way. For short off-cuts, build a simple “between-stud” shelf by nailing a 2×4 between two exposed wall studs.
Look up. If your ceiling is at least 9 feet high, you have prime storage real estate. Only use storage racks specifically rated for overhead use, and you must anchor every single support directly into a ceiling joist, never just into drywall. I like the Racor PHL-1R system for its steel cables; they feel more secure than chain links for holding plastic bins of holiday items.
Hidden Gem Organizational Hack
Look at the space above your garage door tracks. There’s often a dead zone of about a foot high that runs the door’s width. I built a simple, shallow plywood shelf up there, anchored to the ceiling joists, to store my roof cargo box and flat holiday wreath storage containers. It’s perfect for lightweight, bulky items you only need once a year. This is a quick win for maximizing small garage storage. Look for other overlooked zones you can convert into shelves to reclaim floor space.
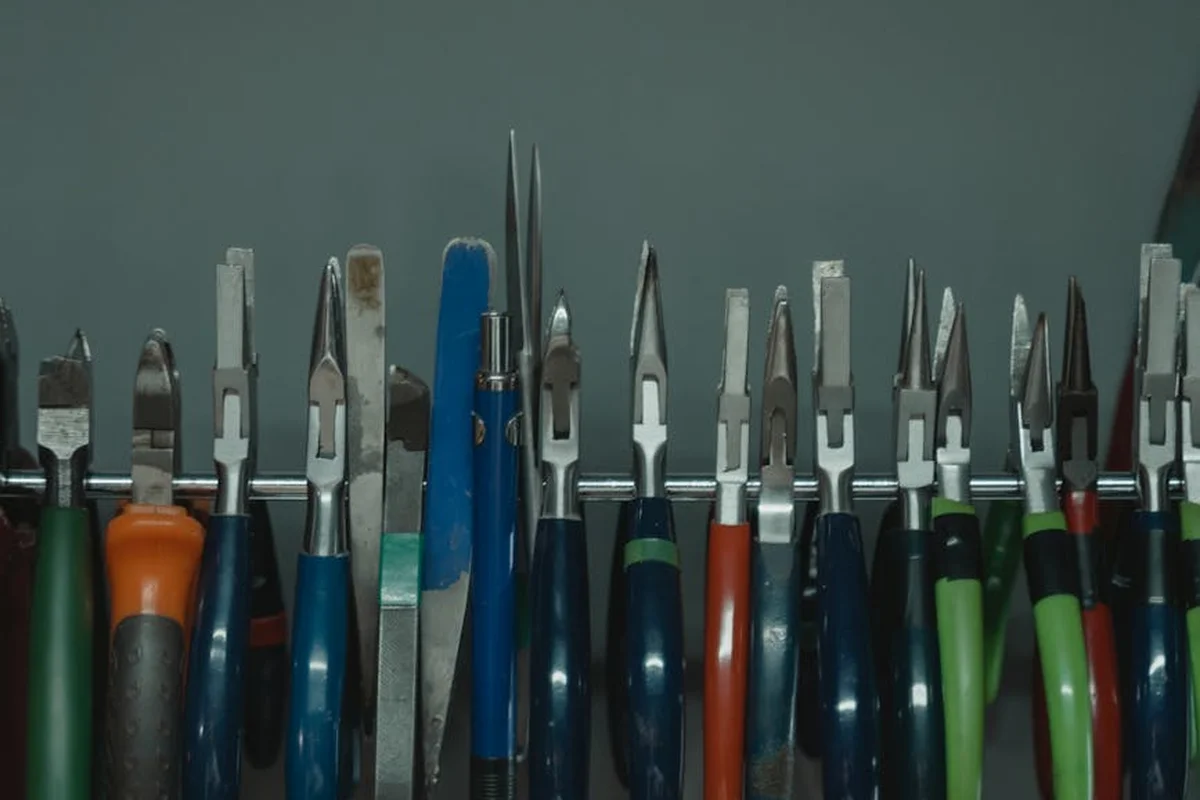
What are the best wall-mounted solutions for my tools?
Match the hook to the tool’s weight and shape. For heavy lawn equipment like string trimmers and leaf blowers, I use Everbilt heavy-duty J-hooks. They have a wide, curved design that cradles the equipment and mounts with two lag bolts into a stud.
For smaller garden tools, a wall-mounted basket is perfect. I prefer wire mesh baskets over solid ones so dirt and water can fall through. For hand tools, the magnetic tool holder bars from companies like TrakMates are fantastic-you just slap the tool up and it stays put, no fumbling with hooks. These setups translate well to a garage wall, making it easy to hang garden tools and keep the space organized. This approach supports hang garden tools garage organization by keeping tools visible and accessible.
My rule for fasteners: use lag bolts or structural screws for anything over 10 pounds. Standard wood screws will eventually work loose from vibration. For plaster or drywall anchors in non-stud locations, I only trust toggle bolts for medium loads.
How can I safely use my ceiling for storage?
Safety isn’t optional here. A falling storage bin is a major hazard. Follow these must-do steps:
- Use a stud finder to locate and clearly mark your ceiling joists. They are typically 16 or 24 inches apart.
- Choose a storage system with a clear weight rating. The combined weight of the rack and all your bins must be under this limit.
- Secure the rack using the hardware provided, ensuring every mounting point hits a joist. Use lag bolts, not drywall anchors.
- Load bins evenly and don’t stack them above the rack’s sides.
For big, bulky items, a dedicated hoist is the way to go. To store a truck cap in a garage, a four-point electric hoist system is your best bet. I installed the Harken Hoister for a client. You attach four straps to the cap, connect them to a central hoist mounted to multiple ceiling joists, and use a wired remote to lift it flush against the ceiling. It clears the entire floor below. The Harbor Freight version is a more affordable option, but check its weight rating twice against your cap’s weight.
Storing the Heavy, the Hazardous, and the Bulky
This is where a good plan prevents a dangerous mess. You need storage that can handle weight and contain risks.
Choosing the Right Shelving
Not all shelves are created equal. For storing cases of motor oil, paint cans, or heavy power tools, you need a bolt-together steel shelving unit. I’ve used the Husky and Gladiator brands for years. Their upright posts and beams bolt together, creating a rigid frame that won’t wobble under hundreds of pounds. The bolt-together design is far stronger than clip-together wire shelves, making it the only choice for truly heavy items. That same stability is invaluable whether you’re outfitting a store, a garage, or a workshop with ladders and other heavy equipment. With bolt-together shelving, you can quickly configure racks to safely store ladders, power tools, and bulk supplies.
For lighter items like camping gear or pool chemicals where you want airflow, a heavy-duty wire shelf is fine. The ventilation helps prevent moisture buildup. Just know its limits.
Hiding the Lawn Mower
If your mower is an eyesore, you don’t need a fancy cabinet. Pick a back corner. Roll the mower in, then simply drape a heavy-duty tarp over it, or hang a simple canvas curtain from a tension rod or a wire across the corner. It costs maybe twenty dollars and makes the whole garage look tidier instantly.
Safe Storage for Hazardous Materials
Gasoline, oil, paint thinners, and batteries need a dedicated home. I use a vented, flammable storage cabinet. The brand “Eagle” makes good ones you can find at industrial supply stores. It must be metal, have vents, and a lock. Always place this cabinet on a spill-containment tray, a shallow plastic basin that will catch any leaks before they hit your floor. This one habit protects your home and meets basic fire safety codes.
Off-Season Small Engine Storage
Storing your lawn equipment properly saves you a huge headache next spring. Here’s my exact process:
- Fuel Treatment: For any gas-powered tool (mower, blower, trimmer), add a fuel stabilizer like Sta-Bil to a full tank. Run the engine for five minutes to get the treated fuel into the carburetor. This prevents the gas from turning to varnish and clogging the system.
- Deep Clean: Hose off all caked-on grass and dirt from the mower deck. For the leaf blower and weed eater, wipe them down with a damp rag. A clean tool won’t attract pests and lets you spot problems.
- Wall Hanging: Get the equipment off the floor. I mount heavy-duty hooks, like the kind from Everbilt, directly into wall studs. Hang the leaf blower and weed eater by their harness loops or balanced points. If you have the space, a dedicated mower lift can get the mower wheels off the ground too.
How do I choose cabinets that won’t sag or tip?
Garage cabinets fail when you ignore their real weight capacity. First, check the manufacturer’s specs. A cabinet rated for 50 lbs per shelf is for rags and spray bottles, not a stack of car parts or heavy tools on the floor.
Any cabinet over about four feet tall must be anchored directly into the wall studs with cabinet screws. I don’t trust drywall anchors for this. Find the studs with a stud finder and drive at least two screws through the cabinet’s back rail into solid wood. This prevents tipping, which is a serious safety hazard, especially with kids around.
For the heaviest items-an engine block, a metal toolbox full of sockets, bags of concrete-skip the tall cabinets entirely. Use a low, wide, welded-steel utility cabinet. Its center of gravity is low, and its weight is spread over a larger area of the floor. It’s much more stable by design.
Create Zones You’ll Actually Use
Organization isn’t just about putting things away. It’s about creating a logical flow so you can find anything and start any project in under a minute.
Start with your floor plan sketch. Draw out four primary zones:
- Workshop Bench: Your dedicated area for fixing and building. Needs easy access to power and your main tool storage.
- Garden Center: Home for potting soil, pots, tools, and the lawn equipment you use weekly. Place this near the garage door to the yard.
- Sports Gear Corral: Bikes, helmets, balls, and seasonal gear. Often best near the interior house door for quick grabs.
- Automotive Bay: Where you keep oil, fluids, cleaning supplies, and car maintenance tools. This zone lives near where your car parks.
Assign these zones based on your workflow and which doors you use to access them, not just on empty wall space. This simple planning step saves you countless steps later.
Now, protect your zones with clear aisles. Your main walking path should be at least 3 feet wide. The aisle next to your car needs to be wide enough for you to open the door fully and get out without hitting a shelf. I use a simple test: roll your trash or recycling bins through the planned aisles. If they get stuck, you need to adjust.
Choosing the Right Containers
Containers keep zones from becoming piles. I use three main types:
- Clear Plastic Bins: My first choice for most things. You can see the contents immediately without pulling it down. The Sterilite 66-quart latch bins are a workhorse in my garage.
- Uniform Colored Bins: For aesthetics in a zone you see from the house, like the sports area. Using all black or all gray bins looks clean and deliberate.
- Heavy-Duty Totes: For garage-specific, messy, or heavy items. I use the HDX brand from Home Depot for things like fireplace logs, rock salt, or car wash supplies. They can get dirty and handle the weight.
What’s the most effective way to label everything?
If you can’t see it and you can’t read it, it might as well be lost. Labeling is non-negotiable.
For a quick, cheap start, use a black paint marker on blue painter’s tape. It’s surprisingly durable. For a more permanent, clean look, a portable label maker like a Brother P-touch is fantastic. The laminated tape withstands garage dust and humidity.
My pro tip is for bins where contents change seasonally, like “Winter Sports” that becomes “Camping Gear.” Create a laminated tag with a blank line. Use a dry-erase marker to label it, and you can wipe and rewrite it forever.
Finally, always place labels on the front *and* the side of the bin. When bins are stacked, you can’t see the front label. The side label lets you identify it without moving a thing.
Keeping Your System Working: The Maintenance Routine
The best garage system in the world will fail without a simple maintenance habit. I treat my garage like a machine. A machine needs regular oil and a quick checkup to run smoothly for years. That discipline also covers storing and maintaining garage appliances, so everything stays reliable when you need it.
First, establish a simple rule for yourself. I call it the 10-minute rule. When you finish a project, you have 10 minutes to clean up and put every single tool back in its assigned spot. This is non-negotiable. Getting into this habit prevents the slow creep of clutter that undoes all your hard work in a single weekend. I keep a small magnetic parts bowl on my bench to toss screws and bits into during a job, making the final cleanup faster.
Next, schedule a seasonal reset. I do this in the spring and fall. The goal is simple: sweep the entire floor, wipe down all shelves and work surfaces, and take a hard look at each zone. Ask yourself: Is everything in this zone still relevant to its purpose? That paint can from three years ago is probably bad. That broken lamp waiting for a “fix” might need to go. This quick audit keeps your zones pure and functional.
Your Quarterly Garage Checkup
Every three months, I do a 20-minute walkthrough with a specific focus on system integrity. Here is my exact routine:
- Check Wall Systems: Grab your cordless drill and a screwdriver bit. Go along your slatwall or pegboard and gently tighten any loose bolts or screws. I’ve found the bolts on Gladiator gear can work loose over time with vibration. A quick snug-up prevents a whole panel from failing.
- Degrease Work Surfaces: My workbench gets grimmy. I use a spray bottle of Simple Green and a rag. Spray it, let it sit for a minute, and wipe it off. A clean bench isn’t just for looks; it prevents grime from transferring to your next project, like a bicycle chain or a piece of furniture.
- Inspect for Pests: Look in the corners of stored boxes, especially near the floor. Look for droppings or nesting material. I once found a mouse nest in an old camping gear bag. Now, I store off-season items in plastic totes with secure lids, not cardboard boxes.
- Look for Fluid Leaks: Check under your lawnmower, pressure washer, and any other gas-powered equipment. A small drip can become a big stain and a fire hazard. Place a cheap oil-absorbent mat under them, or use an old baking sheet as a drip tray.
How do I stop the clutter from coming back?
This is the real battle. Organization is a system, but clutter is a habit. You need rules to win.
My most effective rule is “one in, one out.” If you buy a new cordless drill, an old one has to leave the garage. Decide if you sell it, give it to a neighbor, or recycle it. This rule forces you to make a decision every time you add something, which is the single best defense against accumulation.
To make that rule easy, designate one bin. I have a large, labeled plastic tote in the corner. It’s my “Outgoing” bin. Anything that leaves the house-donations, returns, trash, recycling-goes directly in there. When the bin is full, I deal with it. This stops items from living in a purgatory on the floor or a shelf “on their way out.” They have one home until they’re gone.
Frequently Asked Questions
How do I effectively categorize my tools and equipment?
Use the six-category system from the assessment (Automotive, Garden, Tools, etc.) as your foundation. Then, within each category, group items by frequency of use. Store your daily-use tools at eye level in the most accessible spots, and relegate seasonal or occasional items to higher shelves or overhead storage.
What’s the best way to create and maintain activity zones?
Your zone plan is useless if boundaries aren’t enforced. Use physical barriers like different colored floor tape or the placement of shelving units to define each area’s borders. The key to maintenance is the “10-minute rule”-never leave a zone without returning every item borrowed from it.
What are the critical safety steps for storing paints, gas, and chemicals?
Beyond a vented metal cabinet, ensure it’s clearly labeled and always locked. Crucially, never store oxidizers (like pool chemicals) with flammables, as this creates a severe reaction risk. Keep your cabinet’s safety data sheets (SDS) accessible in a binder outside the garage. For a practical checklist of safe garage storage items, see our Safe Garage Storage Items Guide.
What are your top space-saving tips for ladders, rakes, and other long items?
Get them completely off the floor. Install heavy-duty wall brackets or a specialized rack that holds them horizontally against a high wall. For a cluster of items like shovels and rakes, a tall, narrow bucket filled with sand or pea gravel makes a perfect, cheap vertical holder that keeps handles separated and upright.
Your Organized Garage Journey
The most powerful tool for your garage isn’t on the shelf-it’s the plan you make before you buy a single bin or hook. I’ve redone my own garage three times over the years, learning that a little upfront thinking saves countless hours of rework later. Keep these final points in mind as you build your system for organizing tools and equipment: