
What Are the Power, Amperage, Horsepower, Size, and Motor Replacement Costs for a Garage Door Opener?
If you’re staring at a garage door opener spec sheet feeling lost, you’re not alone. I’ll cut through the confusion and give you the practical details you need to choose or fix your opener right.
This article provides clear, step-by-step advice on how power is measured in openers, what amperage means for your home’s circuit, selecting the correct horsepower, sizing the unit for your door’s weight, and what you can realistically expect to pay for a motor replacement.
I base this guidance on years of hands-on work in residential garages, having installed and serviced hundreds of openers from brands like LiftMaster and Chamberlain.
Understanding Your Opener’s Power: Horsepower, Amps, and What They Really Mean
Let’s clear up the confusion between horsepower and amperage. Think of it this way: horsepower (HP) is the opener’s capacity to do work-its brute strength to lift your door. Amperage (amps) is the measure of electrical current it pulls from your wall outlet to create that strength.
Horsepower is about the work capacity, not the speed; a 1/2 HP opener doesn’t necessarily move faster than a 1/3 HP model, it’s just built to handle a heavier load more comfortably. A common question I get is whether these units use a lot of electricity. They really don’t. An average opener uses about as much energy per month as your coffee maker does to brew one pot. The cost is negligible.
Here’s my go-to analogy: Horsepower is like the strength of a weightlifter. Amperage is how hard that weightlifter is breathing during the lift. A stronger lifter (more HP) might not breathe much harder (draw more amps) for a light weight, but will handle a heavy load much more easily.
Horsepower Explained: From 1/3 HP to 3/4 HP
You’ll typically find three ratings in residential openers. Here’s what they’re for, based on the doors I see every week:
- 1/3 HP: This is for a standard single-car, non-insulated steel door. If your door is light and you don’t use it dozens of times a day, this is often sufficient. Many builders use this as a default.
- 1/2 HP: This is the sweet spot for most homes. It handles standard double-car steel doors, single wood doors, and insulated doors with ease. I install more 1/2 HP units than any other.
- 3/4 HP (and up): This is for heavy-duty work. You need this for large, custom wood doors (like carriage-style), thick insulated doors, or if you use the door constantly, like for a home business.
You need a 3/4 HP opener if your door is exceptionally heavy, made of solid wood, or if it gets used 20-30 times a day, which would strain a smaller motor over time. Can an opener be too powerful? Technically, yes. Putting a 3/4 HP motor on a flimsy single-layer door can cause harsh starts and stops, putting extra stress on hinges, rollers, and the rail. It’s like towing a bicycle with a pickup truck-it works, but it’s not a smooth or ideal fit.
Amperage and Voltage: The Electrical Backbone
Nearly every residential garage door opener in the U.S. runs on standard 120-volt household current. During operation, they typically draw between 3 and 7 amps. The startup surge is higher, which is why your kitchen lights might dim for a second when the door starts.
I always recommend the opener is on its own dedicated 15-amp circuit to prevent nuisance trips. I’ve been to too many service calls where a homeowner’s breaker trips because the opener, shop lights, and a battery charger were all on the same old circuit. A dedicated line is a simple upgrade that prevents headaches.
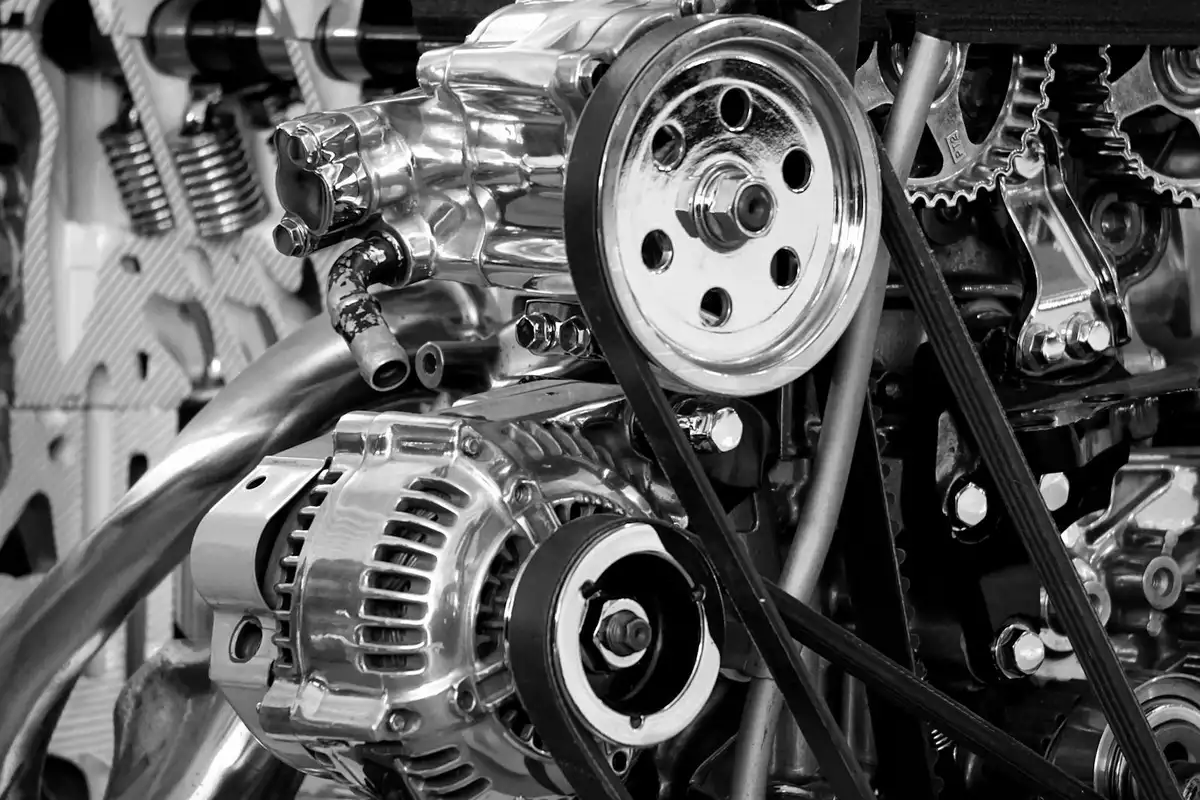
Garage Door Opener Components and How They Work Together
An opener isn’t just a motor in a box. It’s a system. The main parts you should know are:
- Motor Unit (Head): Houses the motor, logic board, and light.
- Drive Rail: The metal track that guides the movement.
- Trolley: The carriage that moves along the rail and attaches to your door’s bracket.
- Wall Console & Remote Controls: Your command centers.
- Safety Sensors: The eyes at the bottom of the door frame.
The system uses two types of power. The heavy lifting-the motor itself-runs on 120V AC from your wall. The brains of the operation (the logic board, lights, and radio receivers) run on low-voltage DC transformed inside the unit.
The safety sensors are always low-voltage DC, usually 5 to 24 volts, which is a critical safety feature to prevent any risk of serious shock. When you’re looking at motor replacement, physical size matters. The new motor’s footprint and mounting points must match your existing rail and ceiling bracket. A Chamberlain replacement motor, for example, won’t bolt directly into an old Genie assembly. You often replace the entire head unit for this reason.
Diagnosing a Problem: Is It the Motor or Something Else?
Before you start looking at motor prices, you need to figure out if the motor is actually the problem. Many times, it’s not. I keep a simple three-step checklist in my head for every service call.
First, listen for the motor’s hum when you press the button. If you hear a distinct humming sound from the unit for a few seconds before it gives up, the motor is likely getting power but can’t start. This often points to a bad start capacitor, a common and inexpensive fix.
Second, check for physical obstructions in the door’s path. Look at the tracks. A single stray garden tool, a kid’s toy, or even a build-up of dirt and leaves in the track can trigger the safety reverse. The opener will stop as if it hit a wall. Clear the path completely and try again.
Third, test the wall control button, not just your remote. If the wall button works but the remote doesn’t, you have a remote or logic board issue, not a motor problem. If nothing works, your next check is critical.
A faulty logic board or misaligned safety sensor can completely stop the motor from engaging. The sensors are those little eyes near the floor. If the green light on one is off or blinking, something is blocking the beam or they’re out of alignment. Gently clean the lenses and adjust the brackets until both lights glow steady. I use a simple carpenter’s level to get them perfectly straight.
Always, always check the manual release mechanism before you decide the motor is dead. Pull the red cord or handle to disengage the opener and try lifting the door by hand. If the door is still incredibly heavy or sticks, your problem is with the springs or tracks, not the opener motor. Replacing the motor in that case is a waste of money. I see homeowners make this expensive mistake all the time.
How Long Do Garage Door Openers Typically Last?
You can expect a decent garage door opener to last between 10 and 15 years. I’ve seen some basic chain-drive LiftMaster models from the early 2000s still running fine with just a new capacitor or gear kit. How long yours lasts depends heavily on two things: how often you use it and if you perform basic maintenance. If you’re near or past the 10–15 year mark or notice slower operation or louder noises, you might consider garage door motor lifespan replacement. Taking a proactive approach can prevent unexpected failures and keep your system safe and reliable.
A household that uses the door 10 times a day will wear parts out faster than one that uses it twice. Lubricating the chain or screw drive once a year with a silicone-based spray (I use Blaster Garage Door Lube) and checking bolt tightness can add years of life.
Listen and watch for the clear signs of a failing motor. Don’t ignore them. First is excessive noise-grinding, screeching, or a loud hum that’s new. Second is visible struggle; the door starts moving slower than usual, or it jerks and stutters on its way up. Third is frequent, unexplained stopping mid-cycle. The motor is overheating and shutting down to protect itself. When you see these signs together, the motor is telling you it’s nearing the end.
Choosing the Right Horsepower and Size for Your Garage Door
Picking the right motor isn’t about getting the biggest number. It’s about matching power to your door’s weight and size. A motor that’s too weak will strain and burn out early. One that’s oversized is just a waste of electricity and money. Here’s a simple guide I use in the shop.
A Simple Guide: Door Material and Size
First, figure out what your door is made of and measure it. This tells you everything.
- Standard Single Steel Door (Up to 7 feet tall): This is the most common. A lightweight, non-insulated single-car steel door is the easiest load. A reliable 1/3 HP opener from a brand like LiftMaster or Chamberlain handles this just fine.
- Insulated Single Steel Door or Standard Wood Door: Here’s where weight jumps. Insulation adds mass, and wood doors are naturally heavier. For these, I always step up to a 1/2 HP unit. The extra muscle provides smoother operation and a longer life for the motor.
- Double Car Garage Doors: Almost without exception, you need a 1/2 HP opener for a double door. They are simply too big and heavy for a 1/3 HP motor to handle reliably over years of use. For very tall or heavily insulated double doors, you might even consider a 3/4 HP model.
The safest rule is to weigh your door if you can, but if you’re estimating, always lean toward the more powerful option for durable, worry-free operation.
1/2 HP vs. 1/3 HP: The Pro’s Take
Homeowners often ask if they can save a few bucks with the 1/3 HP model. You can, but I rarely advise it.
A 1/3 HP opener is designed for one job: lightweight, single-car doors. It has less torque. In my experience, when a 1/3 HP opener fails, it’s often because it was working too hard for too long on a door that was just a bit too heavy for it. The motor winds up straining on cold days or starts making a groaning sound.
A 1/2 HP opener, on the other hand, has reserve power. It lifts standard doors with ease and isn’t bothered by the extra weight of insulation or a wood panel. I install far more 1/2 HP units because they last. The cost difference is minimal, but the longevity and peace of mind are significant.
My advice: unless you have a confirmed lightweight single steel door, do it 1/2 hp. It’s the versatile workhorse that won’t let you down. I’ve been using the LiftMaster 8355W (1/2 HP) as my go-to for standard replacements for years because it’s consistently reliable.
The Real Secret: Spring Balance is Everything
Here’s the most important thing I can tell you: horsepower is meaningless if your door springs are out of balance. The opener’s motor is designed to lift the door, not to fight a heavy, unbalanced door all by itself.
Think of it like a bicycle. The springs are your legs, and the opener motor is a tiny electric assist. If the springs are set correctly, the motor just gives a helpful nudge. If the springs are broken or badly adjusted, the motor is trying to pedal the whole bike itself up a hill—it will fail quickly. That’s why it’s essential to understand how garage door springs, tracks, and openers work together.
Before you even think about opener power, test your door’s balance. Disconnect the opener by pulling the red emergency release cord. Manually lift the door halfway up and let go. A properly balanced door will stay in place, not slam down or drift upward. If it moves on its own, your springs need adjustment. That balance rests on your door springs, and the next steps will walk you through adjusting the garage door springs.
This is one task I strongly recommend leaving to a professional. Garage door springs are under extreme tension and can cause serious injury if handled incorrectly. A pro can tune them so your new-or existing-opener works as intended for a long time.
Cost & Budget: Garage Door Opener Motor Replacement Costs

Pricing out this repair is confusing because you’re rarely buying just a “motor.” You’re usually getting a new gear and sprocket assembly, or a whole new opener unit. Let me break down what you’ll actually pay for, based on the jobs I’ve done in shops and in homes.
The real cost isn’t just the part; it’s the labor to diagnose the exact failure and the hardware to mount it safely. A motor that ran for 15 years often wears out other components at the same time.
The “Good, Better, Best” Price Tiers
Think of these tiers as solutions for different situations, not just quality levels.
- Good (Motor or Gear Kit Repair – $50 to $150): This is for a specific, diagnosed failure on a recent model opener. For instance, a Chamberlain/LiftMaster 1/2 HP chain drive that just stopped lifting might have a stripped plastic gear. You can buy a gear and sprocket repair kit. I’ve used the Chamberlain HD Repair Kit many times. It’s a straightforward fix if you’re handy with a socket set and can follow a video. This is only cost-effective if the motor itself and the drive rail are still in good shape.
- Better (New Budget Opener Unit – $200 to $350): When the motor is shot or the unit is over 10 years old, replacing the entire opener is smarter. In this range, you’ll find new 1/2 HP chain-drive units from brands like Genie. I installed a Genie ChainDrive 750 for a neighbor last year. It’s basic, loud, but gets the job done. These kits come with all new hardware, remotes, and a warranty, which a repair kit does not.
- Best (New Premium Opener Unit – $400 to $600+): This is where you invest in quiet operation and longevity. You’re looking at 3/4 HP or 1 HP belt-drive models with DC motors, like the LiftMaster 87504 or comparable Genie models. The belt is significantly quieter than a chain-it’s the difference between a coffee grinder and a ceiling fan. I always recommend this tier if your bedroom is above the garage. The DC motor also allows for softer starts and stops, which is easier on the whole door system.
Itemizing the Hidden Costs
Don’t let these sneak up on your budget. Here’s what often gets added to the cart or the bill.
- New Mounting Hardware: Old brackets can be rusted or bent. A new standard mounting bracket kit costs $15-$25. For a DIY install, just buy it.
- Disposal of the Old Unit: That old opener is heavy, greasy e-waste. My local dump charges a $15 fee for motorized appliances. Some installers include haul-away in their fee; always ask.
- Extra Parts & Tools: You might need a new reinforcement bracket for the door ($10), or discover the safety sensor wires are frayed ($20 for a replacement kit). If you’re DIY-ing, you’ll need a helper, a sturdy ladder, wrenches, and a drill.
Motor-Only Repair vs. Complete New Opener
This is the key financial decision. Here’s my rule of thumb from the shop.
Consider a motor or gear kit repair only if your opener is less than 7 years old, the model is readily available, and the failure is known (like the common plastic gear wear). You’re saving money but getting zero new warranty on the motor or other parts.
For $100-$150 more than a repair, a new unit gives you a clean slate: all new parts, a full 1-2 year warranty, modern safety features, and often better technology. For any opener pushing a decade old, the new unit is almost always the more reliable and valuable choice.
The Professional Installation Cost Factor
If you’re not comfortable on a ladder working with electricity and heavy components, this is money well spent.
A professional installer will typically charge between $250 and $450 for labor to replace a standard opener. This price includes their travel, expertise, all necessary hardware, testing, and hauling away the old unit. The total project cost (premium opener + pro install) often lands between $700 and $1,000.
DIY replacement is feasible if you are methodical, have a good helper, and your door is in good balance. Test your door’s balance first: disconnect the opener by pulling the red emergency release cord. The door should lift about halfway up and stay in place by itself. If it slams down or is very hard to lift, you have a spring issue-stop immediately and call a pro because garage door spring replacement can be dangerous.
You must absolutely call a professional if your repair involves the high-tension torsion springs, cables, or the door itself. Those springs are under extreme pressure and can cause serious injury if handled incorrectly. A pro will also ensure the safety reverse sensors are perfectly aligned, which is a non-negotiable for family safety.
How to Replace a Garage Door Opener Motor: A Pro’s Step-By-Step Overview
Replacing the entire opener is often simpler and more cost-effective than swapping just the motor. I’ve done both, and a full kit ensures all parts-like the rail, trolley, and gears-are new and work together. Here’s my method for installing a new garage door opener.
The most critical step is disengaging the door from the opener by pulling the red emergency release cord before you touch a single tool. This isolates the heavy door, so if something slips, it won’t come crashing down. If your door has a high-tension torsion spring above the door, stop here and call a professional. That spring is under extreme force and is not a DIY job.
Phase 1: Power Down and Prep
Unplug the opener from the wall outlet. Then, go to your main electrical panel and turn off the circuit breaker that feeds the opener. Use a voltage tester on the unit’s wires to double-check they’re dead. I use a Klein Tools non-contact tester for this; it’s reliable and beeps loudly.
Phase 2: Detach the Old Opener
With the door disengaged, you can now remove the old unit.
- Place your stepladder securely under the motor unit.
- Unscrew the emergency release cord and its housing from the rail.
- Using your impact driver, remove the bolts securing the motor unit to the ceiling bracket or framing.
- Have your helper support the weight of the motor and rail. Unbolt the rail from the header bracket above the door. You can now lower the entire assembly.
- Disconnect the wiring from the back of the motor unit. Take a picture of the wire connections first for reference later.
Phase 3: Mount the New Rail and Motor
Follow the new opener’s instructions, but here’s my pro-take.
First, assemble the new rail on the ground. I prefer to attach the motor head to it now-it’s easier than wrestling with it overhead. Use a 4-foot level when you mount the header bracket to ensure the rail will be perfectly straight, which prevents binding and wear. A crooked rail is the most common mistake I see. Secure everything into ceiling joists or solid blocking, not just drywall.
Phase 4: Wiring It Up
Run the new power cord to the outlet. For the safety sensors and wall button, I use the old wires as pull strings to fish the new ones through. Strip the wires with a dedicated stripper-not your side cutters-for a clean connection. Use the included wire nuts and wrap them with electrical tape for a secure, vibration-proof joint.
Phase 5: Final Connection and Test
Reconnect the door to the new trolley with the provided pull cord. Plug the opener in. Before you run the motor, manually move the door up and down its full travel. It should move smoothly with little effort. If it binds, check your rail alignment. Finally, program the travel limits and force settings per the manual. Test it with the door disconnected first, then connected.
The Gearhead’s Checklist for Motor Replacement
Gathering the right gear before you start saves countless trips back to the workbench. This is my go-to list for a smooth swap.
- Stepladder: A sturdy 6-foot ladder gives you safe, stable access.
- Cordless Impact Driver: My DeWalt 20V Max gets the brackets off and on fast without stripping heads. A drill/driver works, but an impact is better for the lag bolts into framing.
- Locking Pliers: I keep a pair of Irwin Vise-Grips on my belt. They’re perfect for holding a nut in place on the backside of a bracket when you’re tightening from the front.
- Wire Strippers: A simple, auto-adjusting model from Ideal or Klein makes perfect strips every time.
- 4-Foot Level: Non-negotiable for rail alignment. A shorter level won’t give you an accurate reading across the rail’s length.
- Voltage Tester: For confirming the power is off. Never skip this.
For materials, you’ll need the new opener kit. Also, grab a pack of wire nuts and some electrical tape. Wear safety glasses, especially when working overhead; falling dust and debris always finds your eyes. You will almost certainly need a helper. The rail and motor assembly is awkward and heavy; a second set of hands prevents damage to your new unit and your drywall.
Keeping It Running: Your Garage Door Opener Maintenance Routine

Think of your opener like your car. A little regular attention prevents a major, expensive breakdown later. I tell all my clients that ten minutes a month can add years to the opener’s life and keep your family safe. This is the exact routine I use in my own garage.
Your Simple Monthly Check
Set a calendar reminder for the first weekend of the month. Your job is to simply observe and listen.
- With the garage clear, press the wall button to open the door. Listen closely. You’re listening for grinding, screeching, or chattering sounds that weren’t there before. A healthy opener has a steady, smooth hum.
- Next, watch the metal rail that the opener’s trolley travels on. Look from the motor head to the back of the garage. It should be perfectly straight and securely bolted to its brackets. A bent or sagging rail puts immense strain on the motor and will cause premature failure.
If you hear a new noise or see a rail that looks more like a rollercoaster track, you’ve caught a problem early. That’s a win.
Biannual Lubrication (Spring & Fall)
This is the most important hands-on task. The wrong lubricant can cause more harm than good. Never use WD-40. It’s a degreaser and water displacer, not a lubricant-it will attract dust and gum up the works.
I use and recommend a dedicated garage door lubricant. I’ve had good results with the spray-can white lithium grease from brands like Blaster or 3-IN-ONE. For chain drives, a heavy-duty chain lube like the one from Clopay works great. Regular lubrication of all garage door components helps prevent wear and noise. Look for products labeled as garage door lubricants to ensure compatibility with your setup.
- Open the door halfway to access the entire length of the rail.
- For a chain drive, spray a light coat of lube directly onto the chain, focusing on the links that contact the drive sprocket. For a screw drive, apply lubricant along the entire length of the threaded steel rod.
- Run the opener through one full cycle to distribute the lubricant evenly. Wipe off any excess that drips.
Proper lubrication reduces friction, which lowers the amperage draw on the motor and keeps everything running cool and quiet.
Testing the Auto-Reverse Safety Feature
This non-negotiable monthly test takes 30 seconds and could prevent a serious injury. Modern openers have two safety reverses: one for objects and one for the door’s closing force.
- Place a solid object like a 2×4 block of wood or a full roll of paper towels flat on the floor directly under the center of the door.
- Using your wall control button, close the door. The bottom edge of the door must hit the object and immediately reverse back to the fully open position.
- If it doesn’t reverse, stop using the opener immediately and consult a professional. The sensitivity adjustment is on the motor unit, but improper adjustment is a major safety hazard.
Cleaning the Safety Sensor Lenses
Those little plastic eyes near the floor on each side of your door are photoelectric sensors. If their lenses get dirty, the opener thinks something is blocking the door and won’t close. I see this constantly.
Every month, give each sensor lens a quick wipe with a clean, dry microfiber cloth. Don’t use cleaners or water, as they can leave a film. Just a dry wipe removes the fine layer of dust and spider webs that cause most “phantom obstruction” problems. While you’re there, make sure nothing is leaning against them and that the green LED on one sensor and the amber LED on the other are both solidly lit.
Garage Door Opener Power & Replacement: Your Quick Questions Answered
My opener works but seems strained. Should I upgrade the horsepower?
If your current opener groans, moves slower than it used to, or struggles on cold days, it’s likely underpowered for the door’s weight. First, test your door’s balance-if it’s heavy to lift manually, the spring system is the real issue. If the springs are fine, upgrading from a 1/3 HP to a 1/2 HP model is a smart, long-term fix.
My motor is dead. Is it ever worth repairing instead of replacing the whole unit?
Only if the opener is less than 7 years old and you can find an exact-match repair kit, like a common gear and sprocket set. For units a decade or older, replacing the entire opener is more reliable and cost-effective, giving you new parts, a full warranty, and modern safety features.
The circuit breaker for my garage door opener keeps tripping. What’s my first move?
Unplug the opener and reset the breaker. If it holds, the issue is likely a failing motor drawing a surge of amps. Plug in a different appliance to rule out a bad outlet. If the breaker trips only when the opener runs, the motor is likely shorting internally and needs professional diagnosis or replacement.
Final Thoughts on Choosing Your Garage Door Opener
The most important rule is this: match your opener’s horsepower and voltage to the weight and size of your garage door. Getting the right motor for your specific door ensures smooth operation, prevents premature wear, and keeps your entire system safe. If you’re looking to buy LiftMaster garage openers, ½ HP or ¾ HP DC motor models fit standard doors. They offer dependable power, quiet operation, and straightforward installation, aligning with the guidance above. Focus on these key points as you decide:
- Always choose a ½ HP or ¾ HP opener with a modern DC motor for a standard single or double car door; it’s the right balance of power, quiet operation, and efficiency.
- Treat a motor replacement as a system check-inspect the springs, cables, and rollers at the same time to avoid a cascade of failures.
- Budget for the complete professional installation, which often doubles the cost of the opener unit itself, for a safe and code-compliant result.
- When in doubt, consult a certified technician for heavy doors, high-cycle commercial use, or any electrical work you’re not fully trained to perform.