
How Do I Safely Store Exercise and Hobby Equipment in My Garage?
Storing your gear can turn a messy garage into a dangerous obstacle course. I’ll show you how to organize it for easy access while keeping your family and your equipment safe.
We will cover creating safe zones for different activities, choosing the right wall hooks and shelving, protecting delicate gear from humidity and dust, and critical fire safety practices for a mixed-use space.
My advice comes from over a decade of helping homeowners transform their garages from cluttered catch-alls into functional, safe extensions of their home.
How Do I Start by Assessing My Garage and Equipment?
Before you buy a single hook, you need a plan. I use a simple “three-zone” method in every job I do: floor, wall, and overhead. It helps you see all your space, not just what’s in front of you.
The floor zone is for the heaviest, most-used items you stand on or around, like a weight rack or a workbench. The wall zone is your prime real estate for hanging bikes, racks for hand tools, or shelves for bins. The overhead zone, often forgotten, is perfect for lightweight, bulky, or seasonal items like kayaks or holiday decorations stored in protective bags.
Grab a tape measure, a notepad, and your phone’s camera. Start by getting your garage’s basic dimensions.
- Measure the length of each clear wall. Don’t forget to note the location of outlets, light switches, and the garage door opener.
- Measure your ceiling height from the concrete slab to the bottom of any trusses or joists.
- Measure the clearance your garage door needs when it opens. This is the space you can’t use for tall items.
Now, sort your gear. Pull everything into the driveway. I make three piles:
- Heavy and Frequent Use: Things like your daily bike, dumbbells, or a tool chest you use weekly. These need the most accessible, sturdiest spots.
- Lightweight and Occasional Use: Items like a camping tent, a folding table, or hobby paints. These are perfect for wall hooks or higher shelves.
- Bulky and Seasonal: Think skis, paddleboards, or a large inflatable pool. These often go in the overhead zone or in a designated corner.
A client once asked me, “Can I keep my expensive treadmill in the garage?” My answer is always: maybe, but check two things first.
First, your concrete slab. It’s plenty strong, but is it level? A severely sloped or uneven floor will wear out a treadmill’s motor and frame fast. Second, your garage climate. If you live where humidity swings wildly or temperatures freeze, the electronics and belt can be damaged. For a climate-controlled garage, it’s a great option. If not, I’d recommend keeping it inside.
What’s the Best Way to Store Heavy Gym Equipment?
Heavy gear needs respect. A 300-pound weight rack and a 200-pound treadmill demand different strategies.
For a solid weight rack or squat stand, you must anchor it to the concrete. I use a hammer drill with a carbide-tipped masonry bit and 3/8-inch wedge anchors from Simpson Strong-Tie. They don’t budge. For a rowing machine or a weight bench, stability is key on the floor. Make sure the legs are on a perfectly flat surface so it doesn’t rock.
You need to protect your floor. I see a lot of folks use horse stall mats from tractor supply stores. They’re thick and durable, but they’re also incredibly heavy, smell like rubber at first, and are a pain to cut. For garage gyms, I prefer interlocking anti-fatigue mats, like those from Gorilla Mats. They provide cushion, protect the concrete from dropped weights, and are much easier to install and clean. If you’re weighing options, consider the garage floor mats pros and cons. Weight, odor, durability, and cost can all influence your choice.
Tall, narrow equipment like a Peloton bike or a treadmill can be a tipping hazard. To secure a treadmill to the wall, I use a simple anti-tip bracket kit, like the kind sold for bookshelves. Attach one side to the solid frame of the treadmill (not a plastic cover) and the other side into a wall stud using 3-inch lag bolts.
Here’s my gearhead’s checklist for any heavy equipment project:
- Heavy-duty lag bolts (3″ length, 5/16″ diameter) for securing to wood studs.
- A sheet of 3/4-inch thick exterior-grade plywood for creating a level base.
- A 4-foot level-the longer the level, the more accurate your reading across an uneven floor.
- A hammer drill and masonry anchors for concrete.
Securing Treadmills and Exercise Bikes
Your garage floor probably slopes toward the door for drainage. That slope is great for water drainage but not so great for exercise equipment like a treadmill. Plopping a treadmill down on that slope will feel wrong and can damage the machine. Here’s how I build a stable, level platform.
- Place your 4-foot level on the floor where the equipment will go. See how much it slopes.
- Cut your 3/4-inch plywood into a platform slightly larger than the equipment’s footprint.
- Using plastic shims (the kind used for door frames), shim under the plywood until it is perfectly level in all directions. Tap the shims in with a hammer.
- Once level, trace the plywood’s outline on the floor and apply construction adhesive within the lines.
- Set the plywood platform back onto the adhesive and weigh it down overnight. This prevents it from shifting.
- Place your equipment on the now-level, secured platform.
Folding treadmills are popular for garage spaces. The benefit is obvious: you can fold it up and roll it against a wall to save floor space. The trade-off is that the folding mechanism adds complexity and can become a weak point over years of use in a less-controlled environment. A non-folding commercial-grade treadmill is simpler and often more stable, but it’s a permanent floor fixture. For a home garage where space is tight, a quality folding model you maintain well is usually the right call.
How Should I Handle Delicate Hobby Gear and Electronics?

Let’s start with the 3D printer question. Can you keep one in the garage? You can, but I don’t recommend it for long-term storage or operation. The two biggest enemies are temperature swings and dust. Most printer filaments absorb moisture from humid air, which ruins prints. Cold temperatures make plastics brittle and can freeze lubricants in the motors. A simple dust cover isn’t enough.
Your best bet is a dedicated storage cabinet or an insulated enclosure that stays inside your conditioned home space when not in use. If the garage is your only option, look at creating a sealed enclosure and consider a small space heater or dehumidifier for the immediate area during use. This approach also applies to organizing household items in a garage storage space. Sturdy cabinets and sealed bins help keep tools, seasonal gear, and other items tidy and protected.
Sealed Cabinets vs. DIY Enclosures
For protecting sensitive tools like airbrush kits, soldering stations, or camera gear, you have two main paths. I’ve used both in client garages.
- Sealed Metal Cabinets: I install a lot of Husky or NewAge all-weather cabinets. They have rubber gaskets on the doors that keep out dust and a fair amount of moisture. They’re lockable, which is great for chemicals or expensive tools. The downside is cost; a good 60-inch cabinet runs several hundred dollars.
- DIY Enclosures: For a budget-friendly option, I’ve built simple boxes from sealed plywood with a tight-fitting lid and lined the seams with foam weatherstripping. It works surprisingly well for dust. You can add a reusable desiccant pack inside for moisture. It’s not as sleek or secure as a premium cabinet, but it gets the job done for a fraction of the price.
Choose a cabinet for security and a clean look; build an enclosure if you’re prioritizing cost and have basic woodworking skills.
Shelving for Paints, Chemicals, and Small Parts
Never store paints or chemicals on a high, rickety wood shelf. They need stability, safety, and containment. I always recommend sturdy, adjustable steel shelving units, like ones from Husky or Gladiator. Bolt them to the wall studs for earthquake safety.
- Place all liquids in secondary containment trays. The $5 cafeteria trays from a restaurant supply store are perfect for catching drips.
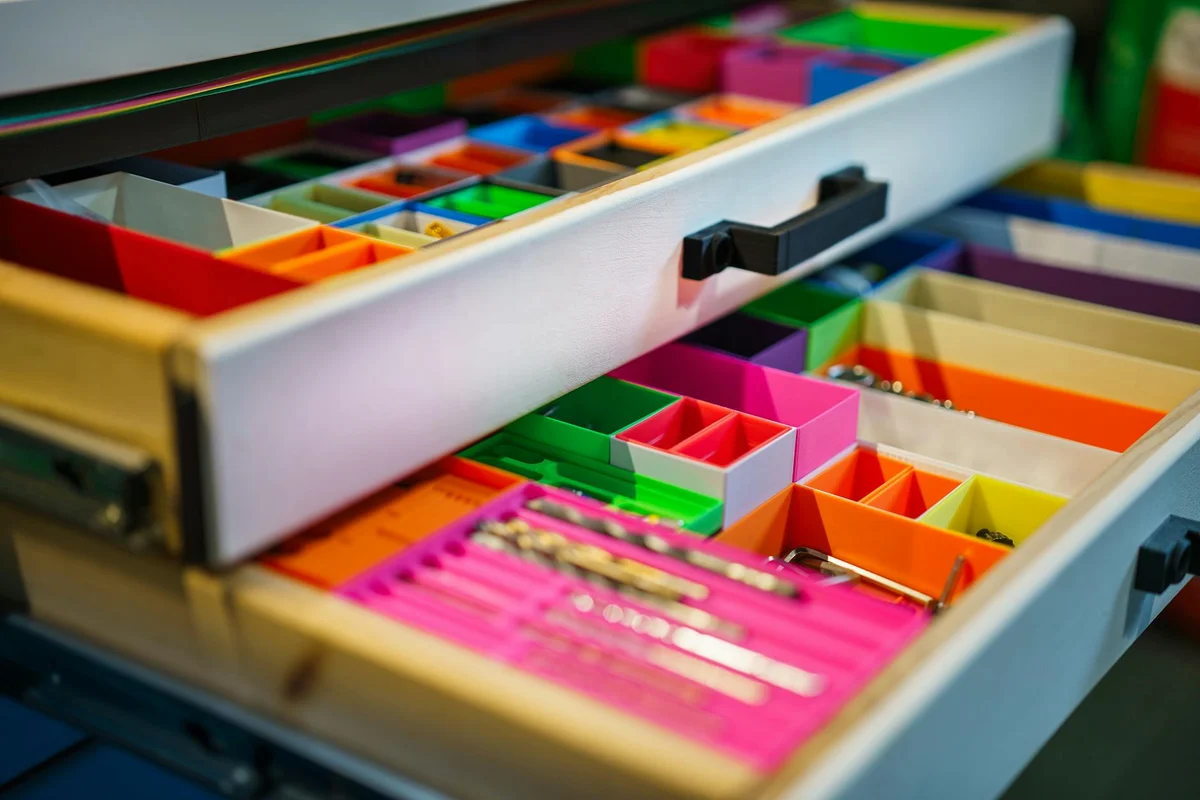
- Keep all products in their original containers with labels facing out. For small parts like screws or model kit pieces, I use Akro-Mils storage cabinets with small, clear drawers. Then, I place the entire cabinet on the sturdy metal shelf.
- Always use safety lids that seal tightly, not just screw-on caps that can be cross-threaded and leak.
Storing Camping Gear, Fishing Rods, and Crafts
These items need to breathe but stay clean and undamaged.
- Camping Gear: Never store a sleeping bag or tent compressed. Hang them in large breathable cotton storage bags or use big plastic totes with the lids loosely placed on top. I use inexpensive wire shelving as a drying rack for gear before it goes into long-term storage.
- Fishing Rods: Wall-mounted horizontal rod racks are okay, but they get in the way. I prefer vertical ceiling-mounted holders, like the ones from Racor. They keep rods straight and out of harm’s way. For expensive rods, use a PVC tube with end caps for full protection.
- Crafts (Fabric, Yarn, Paper): Sunlight and moisture are the killers. Use opaque, plastic totes with secure lids. Toss in a silica gel packet to control humidity. Clearly label each tote so you’re not opening ten boxes to find your sewing thread.
How Can I Protect Everything from Garage Hazards?
Your garage is a tough environment. Proactive protection is cheaper than replacing ruined equipment.
Concrete Moisture Control Methods
Moisture warps wood, rusts metal, and ruins electronics. Here’s your three-part defense system I install regularly.
- A Dehumidifier: This is your first line of defense. For a standard two-car garage, a 50-pint capacity unit works. I’ve had good results with the Frigidaire FFAD5033W1. Set it to maintain 45-50% humidity and empty it regularly or use a hose to drain it.
- Concrete Sealant: Moisture wicks up from the slab. Apply a high-quality penetrating sealer like Ghostshield Siloxa-Tek 8500. It’s not a surface coating; it soaks in and chemically blocks moisture vapor. I apply it with a pump sprayer.
- Vapor Barrier: If you’re storing items directly on the floor, never just use cardboard. Place a 6-mil plastic sheet as a vapor barrier first, then put your shelving unit or a wooden pallet on top of it.
Controlling moisture isn’t optional; it’s the most important step in preserving what you store.
Simple, Pet-Safe Pest Deterrents
You don’t need harsh chemicals to keep mice and insects out. I use methods that are safe for my dog.
- Peppermint Oil: Rodents hate the smell. Soak cotton balls in 100% pure peppermint oil and place them in corners, behind shelves, and near potential entry points. Refresh every 4-6 weeks.
- Steel Wool: Stuff coarse steel wool into any crack, hole, or gap around pipes, cables, or the garage door seal. Mice can’t chew through it. I combine this with a sealant like DAP Dynaflex 230 for a permanent barrier.
- Keep all pet food and grass seed in sealed galvanized steel cans, not plastic bins.
Temperature and Your Electronics
Most consumer electronics are rated for operation between 32°F and 95°F. Storing them outside that range can damage batteries and solder joints. For items like backup hard drives or camera batteries, don’t just leave them on a shelf. Since garages can heat up or cool down quickly, keep these items in a climate-controlled space. This supports garage storage safety and helps protect your devices.
Use an insulated storage box, like a Coleman cooler or a thermal shipping container, as a buffer against extreme heat and cold in the garage. It won’t regulate temperature, but it will slow the rate of change, giving you a much safer middle ground. For a longer-term solution, consider garage temperature control insulation to help maintain steadier temperatures year-round. In the next steps, we’ll link to practical insulation options for a garage space.
Your Maintenance and Cleaning Routine
Set calendar reminders for these simple tasks. They take minutes and prevent major headaches.
- Monthly: Check your dehumidifier reservoir. Walk the perimeter and look for new cracks in the slab or walls where moisture/pests can enter.
- Seasonal (Spring/Fall): Do a detailed pest inspection. Reapply peppermint oil. Check the seals on your storage cabinets and totes.
- Quarterly: Use a shop vacuum with a brush attachment to dust off the vents of any electronics in storage and the coils on your dehumidifier or refrigerator. Clear leaves and debris from the exterior garage door threshold.
What Safety Rules Prevent Accidents with Heavy Items?
Storing heavy gear safely isn’t just about tidiness. It’s about preventing a dangerous and expensive collapse. The rules here are non-negotiable.
Find the Bones of Your Wall
Your drywall is just a facade. It cannot hold weight. All the force must go into the wooden studs behind it. I use a Zircon MetalliScanner stud finder because it locates studs and alerts me to live wires or pipes, which is a critical safety feature. Mark the edges of each stud with painter’s tape. Every single bracket, rack, or heavy shelf must be screwed directly into a wall stud for a secure hold.
Choose Your Hardware Like Your Life Depends On It
For items under 20 pounds, you can sometimes use a high-quality drywall anchor like a toggle bolt. For anything heavier-a weight bench, a kayak rack, a toolbox-you must use lag bolts or structural screws driven straight into the stud. I keep a box of GRK Fasteners’ Rugged Structural Screws in my truck; they have great shear strength and don’t require pre-drilling a pilot hole in most cases, which saves time.
Lift With Your Legs, Not Your Back
I’ve thrown out my back once moving a tool chest, and you only need to learn that lesson once. The technique is simple:
- Stand close to the item with feet shoulder-width apart.
- Squat down, bending at your knees and hips, keeping your back straight.
- Get a firm grip, hug the load close to your body, and slowly stand up using your leg muscles.
- Never twist your torso while carrying. Point your toes where you want to go and move your feet.
This method turns your legs into hydraulic lifts instead of turning your spine into a fragile lever.
Secure Everything That Can Fall
This is especially critical in earthquake zones, but it’s a smart rule everywhere. A 50-pound barbell set falling from a hook can wreck your car or injure someone. Use dedicated straps. I recommend products like QuakeHold’s putty or security straps for securing tall, top-heavy items like shelving units to the wall. Any freestanding unit over four feet tall should be anchored to a stud with an anti-tip bracket.
Respect Overhead Limits
Overhead storage racks are fantastic, but they have strict limits. Most consumer-grade steel racks are rated for 300-600 pounds total distributed weight. That sounds like a lot until you start loading plastic bins full of books or camping gear. A common mistake is overloading one side. You must distribute weight evenly. I tell clients to treat the rack’s capacity like a car’s payload: if the label says 500 lbs, never put more than 400 lbs on it to be safe. If you’re storing engine blocks or hundreds of pounds of tile, you need a custom rack designed by an engineer—especially if you’re planning to install overhead storage racks in your garage.
How Do I Organize for Easy Access and Maximum Space?
Good organization reduces clutter and makes your hobbies more enjoyable because you spend less time searching and more time doing.
Map Your Garage Workflow
Think of your garage like a kitchen. The tools and items you use daily should be within easy reach. I lay everything out on the floor first. Your daily workout gear, like kettlebells or yoga mats, should live on low shelves or wall hooks at waist height. Seasonal hobby gear, like Christmas decorations or ski equipment, can go on the highest shelves or in the overhead racks. Place items you use together in the same zone to create an efficient workflow. Apply this zone-based thinking to organize garage tools and equipment. Group related tools into dedicated zones for faster, smoother projects.
Compare Your Wall System Options
You have three main choices for flexible wall storage:
- Slatwall (My Preferred Choice): This is the panel system you see in retail stores. I use PVC slatwall from a brand like ProSlat because it’s moisture-resistant and strong. The slots accept a wide variety of hooks, shelves, and baskets. You can rearrange your layout in minutes as your needs change. It must be mounted directly to your wall studs.
- Pegboard: The classic, budget-friendly option. The thin hardboard type can sag under heavy tools. I upgrade to a 1/4-inch thick tempered hardboard and use proper pegboard hooks with locking collars so they don’t pop off when you grab a tool.
- French Cleat: This is a DIY powerhouse system. You rip a long plywood board at a 45-degree angle on a table saw. Mount one piece to the studs, and the matching piece goes on the back of your custom tool holders or shelves. It’s incredibly strong and customizable, but it requires more woodworking skill and tools to set up.
For most homeowners wanting a mix of bikes, tools, and bins, a slatwall system offers the best blend of strength, flexibility, and clean look.
Use Labels That Last
Paper labels and markers fade in garage light and dust. You need durable solutions.
- For bins, I use an embossing labeler (like a Dymo LetraTag) on plastic tape. The raised letters don’t rub off.
- For shelves or zones, white electrical tape and a permanent sharpie work surprisingly well and are cheap.
- For a pro look, a brother P-touch label maker with laminated tape is waterproof and smudge-proof.
Label the front and the side of bins so you can identify them from any angle.
Hidden Gem Organizational Hack: The Garage Door Track Loft
Here’s a trick from my own garage that adds storage without losing an inch of floor space. Look at the empty void above your garage door when it’s open. That space above the horizontal door track is often 12-18 inches deep and runs the entire width of your garage. Even when you’ve maximized small spaces, it’s hard to find such a convenient, out-of-the-way spot.
What Maintenance Keeps My Gear and Garage in Shape?
Treating your garage like a forgotten storage closet is a recipe for broken gear and a messy space. A little regular care prevents big problems. The key is to build simple habits that protect your investment and keep your garage functional for years. This isn’t about deep cleaning every weekend; it’s about smart, scheduled upkeep.
Create a Simple Maintenance Calendar
Don’t rely on memory. I use a small magnetic whiteboard on my garage wall, right by the door to the house. I write down four simple quarterly tasks and two semi-annual checks. This system has saved me hundreds in repairs.
- Every Three Months: Lubricate moving parts. For bike chains, I use a dry lube like Finish Line Dry for less dirt buildup. For treadmill belts, a silicone-based lubricant applied under the deck according to your manual keeps it running quietly.
- Every Six Months: Check power tool battery terminals. I take my DeWalt and Ryobi batteries out of their chargers, wipe the terminals with a dry cloth, and look for any corrosion or dirt. This ensures a good connection and prolongs battery life.
Clean and Dry Equipment Before Long-Term Storage
Putting away a muddy mountain bike or a saw dusty from a project is asking for rust. Taking ten minutes to clean gear before it sits idle is the single best way to prevent corrosion and deterioration. Here’s my process:
- Wipe down surfaces with a dry microfiber cloth to remove loose dirt and sawdust.
- For stubborn grime or mud, use a damp (not soaking) cloth with a bit of mild dish soap, then dry immediately.
- Pay special attention to metal parts, hinges, and blades. A very light coating of a general-purpose lubricant like WD-40 Specialist Corrosion Inhibitor on metal surfaces adds a protective barrier.
- Let everything air dry completely in the garage before hanging it up or putting it in a bin.
Inspect Your Storage Hardware Twice a Year
Your shelves and hooks work hard. Gravity and vibration slowly loosen things. Twice a year, I do a “wiggle test.”
- For Shelf Brackets: Grab the edge of the shelf and gently try to lift it up. If there’s movement, tighten the screws or lag bolts into the wall studs with a cordless drill. I upgraded my builder-grade brackets to heavy-duty steel ones from Husky because the flimsy ones sagged.
- For Hooks and Pegboard: Give each hook a firm downward tug. If it moves, check the fastener. For pegboard, ensure the panel itself is still securely mounted to its backer board.
- For Slatwall Panels: Press on the panel in a few spots. If it bows or feels loose, the screws into the studs may need tightening. Most generic PVC slatwall can hold a lot, but only if it’s mounted solidly.
Always Check Manufacturer Guidelines
My general advice is a great start, but your specific equipment might need special care. The manual that came with your Peloton bike or Creality 3D printer has storage and maintenance instructions designed by the engineers who built it. I learned this the hard way with a treadmill; I used the wrong lubricant and voided the warranty. For electronics or complex gear, a quick review of the manufacturer’s website can save you from a costly mistake. File these guides in a folder in your house so you know exactly what your gear needs.
FAQ: Quick Garage Storage Tips from a Pro
How do I quickly assess if my garage is suitable for sensitive electronics?
Use a hygrometer to check humidity; if it regularly exceeds 60%, your garage is a risk. This is where climate control for garages—managing temperature and humidity—becomes essential. Ensure temperatures stay within the equipment’s operating range (usually 32°F to 95°F). For critical items, consider a sealed, insulated cabinet as a mandatory buffer.
What are the most cost-effective storage solutions for a mix of equipment?
Invest in adjustable steel shelving anchored to studs for heavy, bulky items. Use wall-mounted slatwall or pegboard with hooks for medium-weight gear like tools and bikes. For small parts and chemicals, repurpose clear plastic bins with secure lids for visibility and containment.
What’s the minimum maintenance I should do monthly to prevent damage?
Check and empty your dehumidifier, and inspect for new cracks or pest entry points. Perform a “wiggle test” on shelves and hooks, tightening any loose hardware immediately. Dust electronics vents and equipment surfaces to prevent grime buildup.
How can I child-proof my garage storage without sacrificing accessibility?
Anchor all tall shelving and heavy equipment to wall studs with anti-tip brackets. Store paints, chemicals, and sharp tools in lockable cabinets. Keep daily-use items in designated, adult-height zones to maintain workflow while limiting child access.
Your Safe, Organized Garage Awaits
The single most important rule is this: never let your storage system become a safety hazard. Keep these final points in mind to make your system last and keep you safe:
- Always clear a wide, unobstructed path from your car to the house door.
- Use clear or labeled bins so you never have to guess what’s inside.
- Schedule a quick 10-minute inspection every season to check for loose hardware, worn straps, or water damage.
- When in doubt, over-engineer your mounting-anchoring into a stud with a quality lag bolt is always better than a drywall anchor for heavy items.