
Can’t Remember Your Garage Code? Here’s How to Change It
You’re worried about who might have your old code, and you want a fresh one-today. I’ll walk you through resetting it yourself so you can lock things down fast.
This guide covers the steps for common systems, from finding the “Learn” button on your opener and clearing all remotes, to programming a new wireless keypad and pairing car homelink systems.
I’ve programmed hundreds of these units over the years, from basic lifts to smart openers, and I know the tricks to get it right on the first try.
First, Let’s Be Clear: Reset vs. Change Your Code
Before you touch a button, you need to know what you’re actually trying to do. Getting this wrong can lock you out or waste an hour of your time. Think of it like this: changing your code is like replacing the lock on a single door. Resetting your opener is like replacing every lock in the entire building and throwing away all the old keys.
Changing a code means you swap out one existing PIN for a new one on a single device, like your exterior keypad or a specific remote. The main opener unit keeps all its other programmed devices and settings. You do this when you want to update an old code for security or if you gave a code to a contractor and the job is done.
Resetting, often called “clearing the memory” or “factory reset,” erases every single code and remote that was ever linked to your opener. It returns the system to how it was fresh out of the box. This is the nuclear option. You only need this if you’re moving into a new house, if you lost all your remotes, or if there’s been a major security breach and you have no idea who might have a code. Note that reset steps can differ across garage door opener models. The next section includes model-specific guidance with links for easy reference.
I learned this the hard way on a service call years ago. A homeowner just wanted to stop their ex-roommate from using the garage. Instead of just changing the keypad code, they did a full reset. It wiped the codes for their car’s built-in opener, their spouse’s remote, and the keypad. They had to reprogram everything from scratch, which was frustrating for them. Start with the simpler “change” process first.
The Gearhead’s Checklist: What You’ll Need to Get Started
You can’t cook without ingredients, and you can’t program an opener without the right gear. Gathering this first saves you trips up and down the ladder. Here’s exactly what I keep in my tool pouch for these jobs.
- A Reliable Step Ladder: Don’t use a wobbly kitchen chair. You need both hands free and stable footing. My go-to is a 6-foot Stanley Fiberglass Stepladder. The fiberglass won’t conduct electricity if you accidentally touch a wire, and the top platform gives me a safe place to rest my tools.
- A Sturdy Flashlight: The back of the opener motor is dark. Your phone’s light won’t cut it when you’re trying to read tiny print on a circuit board. I use a Streamlight ProTac 2L-X. It’s bright, has a spot-to-flood beam, and I can clip it to my shirt to keep my hands free.
- A Small, Non-Magnetic Screwdriver: A basic #2 Phillips or a 1/4-inch flathead is perfect. You might need it to open a battery compartment or press a recessed “learn” button. I avoid magnetic tips here because you don’t want to accidentally magnetize or drop a screw into the opener’s internal components.
- Your Opener’s Manual and Model Number: This is your map. The model number is usually on a sticker on the main motor unit (the box hanging from your ceiling). If you lost the paper manual, a quick online search for that model number will find you a PDF. The steps differ between LiftMaster, Genie, and Chamberlain, even if they look similar.
- A Fresh 9-Volt Battery: If your keypad is acting sluggish or won’t take a new code, 9 times out of 10 it’s a weak battery. I always pop in a fresh Duracell or Energizer before I start programming. It eliminates the most common point of failure right away.
Having these items ready turns a confusing chore into a straightforward 10-minute task. The right tools aren’t just about convenience, they’re about doing the job safely and correctly the first time.
DIY Difficulty & Time Estimate

I rate this task a solid 3 out of 10 for difficulty. Your main challenge won’t be mechanical skill, it will be patience while you locate the right button on your opener or decipher the instructions for an older model. Think of it like changing a password on your phone, but you have to find the tiny “settings” button first.
For active work time, plan for 10 to 20 minutes if you’re just changing an existing code on a keypad you already use. If you need to perform a full system reset to connect a new keypad or remote, give yourself 20 to 30 minutes. This includes gathering your tools, like a simple stepladder.
There is zero drying or waiting time involved. This is absolutely a one-person job; I’ve done hundreds of these by myself. The only tool you’ll typically need is that stepladder to safely reach the motor unit on your ceiling.
Finding Your Opener’s “Learn” Button is Step Zero
Before you touch your keypad, you need to find the brain of the operation on your garage door opener motor. This is the “Learn” or “Program” button. It’s not on your wall control or remote. You’re looking for a small, usually square, button on the motor unit itself — especially important when installing or programming a garage door remote keypad.
Grab a reliable flashlight-I keep a Streamlight ProTac in my tool belt for this exact job. Shine it on the back or side of the opener’s main housing. The button is often tucked away. Common spots are on the back panel, near where the thin, white antenna wire hangs down, or sometimes behind the plastic light lens cover. On some Chamberlain models, you have to pop that lens off with a flathead screwdriver to find it.
Think of it like finding the tiny “reset” button on your home internet router. It’s there, it’s vital, but it’s designed to be out of the way so you don’t press it by accident.
When you find it, note the color. This tells you about your opener’s security system. A yellow or amber button typically means an older Security+ 1.0 system, common on LiftMaster and Chamberlain openers from the early 2000s to about 2015. A purple or “violet” button means Security+ 2.0, which is the current standard. You might also see red, green, or orange. Next to the button is a small LED light. This light is your communication link during programming-it will blink or stay solid to tell you what’s happening.
My best piece of advice here? Use your phone to take a clear picture of the motor unit, the learn button, and the model number sticker before you do anything. Having a photo for reference saves you from climbing up and down the ladder if you forget the LED sequence.
How to Program or Change Your Garage Door Keypad Code
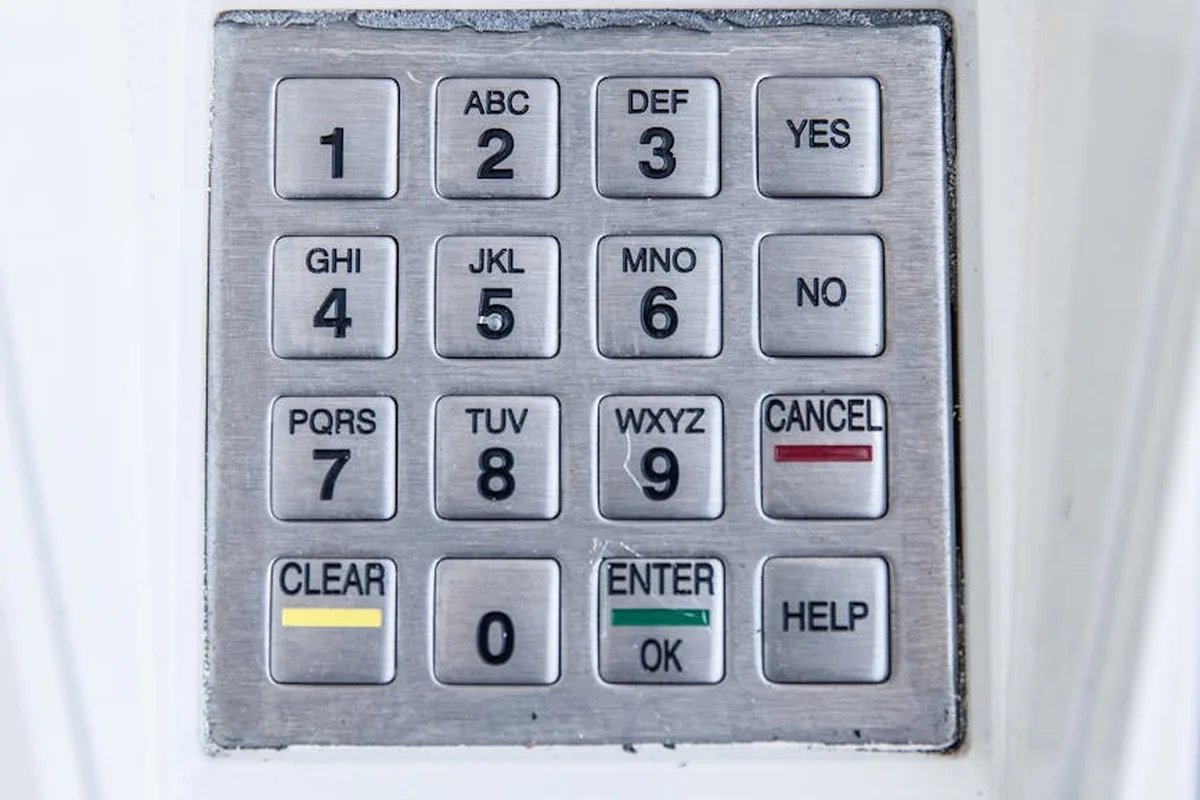
Whether you’re setting up a new keypad or changing the code on your old one for security, the process is almost always the same. It relies on the “Learn” button on your garage door opener motor unit. Think of the Learn button as the opener’s memory-it’s how it learns to recognize new remotes and keypads. I recommend using a sturdy step ladder for this job so you can comfortably reach the motor unit hanging from your ceiling.
For a Brand New Keypad (Initial Programming)
You’re taking the keypad out of the box for the first time. This process wipes any default codes and teaches the opener your personal PIN.
- Locate the “Learn” button on your garage door opener motor. It’s usually yellow, red, purple, or orange and near the light bulb. On my Chamberlain opener, it’s a bright yellow button.
- Press and release the Learn button. You’ll see an indicator light next to it turn on or start flashing. You typically have about 30 seconds to complete the next step.
- Go to your new keypad on the wall. Quickly enter the 4-digit PIN you want, then press and hold the “Enter” or “Program” button. Hold it until you see the opener’s lights flash or hear a single click or beep from the motor unit.
- Test your new code three times in a row. The door should operate smoothly each time.
To Change an Existing Keypad Code
This is for updating a code you already use, maybe because a neighbor moved away or you just want a fresh number. The steps are nearly identical.
- On the motor unit, press and release the Learn button. That indicator light will activate.
- At the existing keypad, type in your new desired 4-digit PIN, then press and hold the “Enter” button.
- Wait for the confirmation flash or beep from the opener.
- Immediately test the new code three times. Your old code is now erased and will no longer work, which is exactly what you want for security.
Pro Tip from the Shop: Before you enter your code, wipe your thumb across all the keypad buttons. This clears any dust or grime and ensures a clean, solid press. A mushy or partial button press is the most common reason programming fails.
If it doesn’t work the first time, don’t panic. Just start over. The most frequent hiccup is taking too long between pressing the Learn button and entering the code on the keypad. You need to move with purpose. Also, double-check your opener’s manual-some very old models require you to enter the code on the keypad *first*, then press the Learn button. If you don’t see the confirmation light flash or hear that beep, the process didn’t take.
How to Reset Your Garage Door Keypad or Opener
You asked, “How do I reset my garage door keypad code?” The direct answer is that you clear it at the opener itself. If you’re wondering, “can you reset a garage door keypad without the code,” the answer is yes, but it requires this same full system reset at the opener.
The key is a small button on your garage door opener motor unit, usually called the “learn” or “program” button. On most LiftMaster or Chamberlain openers, it’s a purple, orange, or yellow button. To clear all stored codes for every remote and keypad, you use this button.
Here is the hands-on process I follow in my own shop and recommend to homeowners.
- Find the “learn” button on the back or side of the garage door opener motor unit.
- Get a stepladder for safe, stable access. Never stand on buckets or chairs.
- Press and hold down the “learn” button. You will see an LED light next to it.
- Keep holding. After about 6 to 10 seconds, the LED light will turn off.
- Release the button immediately when the light goes out.
This action erases the opener’s memory, clearing codes for every single remote control, wall console, and wireless keypad linked to it. That’s the critical detail many guides miss. You aren’t just resetting one keypad, you are wiping the slate completely clean for security. For a new home or a different opener, you’ll need to reprogram the unit to re-link your remotes and keypad. This guarantees only your devices can operate the door.
After this reset, your opener won’t recognize any of your old devices. You must reprogram each one, like your car’s built-in remote and any spare clickers, following your opener’s standard programming steps. If you want to start completely fresh, you can clear the opener’s memory first. This helps ensure no old codes linger as you reprogram each device.
When You’ve Lost the Old Code Entirely
If the previous owner didn’t give you the code, or you’ve simply forgotten it, this full reset is your only safe, do-it-yourself option. Trying to guess or “hack” a code by repeatedly entering numbers is not only frustrating, it can sometimes lock the keypad or opener for a security timeout period. A proper reset is often the quickest way to regain control. In the next steps, we’ll guide you through a safe reset of your garage door opener.
I treat a lost code as a security issue, not just an inconvenience. The professional approach is to treat it like changing the locks on your front door. You start fresh. A full system reset gives you a clean, secure slate and is the method I recommend to ensure no old, unknown codes remain active on your system. It’s a straightforward process that takes about two minutes and guarantees you are back in full control.
Why Won’t My Garage Door Keypad Program? Troubleshooting Tips
You have the manual. You’re pushing the buttons. Nothing happens. This is a common frustration, and the solution is almost always one of five simple issues.
The Top 5 Culprits for a Stubborn Keypad
- A Dead or Weak Battery: This is the number one reason a wireless keypad stops working. Even a battery showing some voltage can fail under the load needed to send a signal.
- Being Too Far from the Opener: You need to be within about 15-20 feet of the motor unit. Walls and your car’s metal body can block the signal.
- A Dirty or Sticky Learn Button: The small, colored button on your opener gets dust, grease, and spider webs. If it can’t be depressed cleanly, the opener won’t enter programming mode.
- Incorrect Timing on Button Presses: Every brand has its own rhythm. Pushing buttons too fast, too slow, or for the wrong duration is like getting the secret knock wrong.
- A Compatibility Issue: Not all keypads work with all openers, especially with very old or very new models. Using a generic keypad with a proprietary system (like certain Genie or Chamberlain models) often causes failure.
Your Diagnostic Flow: Start Simple
Don’t guess. Follow this order to find the problem fast.
- Replace the battery with a fresh, high-quality 9V or coin cell. I keep a pack of Duracell 9V batteries in my service truck just for keypad diagnostics. It fixes the issue more than half the time.
- Stand directly under the garage door opener motor unit with your keypad. Distance and obstructions are easy variables to eliminate.
- Locate the “Learn” or “Program” button on the back of the opener motor. Use a cotton swab with a little isopropyl alcohol to gently clean around and depress the button. You’d be surprised how often this is the fix.
- Get your opener’s manual (you can find the model number on the motor unit and search online). Follow the programming steps to the letter, using a stopwatch or the second hand on your watch to nail the timing. For many openers, you have just 30 seconds after pressing the learn button to enter the code on the keypad.
- Verify your keypad and opener are designed to work together. A universal keypad may need to be set to a specific frequency or protocol listed in its manual.
A Lesson from the Field: Check the Physical Connection
I once answered a service call for a keypad that wouldn’t program. I changed the battery, cleaned the learn button, and confirmed compatibility. Nothing worked. Just as I was about to declare the keypad itself dead, I popped off its cover. Inside, the tiny wire connecting the circuit board to the battery terminal had vibrated completely loose. I re-crimped it, and the keypad worked perfectly. Before you buy a new keypad, open the old one and check for any obvious loose wires or corrosion. It’s a five-minute check that can save you fifty dollars.
Maintenance & Security Routine for Your Keypad System
Treating your keypad like any other tool in your garage means giving it a little routine care. I have seen too many service calls where the problem was just a weak battery or grimy buttons. A quick annual check keeps it reliable.
Simple Annual Maintenance
Grab a Phillips screwdriver and a fresh battery, usually a CR2032 coin cell. I prefer brands like Duracell or Energizer for these; they seem to hold a charge longer in outdoor keypads.
- Open the keypad’s battery compartment. You’ll usually find a small screw on the back or a slide-off cover.
- Remove the old battery and wipe the compartment with a dry cloth.
- Insert the new battery, ensuring the (+) and (-) symbols match the diagram.
- Close it up and test the keypad by entering your code.
Clean the button surface with a dry microfiber cloth once a season to prevent dirt and oil buildup. For stubborn grime on older units, a cotton swab with a tiny bit of rubbing alcohol works, but be gentle and avoid dripping liquid inside.
Your Non-Negotiable Security Habit
Changing your access code is the digital equivalent of changing your locks. I advise clients to do this at least once a year, just like the battery. But there are two times you must do it immediately:
- If you lose a remote control.
- After giving your code to a contractor, cleaner, or guest.
Most openers let you run multiple codes, so you can set a temporary one for workers and delete it when the job is done. Refer to your manual for the “Program/Add a New Code” steps; it’s often as simple as holding the “Learn” button and entering your new digits.
A Smarter Way to Create Your Code
Skip obvious numbers like your address, birthday, or 1234. Instead, think of a combination that has personal meaning but no public link to you. For example, take the number from your first car’s license plate and add your childhood street number. Or use the jersey number from your favorite retired athlete and combine it with the last two digits of an old phone number.
This creates a code you can remember but that is virtually impossible for someone else to guess.
Making code changes part of your seasonal garage check is the easiest, most cost-effective security upgrade you can perform. It takes two minutes and costs nothing, but it completely invalidates any old codes that might be floating around. In my shop, we consider this basic digital hygiene for your home.
Compatibility and Replacement: Can You Swap Your Keypad?
You can absolutely replace a garage door keypad. The critical rule is that the new keypad must be compatible with your specific garage door opener brand and its communication frequency.
Think of it like a lock and key. Your opener only recognizes the “key” from its own brand family. A keypad is not a universal accessory.
Understanding Proprietary “Rolling Code” Systems
Nearly all modern openers use a security feature called a rolling code system. Each time you press a button, it sends a new, unique code to the opener. This prevents someone from copying your signal.
This technology is also why brand matching is non-negotiable. A Chamberlain keypad uses Chamberlain’s specific rolling code language, and a LiftMaster opener only understands LiftMaster’s language, even though they are owned by the same parent company. I’ve helped many homeowners who were confused by this. They bought a Chamberlain keypad for their LiftMaster opener, assuming they were the same, and couldn’t get it to program. Always check the branding on your motor unit itself.
The Universal Keypad Option (And Its Trade-Off)
Universal keypads do exist. Brands like Genie and others make them. They are designed to work with a wider range of opener brands. However, it’s always important to check for compatibility before purchasing.
They require a more old-school setup method using tiny switches called DIP switches. You’ll have to open the keypad and the opener’s motor unit to match a specific pattern of tiny switches. It’s more complex and less secure than modern rolling code pairing.
In my experience, a universal keypad is a good last-resort option for an older system, but for most people, sticking with a keypad made by your opener’s manufacturer is the simpler, more reliable choice. The pairing process is usually just a few button presses.
Your Pre-Purchase Checklist
Before you buy any replacement keypad, do this quick check. It will save you a trip back to the store.
- Find the model number of your garage door opener. It’s on a label on the motor unit (the box hanging from your garage ceiling).
- Check the opener’s user manual, or the manufacturer’s website, for a list of compatible keypad models.
- Purchase the exact model recommended, or one clearly listed as compatible. If you no longer have the manual, a quick online search of your opener’s model number plus “compatible keypad” will give you answers.
Taking these steps ensures your new keypad will pair correctly on the first try. It’s a straightforward swap when you have the right part.
Garage Door Keypad Code FAQ: Quick Answers from a Pro
If I change my keypad code, is the old one truly erased and unusable?
Yes, absolutely. When you successfully program a new PIN using the opener’s Learn button, it overwrites the previous code in that keypad’s memory. The opener will only respond to the new sequence. To be certain, always test that the old code no longer operates the door.
Why does my new code work sometimes but not others?
This is almost always a signal issue. Check for a low battery in the keypad first-a weak signal may only get through intermittently. Also, ensure you’re pressing each button firmly and completely; partial presses in damp weather or with dirty contacts are a common culprit.
How do I add a second, temporary code for a contractor or guest?
Most modern openers and keypads support multiple user codes. The process is identical to adding your primary code: press the Learn button, then enter the desired temporary PIN on the keypad. Just remember to delete that specific code from the keypad’s memory once the work is done.
Can I use the same PIN on multiple remotes or keypads?
Yes, the opener doesn’t care if multiple devices use the same PIN. Each device is learned separately by the opener’s brain. However, for security, I recommend using unique codes for each keypad or remote. This lets you track usage and disable a single device without affecting others.
My keypad just stopped working entirely. What’s the very first thing I should check?
The 9-volt battery. It’s the single most common point of failure. Replace it with a fresh, name-brand battery before attempting any reprogramming. If it’s hardwired, check the wire connections at the keypad and the opener for corrosion or looseness.
Is there any risk of getting locked out of my garage during this process?
Minimal, if you follow the golden rule: always ensure you have at least one other working method of entry-like a physical remote or an interior wall button-*before* you start. Never begin a full system reset if it’s your only way in.
Keeping Your Code Secure and Functional
The most critical step after programming any new code is to immediately test it, ensuring it works before you rely on it in a pinch. Remember these key practices: test every new code right away; change your codes periodically and keep them private; replace keypad batteries at least once a year; and document the steps for your specific opener model for next time.
Evan Gunther
Evan is a general contractor operating in Columbus, Ohio servicing, maintaining and building residential and commercial garages for over two decades. He has personally redeveloped over 100+ garages and installed and reinstalled over 230+ garage doors in his long tenure. When it comes to giving your garage a face lift or fixing common issues, Evan's the pro. Feel free to reach out to him and follow his Garage Log blog for expert, fact based advice.