
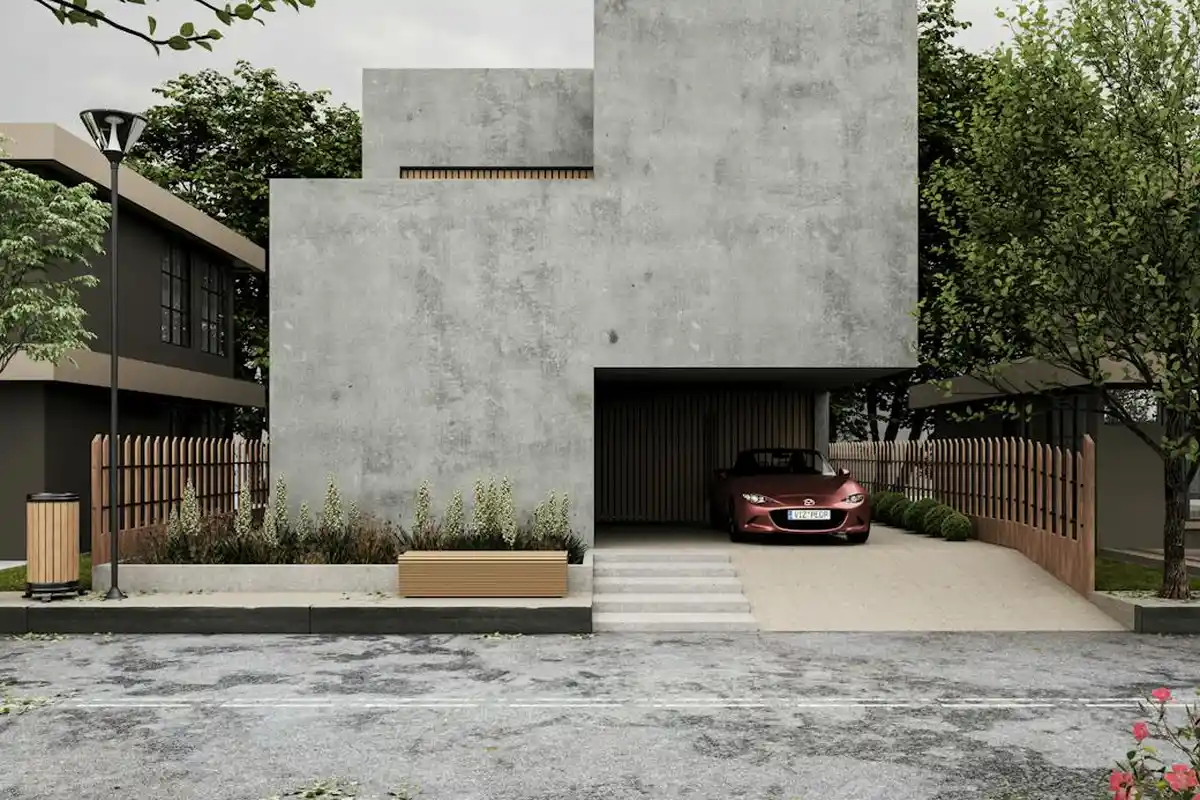
How Much Does It Really Cost to Build a Two-Car Garage Yourself?
If you’re planning a DIY garage build, the biggest worry is usually the budget. I’ll help you estimate the true cost, from foundation to finish, based on my own hands-on projects.
This guide will walk you through material price breakdowns, permit requirements and fees, foundation choices, and unexpected expenses so you can plan with confidence.
I’ve built and maintained residential garages for over a decade, so I know exactly where your money goes and how to avoid costly mistakes.
The Straight Talk on DIY Garage Building Costs
Let’s cut to the chase. When you ask, how much a two-car garage costs to build yourself, you’re looking at an average of $25,000 to $40,000 for a basic, detached structure. I finished a 24×24 foot build last year that landed right in the middle of that range. This includes the foundation, a simple slab-on-grade, standard wood framing, asphalt shingle roof, vinyl siding, and a basic roll-up door. Size is the biggest driver of garage costs, so a larger footprint means more foundation, framing, and roofing materials. Start with your ideal size and then refine features to stay on budget.
That DIY figure is about 40-60% of what a contractor would charge you. On a recent job site I was consulting on, the pro quotes were coming in between $45,000 and $70,000 for a similar build. The difference is pure labor. You’re trading your sweat and time for a massive savings. But remember, that savings assumes you have the skills, tools, and time to do it right. A botched foundation or roof will erase those savings instantly.
So why does the “average” swing by $15,000? Three big factors. First is your material choices. I used LP SmartSide siding on my build because it’s durable and paints well, but it costs more than basic T1-11 plywood. A metal roof versus asphalt shingles is another huge price jump. Second is your location. Lumber, concrete, and permit fees vary wildly by region. Third, and most critical, is your foundation. This is the single biggest variable when figuring out how expensive it is to build a detached garage. A simple 4-inch concrete slab is the most budget-friendly. If you need footings that go below the frost line or a thicker reinforced slab for a lift, your concrete bill can double.
First Step: Choose Your Garage Size and Plans
You can’t price materials if you don’t know the size. The classic two-car garage footprint is 24 feet wide by 24 feet deep. That’s 576 square feet. It fits two midsize sedans with room to walk around. In my experience, that’s the minimum. Most folks regret not going bigger. I built mine at 26×28 feet to allow for a workbench and storage along one wall. Remember, every extra foot in any direction adds more foundation, more framing, more roofing, and more siding. Going from a 24×24 to a 26×28 added about $4,000 to my material list. To get a better sense of how much square footage you actually need, consider your intended garage use.
Do not buy a single 2×4 until you have a complete set of construction plans or blueprints in your hands. I learned this the hard way on an early shed project. I winged it, and my wall framing was off by an inch, which cascaded into huge headaches with the roof sheathing. For my garage, I bought detailed plans online from GarageGuide. They gave me a precise materials list and clear diagrams for every step, from the footing layout to the roof truss spacing.
You can find plans from online retailers, some big-box stores, or even your local building department might have standard plans. Wherever you get them, you must cross-check them with your local building code. Your permit office will reject plans that don’t meet your area’s requirements for wind load, snow load, or seismic safety. I took my purchased plans to the permit counter for a preliminary review before I paid for any lumber. That one-hour conversation saved me from a costly revision later.
Material Cost Breakdown: Good, Better, Best Tiers

When you ask yourself how expensive it is to add a garage, the answer is almost always “more than you think.” A firm budget starts with understanding material tiers. I built my own 24×24 garage and have helped friends with theirs, so I have recent, real numbers. Prices fluctuate, but these ranges for a basic 24’x24′ two-car structure will give you a solid target. I’m breaking it down by the six big-ticket categories involved in garage addition construction.
| Component | Good (Budget) | Better (Mid-Grade) | Best (Premium) |
| Foundation (Slab) | $4,500 – $6,000 | $6,500 – $8,500 | $9,000+ |
| Framing (Walls & Roof) | $5,000 – $7,000 | $7,500 – $10,000 | $12,000+ |
| Roofing | $1,500 – $2,500 | $3,000 – $4,500 | $6,000+ |
| Siding | $2,000 – $3,000 | $4,000 – $6,000 | $8,000+ |
| Garage Door & Opener | $1,200 – $1,800 | $2,500 – $3,500 | $5,000+ |
| Electrical (Basics) | $800 – $1,500 | $2,000 – $3,000 | $4,000+ |
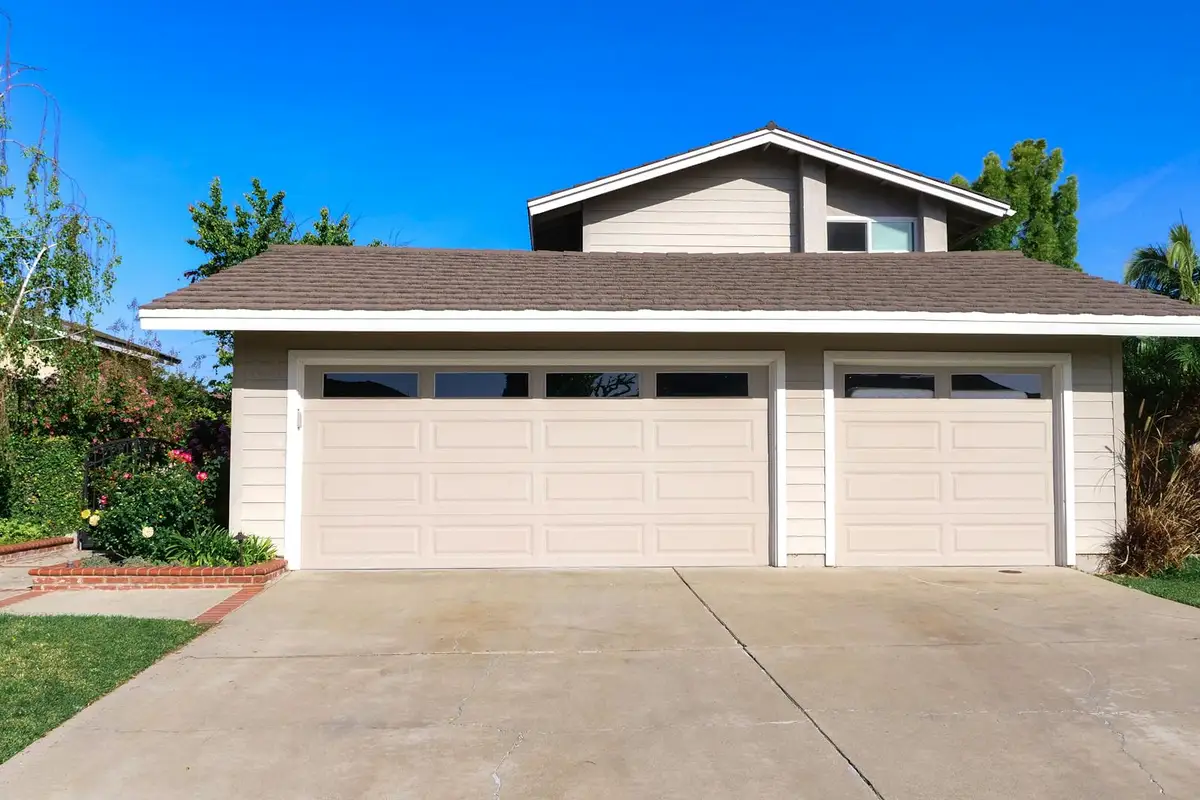
Your total for a DIY build will land somewhere between $15,000 on the extreme low end to over $40,000 for a fully finished, premium space. The big jumps happen when you move from commodity-grade materials to branded, performance-oriented ones. For siding, a “Good” tier is basic vinyl, “Better” is LP SmartSide engineered wood (which I used and love for its durability), and “Best” is real cedar or brick veneer. For the garage door, answering “how expensive is a new garage door” means choosing between a thin, single-layer steel door, an insulated Clopay model, or a fully custom wood door. Garage door cost prices vary widely—from a basic single-layer steel door to better-insulated models and premium wood options. Knowing those numbers up front helps you weigh trade-offs between price, durability, and curb appeal as you plan the build.
Foundation Materials: Slab, Pier, or More?
For a DIYer, a monolithic concrete slab is the most common and often the most cost-effective foundation. A pier foundation can save on concrete if you’re building on a steep slope, but it adds complexity in framing a wood floor system. I always pour a slab. It gives you a solid, permanent floor and acts as the base for your walls.
Here’s what goes into that slab cost, based on my last project:
- Excavation & Gravel Base: You can rent a mini-excavator for a weekend ($300-$400) and need about $500-$800 in crushed gravel for a proper base. Don’t skip this step; it prevents cracking.
- Concrete: A 4-inch thick slab for a 24×24 garage needs about 8.75 cubic yards. A “Good” budget uses a standard 3,000 PSI mix. For “Better,” I specify a 4,000 PSI mix with fiber mesh added for crack resistance. Ready-mix truck delivery is the only practical way.
- Rebar & Vapor Barrier: For the “Good” tier, I use a grid of #3 rebar. For “Better/Best,” I use a full grid of #4 rebar. A 10-mil plastic vapor barrier is cheap insurance ($150) against ground moisture.
Pouring concrete is a hard, fast job that requires several helpers; if you’ve never done it, consider hiring this one phase out to a pro crew. A bad slab dooms the entire building.
Framing, Siding, and Roofing Materials
This is where your garage really takes shape. For wall framing, the “Good” tier uses standard #2 grade spruce or fir. “Better” uses straighter, stronger #1 or Select grade, which goes up faster with less cursing. For roof sheathing, I have a strong opinion: skip the OSB. Even for the budget tier, use 1/2″ CDX plywood. It costs about 20% more but handles moisture from rain delays or attic condensation far better. I learned this the hard way on an early project where OSB swelled and ruined the roof edge.
Your sheathing choice affects the entire building’s longevity, so don’t cheap out here.
For roofing, asphalt shingles are the default. “Good” is a basic 3-tab shingle. “Better” is a 30-year architectural shingle from a brand like CertainTeed or GAF, which I use on most jobs. The “Best” tier is where I often choose standing seam metal roofing. The upfront cost is two to three times higher, but I’ve never had to repair or replace one. It sheds snow better, and in my experience, it outlasts the building. If you plan to own the property for 20+ years, metal can be the more economical choice.
Siding ties it all together. Vinyl (“Good”) is affordable and easy to install but can crack in cold weather and feels flimsy. My go-to “Better” choice is LP SmartSide engineered wood. It has a 5/50-year warranty, takes paint beautifully, and stands up to dings from lawn equipment better than vinyl or real wood. The “Best” tier materials like fiber cement or real cedar offer unmatched looks but require more skilled installation and upkeep.
Navigating Garage Building Permits and Codes
Let’s get the paperwork sorted first. Skipping the permit process is the single biggest mistake a DIY builder can make. It’s not a suggestion, it’s the law for a reason.
The Simple Permit Process: Who to Call and What It Costs
Your first and only call should be to your local Building Department or Planning & Zoning office. Don’t guess. I once saw a neighbor assume a permit wasn’t needed because he was “just replacing the slab,” and he ended up with a stop-work order and a fine.
The process usually breaks down into three clear steps:
- Apply and Submit Plans. You’ll fill out an application and submit your construction drawings. Many offices now have online portals. For a basic detached garage, they often accept simple hand-drawn plans showing dimensions, door/window locations, and the foundation detail.
- Plan Review. A plans examiner checks your drawings against local building codes. This is your safety net-they catch mistakes in your framing or electrical layout before you build them. This review can take anywhere from a few days to a few weeks.
- Inspections. After you pass review and pay the fee, you’ll get your permit. Now, an inspector will need to sign off on key stages: after the footing is dug, after the foundation is poured and before backfill, after framing/rough electrical, and at final completion. You must call to schedule each one.
For a basic two-car garage, expect a permit to cost between $500 and $2,500. It varies wildly by location. In my county, it’s based on the project’s estimated valuation. This is a non-negotiable line item in your budget. Think of it as buying insurance for your project’s legality and your family’s safety.
Common Code Requirements You Must Follow
Codes exist to keep buildings safe and functional. Here are the big three you’ll deal with for a garage.
Property Setbacks. This is the minimum distance your garage must be from your property lines, other buildings, or the street. You absolutely must verify your specific lot’s setbacks before you draw a single line. In my last neighborhood, side-yard setbacks were 5 feet, but I’ve seen them as wide as 10. Garage building property line setbacks can be stricter than general setbacks, affecting how close you can place the garage to your lot lines. Knowing these garage-specific rules early keeps your design on track and avoids later surprises. Placing your structure in the wrong spot can force you to tear it down.
Electrical and Lighting. The National Electrical Code (NEC) dictates this. At a minimum, you’ll need:
- A dedicated circuit for garage door openers.
- GFCI-protected outlets for all 120-volt receptacles.
- Proper lighting controlled by a switch at the man-door.
- If you’re adding a sub-panel, that’s a whole other level of inspection.
I wire all my garage outlets with 12/2 Romex on a 20-amp circuit for heavy-duty tools, and I always use commercial-grade Leviton GFCI outlets-they last longer than the cheap plastic ones.
Garage Door Safety. Modern code requires an automatic reversal system. Your new door opener must have photoelectric sensors that stop and reverse the door if anything breaks the beam. It also needs a constant-contact reversal feature if the door hits an object on the way down. This isn’t optional; it prevents serious injury.
Why This Cost is Non-Negotiable
I frame it this way: the permit fee is the cheapest part of your project. Building without a permit might save you that upfront cost, but it creates massive risk.
If you sell your home, unpermitted work can kill a deal or force a price reduction. Your homeowner’s insurance may not cover a fire that starts in an unpermitted, improperly wired garage. Worst case, the city can make you dismantle what you built. I’ve personally helped a friend tear down a beautiful shed he built too close to the property line because he didn’t check.
Pay the fee, follow the code, and sleep well knowing your garage is safe, legal, and adds real value to your property.
Foundation Types and What They Cost

Your garage’s foundation is not just the floor you park on, it’s the critical base that keeps everything square, dry, and stable for decades. Choosing the right one for your soil and budget is the first major decision. From my time in the field, I’ve seen three common types for DIY garage builds. Understanding garage foundation methods helps you pick the best fit for your soil. Next, we’ll look at the common foundation methods for DIY garages.
Monolithic Slab: The All-in-One Standard
This is the classic, single-pour concrete slab you picture for most garages. The footing and the floor are one solid piece. I’ve poured dozens using a standard 4-inch thick slab with a 12-inch deep footing perimeter. You rent a concrete mixer or, for larger builds, schedule a ready-mix truck delivery. This is the garage concrete slab foundation. It provides a stable, level base for the rest of the build.
For a typical 24×24 foot garage, a monolithic slab will be your most common and often most cost-effective choice, assuming your ground is stable and level.
Pros:
- Faster to build since it’s one pour.
- Excellent resistance to ground moisture when paired with a proper vapor barrier.
- Provides a solid, flat surface right away.
Cons:
- Less forgiving on uneven or poorly draining sites.
- Cracking is harder to control if the ground settles.
- Requires precise formwork setup.
Floating Slab: The Separated Approach
Here, you pour the footing first, let it cure, and then pour the interior floor slab separately. The floor “floats” inside the footing. I used this method on a build where the homeowner wanted to add radiant floor heat pipes later. It creates a thermal break and can handle minor soil movement better.
A floating slab gives you more control and can be a smarter long-term play for tricky soils or future upgrades, but it adds labor and time.
Pros:
- Better control over cracking in the floor.
- Easier to integrate insulation or in-floor systems.
- Footing can be inspected before the floor pour.
Cons:
- More labor intensive with two separate pours.
- Higher material costs for extra forms.
- The joint between footing and slab needs careful sealing.
Pier and Beam: The Elevated Solution
Instead of a full concrete floor, you build a framework of wood beams supported by concrete piers or blocks. The floor is typically plywood or OSB decking. I once helped a friend build a garage like this on a steep, rocky slope where a full slab was impractical and wildly expensive.
Choose a pier and beam foundation if your site has severe slope, very poor soil, or you need a crawlspace for plumbing and utilities.
Pros:
- Adapts to uneven terrain without major excavation.
- Provides accessible under-floor space.
- Wood floor is easier on the legs than concrete.
Cons:
- Less thermal mass, so the garage can be colder.
- Requires more framing lumber and skilled carpentry.
- Not ideal for heavy vehicle traffic without robust engineering.
Comparing Your Foundation Costs
These numbers are for material costs only, based on my projects in the last few years. Labor is you and your crew. Prices fluctuate, but this gives you a solid ballpark for a 24×24 foot (576 sq ft) structure. I always buy a little extra material for waste.
| Foundation Type | Key Materials | Estimated Material Cost Range | My Notes |
| Monolithic Slab | Concrete, rebar, vapor barrier, forms (2×4 lumber) | $3,500 – $5,500 | Cost hinges on local concrete price per yard. Use fiber-reinforced mix to reduce cracking. |
| Floating Slab | Concrete, rebar, vapor barrier, insulation board, separate form lumber | $4,200 – $6,800 | Added cost for insulation (I use Dow Styrofoam) and the extra forming labor. |
| Pier and Beam | Concrete for piers, pressure-treated lumber (6×6 posts, 2×10 beams), hardware, decking | $2,800 – $4,500 | Lumber prices vary the most here. Don’t skimp on the post bases (I use Simpson Strong-Tie). |
A Hard Lesson on Site Prep and Drainage
I learned this the expensive way on my first solo garage project. I was so focused on the pour that I rushed the site prep. The ground looked level to my eye, but I didn’t properly compact the fill dirt or establish grade sloping away from the pad.
Two years later, seasonal runoff was pooling against one wall. It took renting a jackhammer to cut a channel and installing a French drain to fix it. That repair cost nearly as much as the original foundation.
Your foundation’s real cost includes the unseen work: proper excavation, compaction with a plate compactor, and ensuring a minimum 6-inch drop in grade over 10 feet away from the slab.
Spend a weekend with a laser level, a skid steer rental, and a good compactor. It’s boring work, but it prevents thousands in water damage and cracked concrete down the line. Your foundation is only as good as the dirt it sits on.
The Gearhead’s Essential Tool Checklist
I’ve built and repaired more garages than I can count. The right tools don’t just make the job faster, they make it safer and the final result more professional. This is my go-to list, honed from years in my own shop.
Basic Hand Tools (Buy These)
You’ll use these on almost every project, so invest in quality. Cheap tools break and can be dangerous.
- Claw Hammer: A 16-ounce model from Stanley or Estwing is perfect. It’s balanced for framing and has enough heft for driving nails without wearing you out.
- Utility Knife: Get one with a retractable blade, like from OLFA. You’ll use it constantly for opening material bundles and trimming sheathing.
- Speed Square: This isn’t just for marking 90s. A 7-inch Swanson Speed Square is a layout tool, a saw guide, and a level check. I keep one in my apron at all times.
- Chalk Line: For snapping long, straight layout lines on your slab or floor plates. A Tajima chalk reel is reliable and doesn’t jam.
- Pry Bar: A flat 24-inch bar is essential for adjusting framing members. I prefer the one from Husky; it’s tough and the nail-pulling notch is sharp.
- Tape Measure: Don’t skimp. A 25-foot Stanley PowerLock is my standard. The blade is stiff enough to extend several feet without buckling, which is critical for solo measuring.
Layout & Measurement (Buy These)
Your garage will only be as square and level as your tools. Accuracy here prevents major headaches later.
- 4-Foot Level: For checking posts, beams, and door frames. I use an Empire True Blue. The vials are easy to read, and the solid construction survives drops.
- Laser Level: This is a game-changer for laying out foundation forms or establishing a level line around the perimeter. A self-leveling model from DeWalt is worth every penny and saves hours.
- Framing Square: Essential for checking corner angles and laying out rafters. An aluminum one is lighter and won’t rust.
Power Tools (Buy the Core, Rent the Occasional)
These are your workhorses. I buy brands with strong local repair support.
- Cordless Drill/Driver Combo Kit: This is your most-used tool. I run a Milwaukee M18 Fuel set. The battery life is excellent, and the hammer-drill function handles concrete anchors. You need two batteries so one can always be charging.
- Circular Saw: For cutting all your dimensional lumber and sheathing. A 7-1/4 inch Skilsaw worm drive is heavier, but the blade-left design gives you a perfect sight line. For most DIYers, a standard sidewinder from Makita is lighter and powerful enough.
- Framing Nailer: If you’re doing the walls and roof yourself, this is a must-buy, not a rent. A pneumatic 21-degree framing nailer from Bostitch drives 3-inch nails all day. You’ll need an air compressor (at least 6-gallon) to run it.
- Reciprocating Saw (“Sawzall”): For cutting through old material, trimming posts, or making quick plunge cuts. A corded Milwaukee Super Sawzall has never let me down when I need raw power.
- Miter Saw: For precise cuts on trim and fascia. A 10-inch sliding compound miter saw from DeWalt is versatile. You can rent one, but if you see more projects in your future, buying is smart.
Specialty Tools for Foundation & Concrete (Rent These)
You’ll use these once. Renting is the only cost-effective move.
- Concrete Mixer: Renting a 6-cubic foot towable mixer from your local equipment yard is far better than mixing bags by hand. It ensures a consistent pour for your slab.
- Plate Compactor: For compacting the gravel base under your slab. A well-compacted base prevents concrete cracking. This is a heavy, single-use tool-always rent it.
- Concrete Vibrator: This wand removes air bubbles after you pour. It’s crucial for a strong, professional-grade slab. Rental shops have them.
- Concrete Float & Trowel: You can buy these basic finishing tools, but a rental package often includes a bull float, which is essential for smoothing a large slab.
Safety Gear (Non-Negociable Purchase)
I’ve seen too many close calls. This gear is as important as any saw or hammer.
- Safety Glasses: Wear them from the first moment you’re on site. Debris flies during cutting and demolition. I like the DeWalt Concealer model because they fit over my prescription glasses.
- Hearing Protection: Constant noise from saws and nailers causes permanent damage. Use foam earplugs or over-the-ear muffs from 3M.
- Work Gloves: Protect your hands from splinters, sharp metal, and concrete burns. Mechanix Wear gloves offer good dexterity and durability.
- Dust Mask/Respirator: A basic N95 mask is fine for sawdust. When cutting concrete blocks or pressure-treated wood, use a half-face respirator with P100 cartridges.
- Steel-Toe Boots: A dropped tool or beam can crush your foot. It’s not a fashion statement; it’s basic protection. Timberland PRO boots are comfortable for long days.
Building It Step by Step: A Pro’s Guide
From my years of working on garages, I break every project into six distinct phases. Tackling them in order is the only way to build something square, safe, and durable.
- Site Prep: Clearing, grading, and marking the exact footprint.
- Foundation: Forming and pouring the concrete slab.
- Framing: Erecting the walls and roof structure.
- Roof: Installing sheathing and your chosen roofing material.
- Enclosure: Adding siding, windows, and the garage door.
- Finish: Running electrical, insulating, and installing drywall.
The biggest pitfall I see is rushing the foundation and framing to get to the “fun” parts. If your base isn’t perfectly level and square, every step after it becomes a frustrating fight against gaps and misalignments. I learned this the hard way on an early project where we were off by just an inch; we spent more time shimming and trimming than we did framing.
You cannot frame and raise walls by yourself. Trying to muscle up a 20-foot wall section is like trying to wrestle a refrigerator onto a dolly alone-it’s a great way to get hurt or damage your work. Plan for at least one strong helper on framing day, and two is even better.
Pouring the Foundation and Floor
Think of your slab as the dinner plate your entire garage sits on. If the plate is warped, everything on it is unstable. Here’s my method for a reliable 4-inch thick slab.
- After your site is graded, build your forms from straight 2×8 or 2×10 lumber, staked securely into the ground.
- Use a quality transit or laser level, like a Stanley or DeWalt model, to set the top of your forms perfectly level. Check for square by measuring diagonally from corner to corner; the measurements must be equal.
- Lay down a 4-6 inch bed of compacted gravel for drainage, then cover it with a heavy-duty 6-mil plastic vapor barrier. This stops ground moisture from wicking up into your concrete.
- Place wire mesh or rebar on chairs to keep it centered in the slab. This prevents cracks from spreading.
- Order ready-mix concrete. For a typical 24’x24′ slab, you’re looking at about 7.5 cubic yards. Have your crew ready to pour, screed, float, and finish in one continuous effort. A bull float gives you a smooth, professional surface.
- Keep the slab moist and covered with plastic sheeting for at least three days to cure properly. Do not build on it for a full week, and wait 28 days before driving heavy vehicles on it for maximum strength. In colder weather, I use insulated concrete blankets to maintain the right temperature.
Framing Walls and Setting the Roof
With a solid slab, you can start building the skeleton. I typically build walls flat on the deck, using pre-cut studs and plates.
Wall Assembly: I lay out my top and bottom plates side-by-side, mark all my stud locations (usually 16 inches on center), and nail them together with a framing nailer. I prefer a Paslode cordless gun for its speed and reliability on big jobs. Once a wall section is built, call your helpers. Tilt it up, brace it plumb with temporary 2x4s, and nail it to the slab using a powder-actuated tool or concrete anchors.
Sheathing: Slap on 7/16-inch or 1/2-inch OSB sheathing right after the walls are up and braced. This locks everything into a rigid box and makes it safe to work inside.
Roof Decision: You have two main choices. Pre-fabricated trusses are like a giant puzzle piece you lift into place. They are engineered for specific loads and are very fast to install, but you’ll need a small crane or a large group of people to set them. I’ve used these on projects where attic storage wasn’t a priority. Stick-building a roof (cutting rafters on-site) is more labor-intensive but gives you a clear, usable attic space for storage. It requires more skill to get the angles right.
Whichever you choose, secure the first truss or rafter pair perfectly plumb and braced, then use temporary braces to hold the others as you go. Once all are in place, nail on your roof sheathing (usually 1/2-inch plywood) to tie it all together. This approach also provides a solid base if you’re considering raising or modifying the garage roof structure. The next steps expand on how to handle that project.
Installing Doors, Windows, and Wiring
This phase turns your shell into a functional building. Precision here prevents leaks and drafts.
Garage Door Header: The opening for your garage door needs a strong header to carry the roof load. For a two-car door, this is typically a built-up beam of two 2x12s with a 1/2-inch plywood spacer. Make it long enough to rest on jack studs at both ends. Getting this header perfectly level is non-negotiable for smooth door operation later.
Window Flashing: When you install a window, think of it like putting on a raincoat. You must install flashing tape above the window to direct water out and away from the framing. I use a product like Tyvek FlexWrap because it’s sticky, wide, and conforms well. Skipping this step is a guaranteed ticket to rot and water damage inside your walls within a few years.
Electrical Rough-In: Before you insulate or drywall, run your wiring. Plan for at least two dedicated 20-amp circuits: one for garage door openers and lighting, and another for your outlets. Use metal or PVC conduit where required by code. I run 12/2 NM-B wire for these circuits and always install more outlets than I think I’ll need-every 6 feet along the wall is a good rule.
You can safely mount boxes and run wire through studs, but the final connection to your home’s main panel is a job for a licensed electrician. They will ensure it’s done to code, properly grounded, and safely connected. This isn’t an area for DIY experimentation.
Don’t Forget These Hidden Costs
When I pencil out a garage build on my notepad, the big numbers for lumber and concrete are obvious. The real budget-busters are the smaller lines you don’t see coming. I’ve seen too many projects stall because the cash ran out for the “little” things.
When “A Few Bucks” Adds Up to Hundreds
You will need more than lumber and shingles. These are the costs that creep up on you during the job.
- Dumpster Rental and Soil Disposal: A 20-yard dumpster from a company like Waste Management is not optional. Demo waste, scrap wood, and packaging piles up fast. If you’re digging a foundation, you’ll have dirt to haul away. I budget $400-$600 for this.
- Fuel for Tools and Travel: Your truck trips to the lumberyard add up. So does gas for the compressor, generator, and concrete mixer. For a recent build, I spent over $150 just keeping everything running.
- Fasteners, Adhesives, and Caulk: You’ll burn through boxes of screws, tubes of construction adhesive for headers, and caulk for sealing. Don’t buy the cheapest screws; I use GRK Fasteners’ structural screws for their holding power and reduced splitting.
- Building Permit Revisions: If your inspector requires a change, re-stamping plans costs money and time. I always add a 10% contingency to my permit fee for this.
Treat these small expenses as a mandatory line item, not an afterthought.
The Finish Work Will Blow Your Initial Budget
Your budget might cover a dried-in shell. Making it look like a finished garage is another story. This is where DIYers often get stuck.
Paint is a perfect example. You need primer and top coat for siding, trim, and the interior. For durability, I use a quality exterior paint like Sherwin-Williams Duration. For the interior walls, a basic drywall paint works, but you still need rollers, trays, and tape. This can easily be a $500-$700 add-on.
The floor is the biggest trap. A basic concrete sealer is one cost. But many homeowners see my epoxy floor and want that. A DIY epoxy kit from a brand like Rust-Oleum is $200+, but proper prep (etching, cleaning) and a clear topcoat can double that. Shelving and storage are the final hit. Even simple metal shelving units or lumber for building custom racks will add several hundred dollars.
Finishing touches like paint, sealant, and storage routinely add 15-20% to the total material cost.
So, What’s the Real Total?
Let’s tie this back to the average cost. If your core material estimate is $25,000, you cannot stop there.
You must add that 10-15% contingency for hidden construction costs (dumpster, fuel, extras). Then, you must add another 15-20% for the finishes you’ll actually want. This isn’t padding the budget; it’s reality. A $25,000 shell can easily become a $30,000+ finished garage before you know it.
My advice is to price out every single item, down to the last box of nails and gallon of paint, before you buy the first 2×4. Build your budget from the finish line backward.
DIY Difficulty and Time Commitment
On a scale of 1 to 10, with 10 being a full home build, I rate a two-car garage project as a solid 7 or 8 for a motivated DIYer. The foundation work alone is a major hurdle; concrete doesn’t forgive mistakes. Getting walls plumb, square, and safely brazed requires a sharp eye and good technique.
Breaking Down Your Time Investment
You’re looking at two types of time: active work hours and mandatory waiting periods. For a basic 24’x24’ stick-built garage, plan for 200 to 350 hours of hands-on work, spread over many weekends.
The biggest time-sink isn’t the labor you do, it’s the waiting for materials to cure or for inspections to be scheduled.
- Site Prep & Foundation (50-80 hours active): This includes digging footings, building forms, placing rebar, and pouring. Then, you wait. Concrete needs a minimum of 7 days to cure properly before you can frame on it.
- Framing & Sheathing (80-120 hours active): Erecting walls, setting roof trusses, and sheathing the structure. This is the most physically demanding phase.
- Roofing, Siding, Doors (70-100 hours active): Installing shingles, hanging siding panels, and setting the large overhead door. These tasks are weather-dependent.
- Waiting & Administrative Time (3-8 weeks total): This covers concrete curing, drying time for any coatings, and most importantly, coordinating and waiting for required municipal inspections at each phase.
Solo Job or Team Effort?
You cannot do this completely alone. I’ve tried shortcuts, and it’s not safe or smart. You need at least one dedicated, capable helper for critical stages.
- Absolutely Need a Helper: Setting wall frames upright, lifting roof trusses into place, and positioning the header beam above the garage door. For these tasks, I rely on my brother-in-law. We use a telehandler for trusses now, but for years it was just two of us with muscle and temporary bracing.
- Can Be Solo (with planning): Sheathing walls, installing siding, and laying shingles. For sheathing, I use a panel lift from Genie. It’s a back-saver and lets one person safely manage large OSB sheets.
The Skills You Honestly Need to Succeed
This isn’t a shed. Success hinges on a mix of mid-level construction skills, relentless patience, and a commitment to following code. Before you buy your first 2×4, be honest with your skill level in these areas:
- Concrete Formwork: Can you build a square, level, and braced form that won’t blow out under the pressure of wet concrete? I use a laser level for this every single time.
- Framing: Understanding how to read plans, make precise cuts, and assemble walls with proper headers, cripples, and jack studs. Familiarity with a framing nailer is a must.
- Roofing: Skill with a chalk line, nail gun, and knife for shingles. Knowing how to properly install ice and water shield and flashing is critical to prevent leaks.
- Tool Proficiency: Comfort with a circular saw, compound miter saw, level, and a heavy-duty drill/driver. I’m a DeWalt user for cordless tools because their batteries last through a full day of framing.
- Code and Safety Sense: Knowing local requirements for footing depth, wall bracing (like Simpson Strong-Tie connectors), and electrical rough-ins if you’re wiring it. Always wear safety glasses and hearing protection.
Garage Care Pro FAQ: After You Build It
My DIY build went over budget. Where did I likely go wrong, and how can I manage costs on future maintenance?
Most budget overruns happen with finish work and site utilities. You likely underestimated paint, flooring epoxy, electrical upgrades, or proper drainage solutions. For future projects, price out every consumable-caulk, fasteners, sealant-as a dedicated line item before you start, and always add a 15% contingency for unforeseen issues.
What’s the single most important maintenance task for my new garage to ensure it lasts?
Without a doubt, managing water. Inspect and clear your roof gutters and downspouts twice a year. Ensure the ground around your foundation slopes away at a minimum of 6 inches over 10 feet. Water intrusion is the leading cause of rot, mold, and foundation damage I see.
I built it myself. How do I make sure it’s legally sound for insurance and future resale?
Secure your final inspection sign-off and keep that permit certificate filed with your home’s paperwork. If you missed a permit, contact your building department now for a retroactive inspection. Do not wait until you sell; unpermitted work can void insurance claims and kill a home sale.
The concrete slab is poured. What’s the first care step I should take?
Apply a high-quality penetrating concrete sealer after the slab has fully cured (at least 28 days). This seals the surface against oil stains, road salt, and moisture. For a higher-end finish, consider a professional epoxy coating, but proper prep is non-negotiable for adhesion and longevity.
Your Bottom Line on Building a Garage Yourself
My best advice is to build your budget around the foundation and materials first, because they are the non-negotiable costs that will make or break your project. Here are the key points to walk away with:
- Your foundation is your biggest single expense and the most critical for a long-lasting structure; don’t cut corners here.
- Permit costs are small but skipping them risks fines and makes future home sales difficult.
- Material prices fluctuate, so get quotes and lock them in before you finalize your plans.
- Be realistic about your time and skill; a helper or hiring out key steps like concrete or roof framing is a smart investment, not a failure.
Evan Gunther
Evan is a general contractor operating in Columbus, Ohio servicing, maintaining and building residential and commercial garages for over two decades. He has personally redeveloped over 100+ garages and installed and reinstalled over 230+ garage doors in his long tenure. When it comes to giving your garage a face lift or fixing common issues, Evan's the pro. Feel free to reach out to him and follow his Garage Log blog for expert, fact based advice.